Impasto Techniques for Plein Air Texture: Building Expressive Oil Paintings Outdoors
A practical guide to building oil painting texture outdoors. Learn impasto, palette knife and brush techniques, alkyd tips for UK conditions, and safe ways to transport wet textured panels.

Key takeaways
- • Always apply lean layers first, then thicker fat layers for impasto to prevent cracking.
- • Use palette knives and stiff hog bristle brushes for decisive, textured marks in focal areas.
- • Consider alkyd or alkyd-modified paints and compatible impasto mediums in cold, damp UK conditions.
- • Place heavy texture in the focal area and foreground; keep mid-distance and sky flatter.
- • Protect textured work with a wet panel carrier and prime panels well to prevent sinking and smearing.
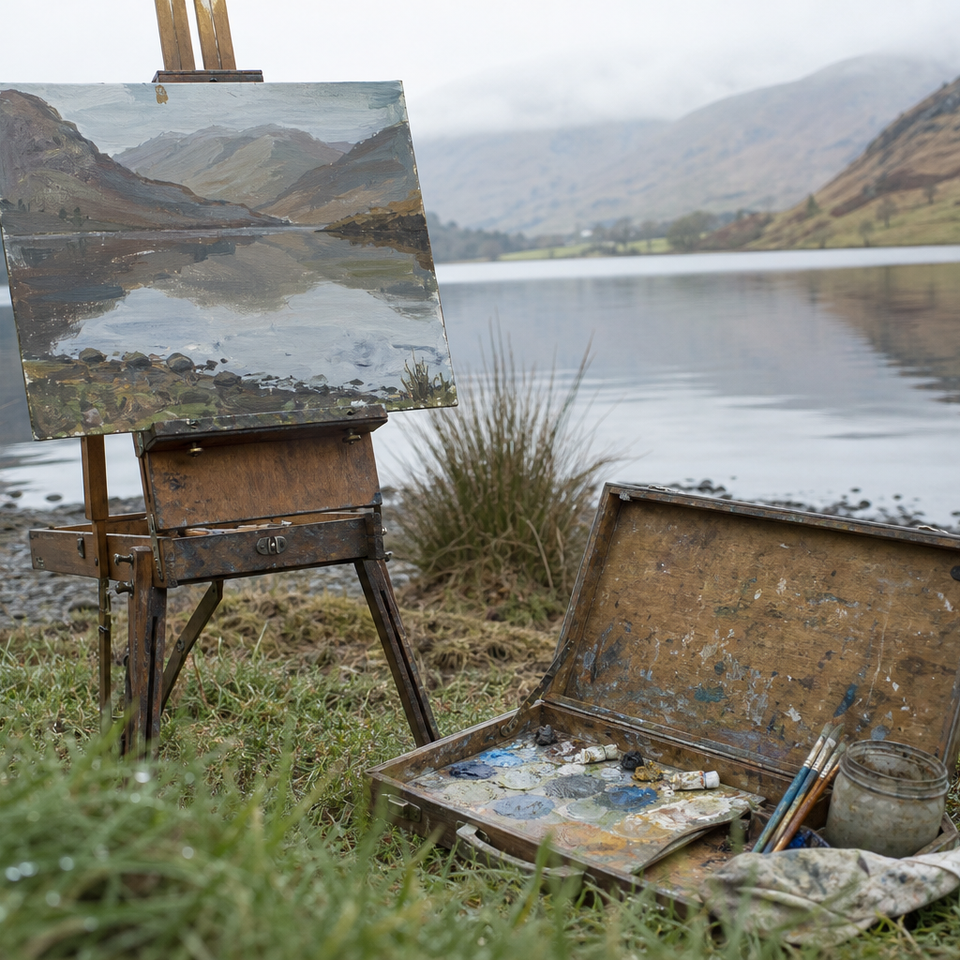
There's a particular frustration that hits somewhere around your fifth or sixth plein air session. Your colour is improving, your compositions are holding together, but something still feels off. The painting looks flat. A little polished. Overworked in places. What's missing, more often than not, is oil painting texture: the physical presence that makes a stone wall read as stone, a cloud feel like it has actual weight, or a field of grass look like it moves in the breeze.
This guide is about how to build that texture into your plein air paintings, outdoors, in the field, in the kind of conditions that most UK painters actually work in. That means cold mornings, damp air, limited time, and the very real problem of getting a heavily textured wet panel home without ruining it. We'll cover impasto oil painting techniques that work on location, the practical materials that help, and a simple process you can use on your next session.
What Do We Mean by Oil Painting Texture?
Before reaching for a palette knife, it helps to be clear about what texture actually is in a painting, because there are two distinct types, and they work very differently.
Physical Texture vs Optical Texture
Physical texture is exactly what it sounds like: raised, tactile paint on the surface of the panel. You can feel it with your fingertip. It's created by loading paint thickly (impasto), by using a palette knife to deposit paint in a single gesture, or by dragging a stiff brush through a loaded surface. Done well, it catches light in a way that flat paint simply cannot.
Optical texture is the illusion of texture created through how paint is applied rather than how much. Broken colour, dry-brush work, scumbling, and glazing over an uneven surface all create the impression of roughness or complexity without necessarily building up physical ridges. A scumbled passage of pale paint dragged across dried brushwork can suggest lichen on rock convincingly without a single thick stroke.
Strong plein air painting typically uses both, but they're not interchangeable. Physical texture makes the most impact in focal areas and foreground detail; optical texture handles quieter passages without drawing excess attention to itself. The key principle is that texture should serve the painting's structure. Light, value, and composition come first. Texture makes them more convincing.
The Core Principle: Thick Over Thin, Fat Over Lean
If you only take one technical idea from this article, make it this: fat layers go over lean layers, never the other way around.
In plain English: your first marks on the panel should be relatively lean, meaning either thinned slightly with solvent or used with very little added oil. As you build up, later layers become fatter, meaning richer in oil or impasto medium, and applied more thickly. The reason this matters is drying time. Oil-rich paint dries more slowly than lean paint. If you trap a slow-drying fat layer under a faster-drying lean one, the outer skin forms a crust while the paint beneath is still moving. Eventually it cracks.
For plein air work, the practical translation is simple. Your initial block-in, the thin wash that establishes shapes and tonal masses, is your lean layer. The bold, expressive impasto marks you put on top contain no added solvent at all.
The golden rule for layering
Lean layers first, fat layers last. In practice this means your first marks can be thinned slightly with a little solvent; later, thicker strokes go on top with no additional solvent at all. Ignore this and your impasto will eventually crack.
Impasto Oil Painting Outdoors: Making It Work on Location
This is where plein air texture gets interesting, and where most technique articles fall short. Studio impasto and location impasto are not the same problem. Outside, you're working quickly, often in poor conditions, and the paint needs to behave. Here's what actually works.
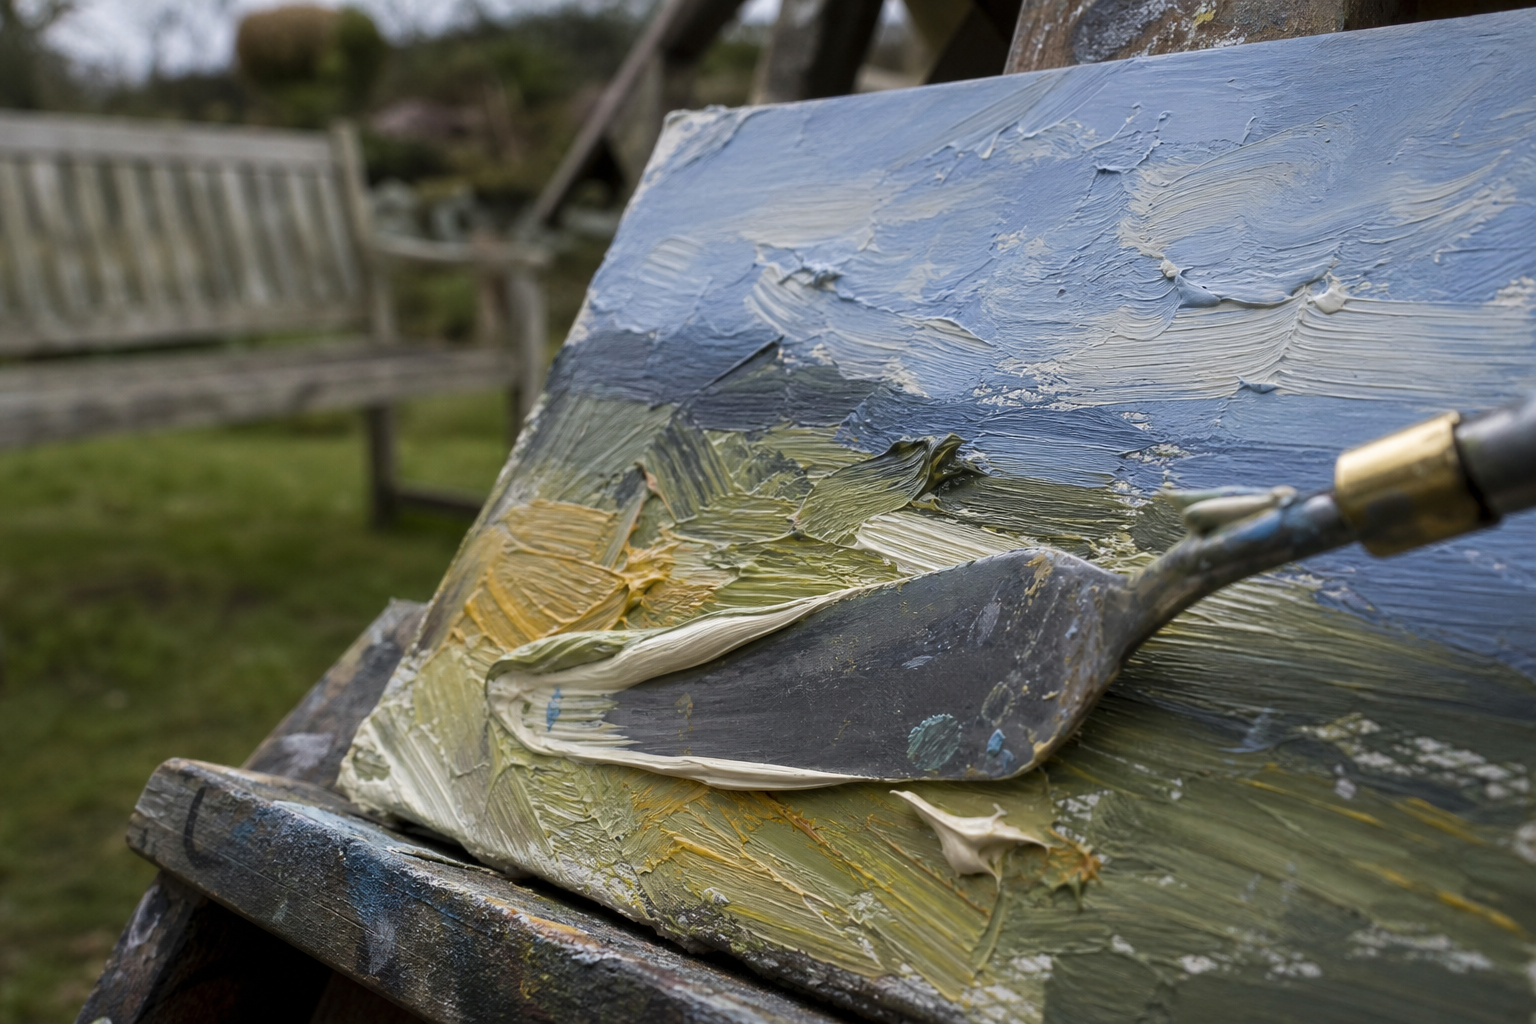
Palette Knife Technique for Plein Air Texture
A palette knife is one of the most useful tools in plein air texture work, partly because it forces you to work decisively. You load the blade, press it to the panel, and lift off. That's the whole gesture. There's no scrubbing, no blending, no second-guessing. The mark is either right or it isn't, and you move on.
Think of it less like spreading butter and more like printing. The flat of a wide, flexible blade deposits a clean-edged load of paint in a single motion, giving you a bold, luminous stroke that a brush can rarely match. Use the tip for shorter, denser marks: the edge of a wall, a highlight on dark water, a burst of light through foliage.
A selection of two or three blade shapes is more versatile than a single knife. A larger blade encourages bolder, less fussy marks, which is mostly a good thing outdoors where time pressure keeps you honest. Paint should be used largely straight from the tube; if you want a little extra body, mix in a small amount of impasto medium on the palette before applying.
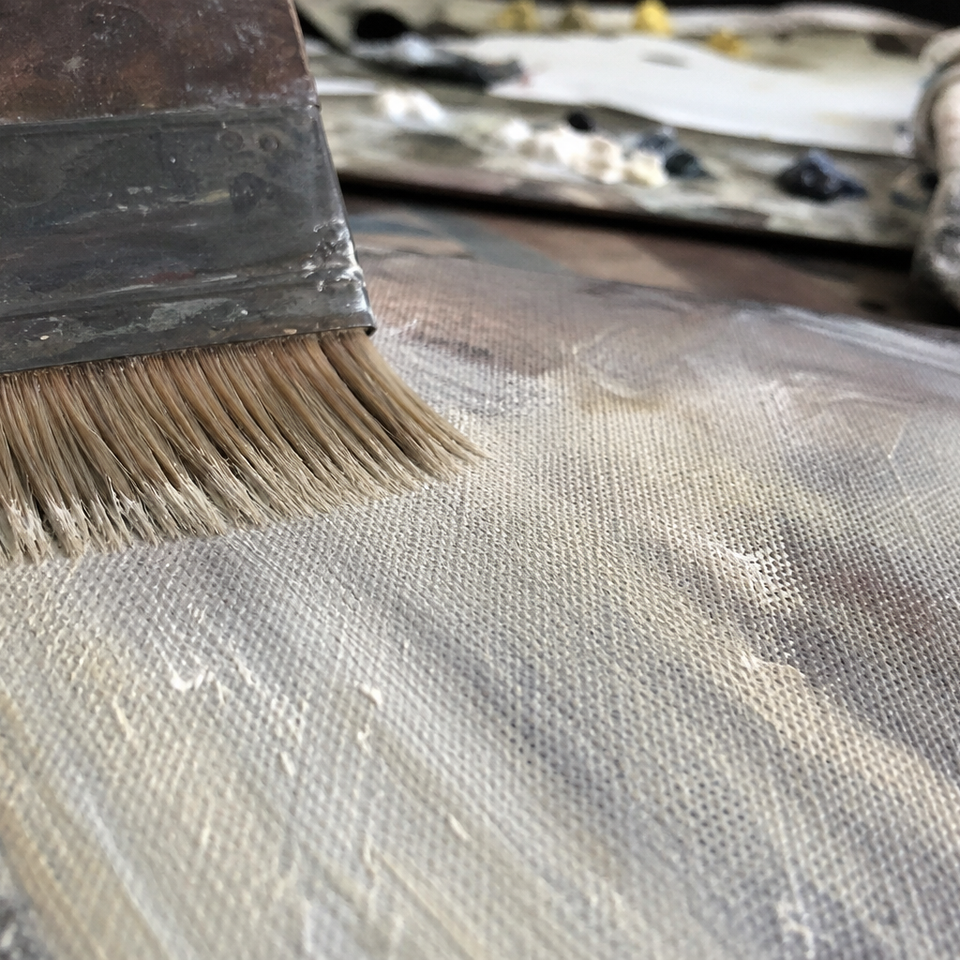
Brushwork That Creates Texture
You don't need a palette knife to build plein air texture. Stiff hog bristle brushes, particularly brights and filberts, drag and break paint across the surface in a way that softer synthetic brushes simply don't. The bristles leave natural texture behind as they move.
The key is varying your stroke: change direction, pressure, and length deliberately. Predictable marks, all going the same way at the same pressure, flatten a painting even if the paint is thick. A loaded flat brush dragged sideways across a semi-dry underlayer creates broken, energetic marks ideal for foreground grasses or rough stone. Varying the angle slightly with each pass keeps the surface reading as alive.
The single most important discipline is not overworking. When you blend a textured mark, you lose it. If a stroke isn't sitting right, place a new one beside or over it rather than working the paint that's already down. This feels counterintuitive at first, but it's the habit that separates expressive from muddy.
Jackson's Art and Ken Bromley both stock a good range of hog bristle brushes at various price points if you're building up your outdoor kit.
Using Impasto Mediums in the Field
Paint straight from the tube is often all you need for building texture outdoors. But if you want additional body or faster setting, impasto and gel mediums help. Liquin Impasto from Winsor & Newton is the most widely available option in the UK; it thickens paint while actually speeding up drying, which matters a great deal when you're painting outside in British conditions. It's stocked by most UK art suppliers including Cass Art and Ken Bromley.
The important rule with any medium is to mix it into the paint on your palette, not directly onto the painting surface. A small amount goes a long way.
One note of caution: do not use straight linseed oil or stand oil to build body in thick applications. Both slow drying considerably, and in thick passages they can cause wrinkling as the outer surface skins over before the oil beneath has cured. If you want to add oil medium at all in heavily textured work, use it sparingly in earlier, leaner layers only.
Water-mixable oils with compatible impasto mediums are worth considering if you prefer low-solvent working outdoors.
Optical Texture: Glazing and Scumbling Over Textured Surfaces
Once you've built physical texture into a panel, you have a surface that optical techniques can really exploit. A thin transparent glaze pools naturally in the depressions left by knife marks or brush ridges, deepening shadows and adding colour variation without losing the mark structure beneath. A scumble catches only the raised ridges and leaves the recesses dark, mimicking the way raking light falls across rough stone or bark.
In plein air practice, glazing is most realistic as a studio follow-up. Thin glazes applied outdoors can be disturbed by wind, pick up dust, or shift before they settle. A quick glaze pass at home, once the surface is dry to the touch, is more controllable and often more effective.
Scumbling and dry-brush work are more practical in the field. For scumbling, load a stiff brush with a small amount of semi-opaque paint and drag it lightly across a dry or near-dry textured area. The paint catches the peaks and skips the troughs. It's one of the most convincing ways to suggest light on rough surfaces, and it works quickly. Dry-brush is similar: a mostly dry brush dragged over raised texture creates an immediate sense of broken light with almost no effort.
UK Conditions and What They Mean for Texture
The practical realities of painting outdoors in the UK deserve honest attention rather than a footnote. Cold temperatures, high humidity, and the ever-present wind all affect how textured paint behaves on the panel.
Below 10°C, oil paint dries significantly more slowly than the manufacturer's stated times (which are usually given for controlled studio conditions). Thick impasto marks that would be touch-dry within hours in a warm studio may still be soft when you pack up and head home. High humidity extends working time further, which sounds useful until your carefully placed knife marks begin to sag under their own weight.
Wind creates a different set of problems. Thin applications and glazes can skin over unevenly, and grit carried on the breeze has a habit of finding its way into freshly applied paint. Working on smaller panels and using a side-screen on your easel both help.
Alkyd-based mediums and alkyd-modified paints are the practical solution for most of these issues. They speed up the initial surface set without compromising the paint film, and they make a real difference in cold or damp conditions. Alkyd-modified whites (available from several brands, including Winsor & Newton's Griffin range) are particularly useful for building light passages that set quickly while remaining mixable.
| Condition | Effect on texture | Practical response |
|---|---|---|
| Cold (below 10°C) | Significantly slows drying; impasto stays soft | Use alkyd medium or alkyd-modified paint to speed setting |
| High humidity | Paint stays workable longer; marks may sag | Keep strokes deliberate; avoid overworking |
| Wind | Can dry thin glazes too fast or carry grit into wet paint | Work on smaller panels; protect with an easel side-screen if possible |
| Overcast/diffused light | Consistent tonal reading; easier to judge values | Good conditions for building careful textural layers |
Common Problems With Oil Painting Texture (And How to Fix Them)
Running into problems with texture is a normal part of developing the technique, not a sign that you're doing it wrong. Here's what usually causes the most common issues and what to do about them.
Cracking is almost always caused by fat paint under lean, or by applying excessively thick paint with stand oil or another slow-drying medium. Keep your early layers lean and build up gradually. If you're painting alla prima in a single session, keep the impasto marks to the upper layers only.
Wrinkling shares the same root cause: a slow-drying rich layer trapping wet paint beneath a faster-drying skin. It's also caused by using too much cobalt drier, which can actually slow long-term drying in excessive quantities. If you use a drier at all, use very small amounts.
Smearing on transport is a constant frustration with heavily textured panels. A proper wet panel carrier is close to essential once you're working with any significant impasto. If you don't have one, propping two panels face-to-face with small spacers (even a few blobs of blu-tack at each corner) keeps the surfaces apart. Never stack wet panels flat.
Impasto that sinks or loses definition usually means the support was too absorbent, pulling oil out of the paint before it could hold its shape, or the paint was thinned too much before application. Prime your panels thoroughly before painting, and work with paint at closer to tube consistency for your impasto marks.
Uneven gloss across textured areas is common and easily addressed. A light coat of retouch varnish once the surface is touch-dry will even out the sheen without disturbing the marks. Full final varnish should wait several months on any panel with heavy impasto: thick paint takes a long time to cure all the way through.
Palette knife vs brush for impasto outdoors
Pros
- + Palette knife deposits paint cleanly without overworking
- + Creates bold, unpredictable marks quickly
- + Easy to wipe clean between strokes
Cons
- - Less control for small areas or fine marks
- - Can feel unfamiliar at first if you're used to brush-only work
- - Mixing on the canvas is harder to control
Putting It Together: A Simple Textured Plein Air Process
A simple textured plein air process
Choose your format
Pick a smaller panel (6x8 or 8x10 inches) so you can finish before the light shifts and the paint surface dries awkwardly.
Lay in the block-in thinly
Use a lean, solvent-thinned wash to establish main shapes and values. This is your lean foundation layer.
Build texture in key areas
Load a palette knife or stiff hog brush with paint straight from the tube and place bold marks in the focal area. Don't scrub; place and leave.
Let it read before adding more
Step back and assess. Resist the urge to blend; the textured marks are working if the values are right.
Add optical texture at the end
A dry-brush pass over ridges, or a very thin scumble of lighter colour, can make texture sing without disturbing what's underneath.
One practical note on where texture should live in the composition: heavy impasto and bold mark-making work hardest in your focal area and the immediate foreground. Quieter, flatter treatment in the mid-distance and sky keeps the viewer's eye where you want it. This isn't a rule so much as a natural consequence of how the eye reads a painting. When everything is equally textured, nothing reads as particularly interesting.
Developing a textural sensibility is not something that happens from a single session of deliberate practice. It builds gradually, painting by painting, as you start to notice which marks worked, which ones lost definition, which passages feel alive when you look at the panel a week later. The palette knife will feel unfamiliar for a few outings, and then suddenly it won't. The dry-brush technique will seem to do nothing for two paintings, and then on the third it'll be exactly what a passage needed.
Rather than trying to apply all of this at once, choose one thing to focus on next time you're out. Take a palette knife even if you're not sure you'll use it. Try laying in a lean block-in before you reach for any thick paint. Step back before you blend. Any one of those habits will move your plein air texture in the right direction, and the rest follows naturally from there.
Meta description: Learn how to build expressive oil painting texture in your plein air work, with impasto techniques, palette knife methods, and practical advice for painting outdoors in the UK.
FAQ
Frequently Asked Questions
What is the single most important rule for building oil painting texture?
Follow fat over lean. Lay down lean, solvent-thinned block-ins first and apply thicker, oil-richer impasto marks on top to avoid cracking and wrinkling.
Can I use a palette knife outdoors and when does it work best?
Yes. A palette knife deposits bold, clean marks quickly and is ideal for focal areas and foregrounds. Use a few blade shapes and paint close to tube consistency.
How do I speed drying in cold or damp UK conditions?
Use alkyd or alkyd-modified paints and alkyd-compatible impasto mediums. They speed surface set and reduce sagging and long drying times outdoors.
How should I transport wet textured panels safely?
Use a purpose made wet panel carrier. If you do not have one, prop two panels face-to-face with small spacers or blobs of blu-tack at the corners. Never stack wet panels flat.
When should I use glazing versus scumbling or dry-brush?
Use scumbling and dry-brush outdoors to catch raised ridges quickly. Reserve thin glazes for studio follow up after the surface is touch-dry for more control.
Author

PleinAirPainting Editorial Team
PleinAirPainting.co.uk helps artists paint outdoors with confidence through UK-focused guides, equipment advice, resources and plein air inspiration.