Scumbling in Plein Air Painting: Technique, Timing, and Texture
Use scumbling plein air painting to add mist, haze and atmosphere. Learn the right paint consistency, brush choice, a UK two stage workflow, and quick fixes for muddy or overworked scumbles.

Key takeaways
- • Scumbling adds atmosphere by laying a broken, opaque veil over a dry underlayer, creating optical mixing rather than smooth coverage.
- • Use stiff paint with no medium and stiff bristle brushes. Load sparingly and drag to leave a broken mark that lets the underlayer show.
- • In UK plein air work a two stage workflow is practical: block in on location, allow the study to dry, then scumble in the studio when the surface is matte.
- • Keep scumbles physically thin and respect fat over lean. If a scumble fails, it can be wiped off without harming a fully dry underlayer.
- • Avoid muddy results by ensuring the ground is dry, choosing contrasting scumble colours, and limiting passes to one or two decisive applications.
There's a particular problem that catches up with a lot of plein air painters once they move beyond the basics. The tonal structure is there, the colour relationships are roughly right, but something about the painting feels flat. The atmosphere isn't quite reading. That soft, hazy quality you were looking at in the field has somehow vanished. Scumbling in plein air painting is one of the most effective tools for solving exactly that problem, and it's genuinely underused by painters who know the term but aren't sure how to apply it in practice.
This article is specifically about how scumbling works outdoors and in the studio as a follow-up to outdoor work, including the honest reality of what's achievable in a single UK session versus what needs a second stage. If you've heard the term in a workshop and wondered what separates it from dry brush or glazing, that's covered here too.
What Is Scumbling? (And What It Isn't)
Scumbling is a technique in which a dry, broken, opaque or semi-opaque layer of paint is dragged lightly across a completely dry darker or more saturated layer below. The key word is broken. You're not laying down a smooth film of paint. You're creating a veil with gaps, letting the underlying colour breathe through in places while the upper layer settles on the raised texture of the surface.
The result is an optical effect rather than a physical mixture. Your eye blends the two colours together where they interact, and the broken nature of the upper layer creates a luminous, atmospheric quality that solid paint simply can't replicate. Constable used it to extraordinary effect in his cloud studies and foliage passages, and the reason it's still central to landscape painting technique is that it genuinely describes what mist, haze, and diffuse light look like better than any other approach.
Scumbling versus glazing
These two techniques are conceptually opposite, though they're often confused. A glaze is transparent, smooth, and continuous. You thin your paint with medium to a near-fluid consistency and apply it in an even, flowing layer over a dry underpainting, deepening colour and enriching tone without obscuring what's beneath.
A scumble uses opaque or semi-opaque paint, applied dry and broken, so that the lower layer shows through not because the upper paint is transparent but because it physically doesn't cover the whole surface. Glazing works by transparency. Scumbling works by incompleteness. If you're using medium to thin the paint, you're glazing, not scumbling.
Scumbling versus dry brush
Dry brush and scumbling share some DNA, but they're not the same thing. Dry brush tends to produce scratchy, linear, calligraphic marks. Think of the sharp texture of individual grasses, the texture of a stone wall seen up close, or rapid strokes to suggest water movement. It's a mark-making technique as much as a layering one.
Scumbling is about broad, broken veils of colour that alter perceived tone and atmosphere across an area. You're not making individual marks; you're applying a modified atmosphere. The brush movement is often sweeping and the intention is to shift how a passage reads rather than to add detail.
| Technique | Opacity | Surface | Typical use |
|---|---|---|---|
| Scumbling | Opaque or semi-opaque | Broken, matte | Atmosphere, texture, value adjustment |
| Glazing | Transparent | Smooth, continuous | Colour depth, tonal refinement |
| Dry brush | Variable | Scratchy, linear | Calligraphic marks, foliage detail |
Why Scumbling Works So Well for Plein Air Subjects

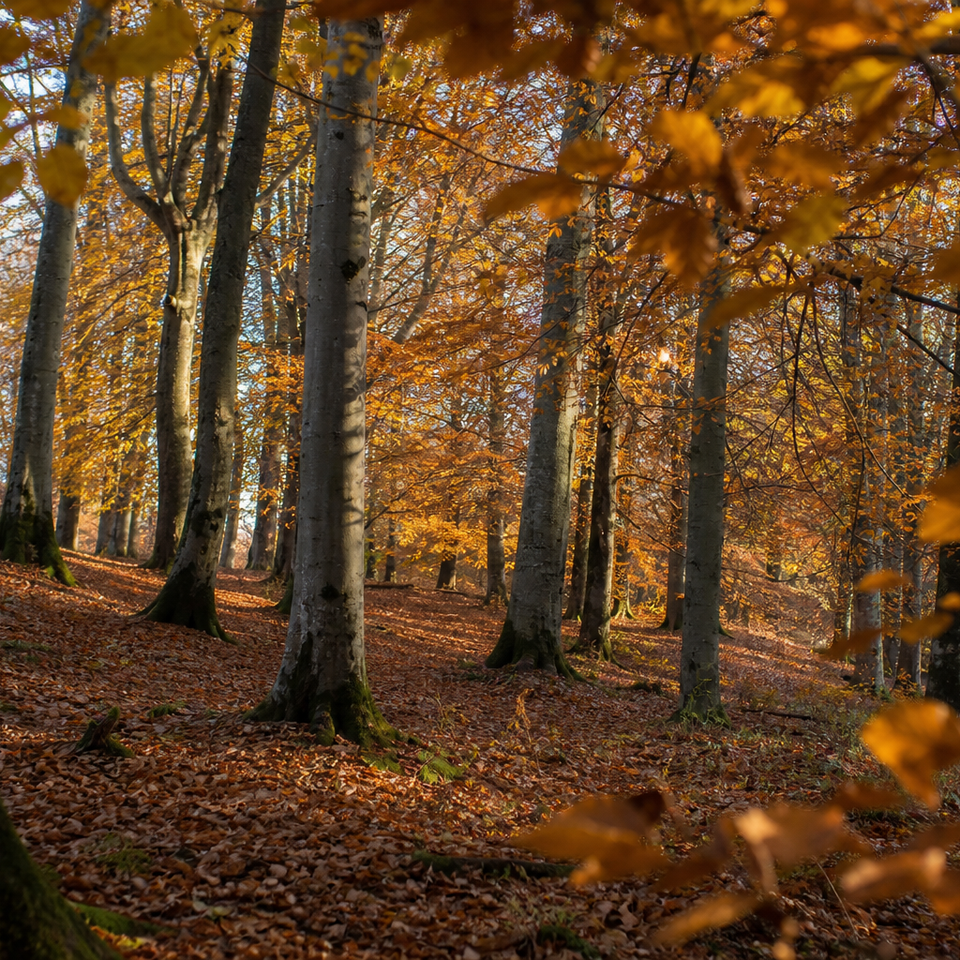
Think about what the British landscape actually looks like. Coastal mist sitting over an estuary. The soft, indefinite edge of a moorland horizon. Lichen on a dry stone wall. Frost on grass. A sky that isn't quite overcast and isn't quite blue. These are all scumbling subjects. The technique describes them almost naturally, in a way that careful, precise brushwork often can't, because precision implies clarity and these things aren't clear.
Beyond description, scumbling is also genuinely useful as a late-stage editing tool. When you bring a plein air study back to the studio, you can use a scumble to shift the value of a sky, knock back a mid-ground that's competing too hard with the focal point, or introduce a unifying atmospheric layer across the whole piece. You're not repainting; you're adjusting.
The optical mixing effect matters too. Because the eye is doing some of the blending work, the surface of a scumbled painting tends to feel more alive and vibrating than one where everything is mixed and applied as a flat layer. It's a quality that's difficult to describe precisely but immediately visible in a finished painting, especially at the atmospheric scale of a plein air study.
Getting the Right Paint Consistency for a Scumble
This is the section that separates painters who get scumbling right from those who end up with muddy smears. Paint consistency is everything, and the standard that most painters are used to working at outdoors is too wet and too fluid for a proper scumble.
The paint should be stiff. Either take it straight from a fresh tube (many pigments are firm enough straight out), or squeeze it out on your palette and leave it for ten minutes to bleed off some of the oil. What you're looking for is a consistency that holds its shape and doesn't slump, like a soft butter rather than single cream.

Add no medium whatsoever. This is the rule. Any solvent or oil thins the paint and destroys the dry, broken character of the scumble. If the paint feels too soft even after resting on the palette, some painters add a very small amount of chalk or dry pigment to stiffen it and make it more matte. This works, but use it sparingly; too much absorbent filler without sufficient binder causes long-term problems. For most purposes, stiff paint straight from a tube or left briefly on the palette is all you need.
Brush choice and loading
Stiff hog bristle flats and filberts are the workhorses for scumbling. The bristle texture helps break the paint as you drag, which is exactly what you want. Soft synthetic brushes are the wrong tool here; they tend to blend the paint rather than drag it in a broken layer, and you lose the characteristic effect.
For large atmospheric passages, a wide decorator's brush (the sort you'd use for household painting) is excellent and significantly cheaper than art supply alternatives. You can pick one up at any hardware shop or DIY retailer for roughly £8 to £15. For smaller passages, mid-range hog bristle flats and filberts from Jackson's, Ken Bromley, or Cass Art typically run around £5 to £12 each, and a couple of sizes will cover most situations.
Load the brush sparingly. You want much less paint on it than feels natural for normal brushwork. Then wipe the loaded brush once on a clean rag before you apply it.
The wrist test
Before scumbling, drag the loaded brush across the back of your wrist. If it leaves a solid, smooth stroke, the brush is too wet or too loaded. You want a broken, patchy mark with the weave of your skin showing through.
Adding tooth to your ground
Scumbling works best on a surface with texture. Coarse linen, rough canvas board, or a gesso ground applied with a brush rather than a knife will all give the dry paint something to catch on. The bristles skip across the high points of the surface and leave the low points uncovered, which produces the broken effect.
Smoother grounds still work but give softer, less pronounced results. Pre-primed canvas boards suitable for plein air work are widely available from UK suppliers; standard plein air sizes (25 x 30 cm up to A3) typically run from around £2 to £8 depending on the supplier and quality. If you have a preference for smoother panels but want a more pronounced scumble effect, an extra coat of textured gesso applied with a wide brush before going out is an easy solution.
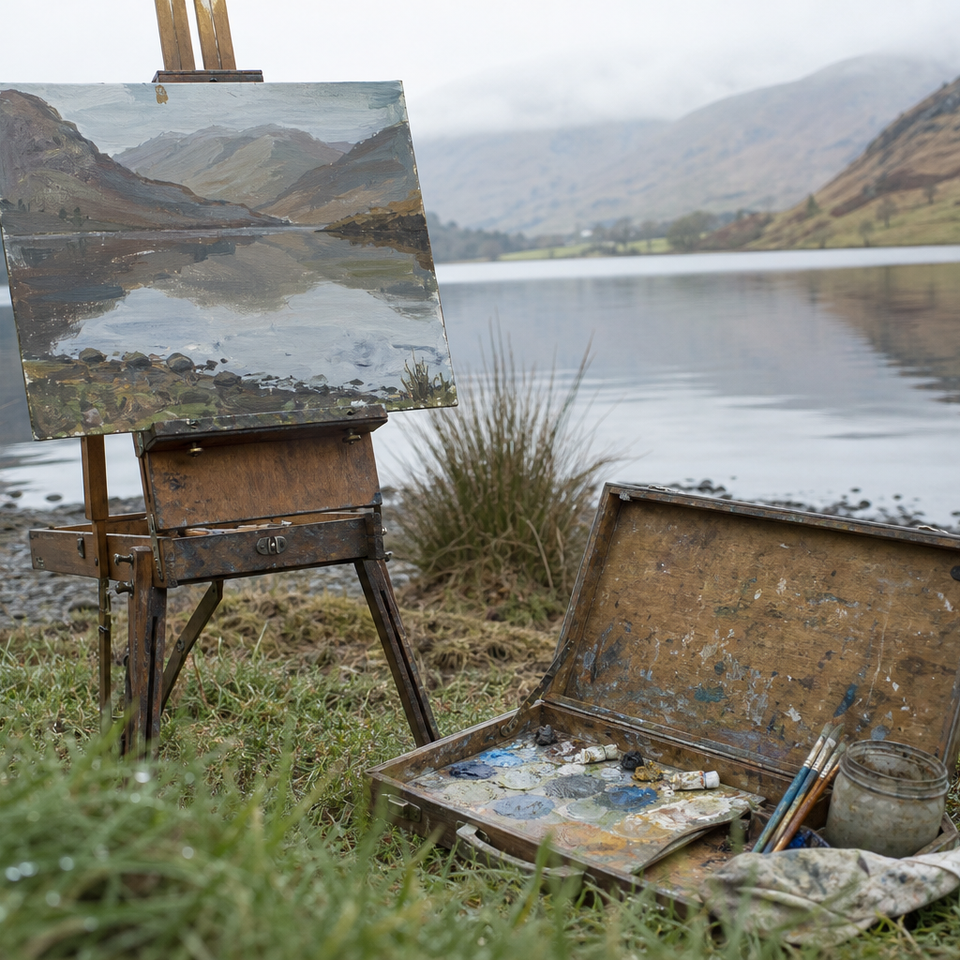
A UK Plein Air Workflow That Uses Scumbling
Day one on location: what to plan ahead
Here's the honest reality: in British conditions, true dry-over-dry scumbling in a single outdoor session is rarely possible. Oil paint takes time to set, and in the cool, damp conditions that characterise most UK painting days, that time is longer than it would be in, say, a warm Mediterranean afternoon. This isn't a disadvantage. It's just how the material behaves, and once you plan around it, the results are better.
What you're doing on location is laying the foundation. Keep your underpainting lean and relatively thin. Use bold, committed tonal and colour decisions rather than building up heavy paint. Leave interesting surface texture rather than smoothing everything out; the scumble needs something to catch on later.
If you're using an alkyd-based medium in your underlayers, the study may be ready for scumbling within 24 to 48 hours back home, which makes this a practical two-session approach. Without alkyd medium, straight oils in UK conditions may need five to seven days before they're genuinely ready.
In warm, dry conditions (they do happen in Britain, occasionally), some light dry brush work into nearly-set passages in the later stages of a session can suggest rough texture. But that's not scumbling over a dry layer and shouldn't be treated as such. Frame it for what it is: working into a setting but not fully dry surface, which carries some risk of muddying.
Back in the studio: applying scumbles to dried field studies
Once the study is home, the main job is patience. Allow the paint to dry properly. Test by holding the panel at a raking angle in good light. Any greasy sheen or tacky areas mean it needs more time. A uniformly matte or satin surface is what you're waiting for.
When it's ready, scumbling becomes a genuinely forgiving technique. If a scumble doesn't work, wipe it off with a solvent-dampened rag. The dried underlayer is safe. You can try again without any damage to the original study, which is a significant advantage over reworking a wet painting.
Work on atmospheric and secondary areas first. Protect the focal point from over-scumbling; the eye needs somewhere to rest, and a passage of cleaner, less modified paint will give it that.
A two-stage scumbling workflow for UK plein air
Day one on location
Block in your tonal statement and main colour areas. Keep the paint lean and relatively thin. Don't overwork — you need texture and surface interest for the scumble to catch later.
Transport and dry
Carry the panel home flat in a panel carrier or use panel separators. In cool UK conditions, allow at least 24 to 48 hours with a fast-drying alkyd medium, longer with straight oils.
Assess the dried study
Once the surface is fully dry, hold the panel at a raking angle to check for shine. Greasy or tacky spots need more time. A uniformly matte or satin surface is ready.
Mix your scumble colour
Squeeze out an opaque, light-valued colour — often a warm or cool tint of titanium white. Keep it stiff. Don't add medium. If it feels too soft, leave it exposed on the palette for ten minutes to lose some oil.
Load and drag
Use a large, stiff flat or filbert. Load the tip sparingly, wipe once on a clean rag, then drag lightly across the surface, letting the texture break the mark. Work the atmospheric and secondary areas first.
Assess and stop
Step back after each pass. Scumbling is easy to overdo. One or two decisive applications almost always reads better than several tentative ones.
Common Problems (And How to Fix Them)
Muddy scumbles. This is almost always caused by the underlayer not being properly dry, or by the brush carrying residual medium or moisture. The upper and lower layers mix physically rather than sitting separately, and the result is a dead, greyish smear rather than a vibrating veil. The fix is simple: wait longer and wipe the brush genuinely dry before loading. If you're working in the field and muddying is a persistent issue, it's a reliable sign that the underlayer isn't ready.
The effect looks like a dirty smear rather than a vibrating surface. This usually happens when the scumble colour is too close in value or temperature to what's beneath it. A scumble needs contrast to work optically. It should be decisively lighter (or occasionally darker) and different enough in colour temperature to read as a separate event. If you're blending a warm mid-tone over a slightly cooler mid-tone, neither the eye nor the painting knows what to do with it. Make the scumble count: a cool pale blue-grey dragged over a warm dark ground, or a warm cream over a cool grey. Don't hedge.
Overworking and losing the freshness of the plein air study. This is probably the most common failure, and it's easy to do because scumbling feels productive. Each additional pass, though, reduces the optical mixing effect and deadens the surface. The solution is to commit to one or two decisive applications and stop. Step back before each pass, not after. If you're unsure whether it needs more, it probably doesn't.
A note for those working outdoors in warmer months: airborne dust and pollen can settle on tacky scumble layers if you're working outside. Angle the panel away from the wind and work on smaller formats if you're applying scumble passages on location. This is a minor practical concern but worth knowing about.
On-location scumbling versus studio scumbling
Pros
- + On-location: captures live light effects and immediate atmosphere
- + On-location: useful for suggesting rough texture in nearly dry passages
- + Studio: underlayer is fully dry, so no risk of lifting or muddying
- + Studio: can wipe off an unsatisfactory scumble with solvent without damaging the study
Cons
- - On-location: UK damp and cool conditions make true dry-over-dry scumbling rare in a single session
- - On-location: timing is difficult — the underlayer must be set but the session may be over before it is
- - Studio: you lose the immediacy of working in front of the subject
- - Studio: easy to overwork a painting that was lively in its raw plein air state
Keeping Scumbled Plein Air Paintings Structurally Sound
Scumbling has a long and stable history in oil painting, and when it's done correctly it's a perfectly archival technique. The rules to keep it that way aren't complicated.
Scumble only over a fully dry layer. This is the structural rule as much as a practical one. Paint applied over a layer that's still drying can cause wrinkling or cracking as the layers dry at different rates.
Keep the scumble physically thin. Even though a scumble is opaque, it should be applied as a thin veil, not a thick paste. The opacity comes from the pigment, not the volume of paint.
Respect fat over lean. Your scumble should be similar in oil content to what's below it, or slightly fatter. Never markedly leaner. The risk is cracking over time if a lean layer is applied over a fatter, more flexible one. Since scumbles typically contain no added medium, and if your underlayers were painted lean and thin, this is rarely a problem in practice. But it's worth being aware of, especially if you're building multiple layers.
If you're using chalk or dry material in your scumble mix, use it sparingly. Too much absorbent filler without sufficient binder will cause long-term instability. A small amount to stiffen the paint is fine; building a thick, chalky layer is not.
For painters who intend to sell or exhibit their work, these considerations matter. A thin, well-applied scumble over a sound, fully dry plein air study is structurally fine. Heavy experimental layering over an insufficiently dry ground is not.
Practical benchmarks for scumbling over plein air studies
- Minimum drying time before scumbling (straight oils)
- 5–7 days
- Minimum drying time with alkyd medium
- 24–48 hours
- Recommended scumble thickness
- Very thin
- Maximum sessions in a day outdoors
- Usually 1
Varies by pigment, temperature and paint thickness
In warm, dry conditions; allow longer in UK winter
Physically thin even when opaque — don't build up a heavy layer
True scumbling over dry paint is rarely possible in a single outdoor session in UK conditions
Once you've worked through the two-stage process a few times, the timing becomes second nature. And there is something genuinely satisfying about coming back to a field study a week later, dragging a near-dry brush across it, and watching a moorland horizon soften into mist in a way that no amount of careful wet-into-wet brushwork could quite achieve. That's what scumbling does well, and it's why it's worth taking the time to learn it properly.
FAQ
Frequently Asked Questions
What is scumbling in plein air painting?
Scumbling is dragging a dry, broken opaque or semi opaque layer of paint lightly over a completely dry, darker or more saturated underlayer to create a luminous, atmospheric veil.
How is scumbling different from glazing or dry brush?
Glazing uses thin transparent layers to change tone. Dry brush makes scratchy linear marks. Scumbling uses stiff, opaque paint applied in broken veils to alter atmosphere and value optically.
Can I scumble on location in the UK in a single session?
Usually not. In typical cool, damp UK conditions true dry over dry scumbling needs the underlayer to be fully set, so a two stage approach with studio scumbling after 24 to 72 hours or longer is common.
What paint consistency and brushes work best for scumbling?
Use stiff paint straight from the tube or left briefly on the palette, with no added medium. Stiff hog bristle flats or filberts and wide decorator brushes are ideal. Load sparingly and wipe the brush once before dragging.
How do I avoid muddy or dead scumbles?
Wait until the underlayer is fully dry, choose a scumble colour with clear value or temperature contrast, keep the veil thin, and stop after one or two decisive passes rather than overworking.
Author

PleinAirPainting Editorial Team
PleinAirPainting.co.uk helps artists paint outdoors with confidence through UK-focused guides, equipment advice, resources and plein air inspiration.