Plein Air Oil Painting Techniques: 10 Essential Tips for Outdoor Painters
Ten practical oil painting techniques for plein air painters in the UK. Learn to work small, tone panels, limit your palette and resolve studies before the light changes.
Key takeaways
- • Work small to paint faster and avoid overworking.
- • Tone panels with a mid value ground before each session.
- • Limit your palette and pre-mix generous quantities of key tones.
- • Block in values early and use alla prima wet into wet with intention.
- • Observe the light, commit to the effect you began with and adapt to UK conditions.
There's a moment most oil painters recognise: you've set up outside, the scene looks beautiful, and then everything you thought you knew about painting seems to dissolve in the wind. The colours look different. The light has already shifted. Your brush feels wrong in your hand. Studio oil painting and outdoor oil painting use the same materials, but they are not the same activity.
The good news is that most of what you already know transfers. Your understanding of colour mixing, your feel for brushwork, your sense of composition: these all come with you. What changes outdoors is the context around them. Time pressure, shifting light, British weather, and the sheer complexity of the natural world all demand specific adaptations. The oil painting techniques in this article address exactly those adaptations. These aren't generic studio tips repackaged for the outdoors. They're the methods that actually hold up when you're standing in a Derbyshire field in October with the light changing every ten minutes.
New to plein air oils?
If you're just starting out with outdoor oil painting, it's worth reading our beginner's guide to plein air painting first. These techniques build on the basics and will make more sense once you've had a session or two outside.
Why Outdoor Oil Painting Demands a Different Approach
The central fact of plein air painting is time. In a studio, the light stays where you put it. Outside, it moves constantly, and in the UK it can change dramatically within a single session. A cloud crossing the sun doesn't just alter the brightness; it shifts the entire tonal structure of your scene, changes colour temperature, and softens or sharpens every edge. What you're painting at the start of a session may look almost nothing like what's in front of you an hour later.
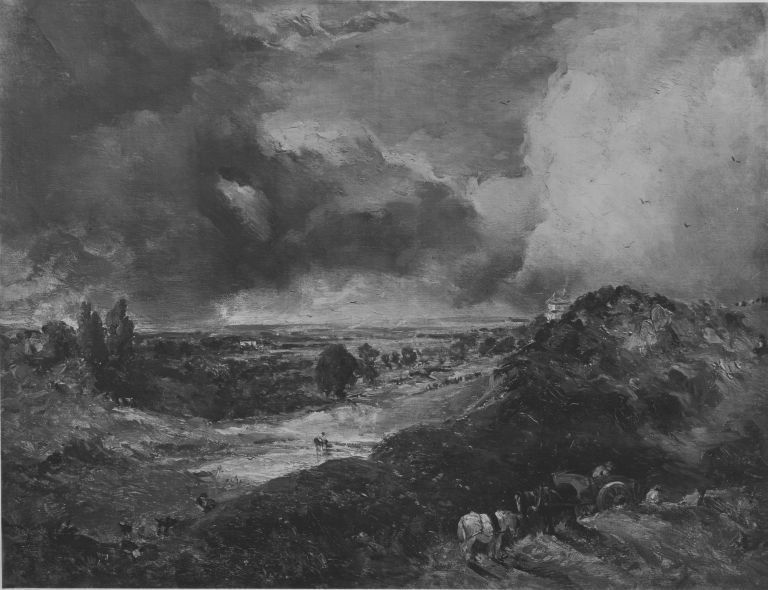
Landschaft mit Fernblick und Gewitterhimmel (Hampstead Heath with Branch Hill Pond) by John Constable. by John Constable — Public domain
Constable understood this better than almost anyone. His oil sketches of Hampstead Heath capture not just a place but a specific atmospheric moment, often noted with the time of day and weather conditions on the back of the panel. He wasn't trying to record every detail of the Heath; he was chasing an impression. That's the shift in mindset that outdoor oil painting asks of you.
British light adds its own particular character to this challenge. It's often softer and more diffuse than Mediterranean or Californian light, which actually suits oil painting beautifully for tonal work. But it moves fast, and sessions can be cut short without warning. The approach needs to be responsive, not methodical in the studio sense. That means streamlining your process, sharpening your decisions, and accepting that a small resolved study is a success, not a compromise.
The 10 Techniques That Will Improve Your Plein Air Oil Painting
1. Work Small to Work Fast
The single most effective adjustment you can make when moving your oil painting techniques outdoors is to reduce your panel size. Working on a 6x8 or 8x10 inch panel instead of a larger surface changes everything: you cover ground faster, your compositional decisions come earlier, and you're far more likely to reach a resolved painting before the session ends or the weather closes in.
Smaller panels also reduce the temptation to overwork. On a large surface, there's always another corner to fuss over. On a small one, you're forced to think in masses and impressions rather than details. That constraint is genuinely useful.
In UK conditions especially, a session that runs to 90 minutes is a good session. Clouds, rain, fading light, or simply running out of the specific effect you came to paint can all shorten your time. A small, finished study you carry home is worth far more to your development than a large abandoned one. MDF boards primed with gesso, or ready-made gesso panels (widely available from UK suppliers like Jackson's Art), are a practical and affordable choice for outdoor work.
2. Tone Your Panel Before You Start
Starting on a raw white panel outdoors is harder than it sounds. The white ground creates a false reference point for all your early tonal decisions, making it difficult to judge whether your darks are dark enough or your lights are holding their luminosity. It also glares in bright outdoor light in a way that makes accurate seeing genuinely difficult.
Toning your panel with a mid-value ground solves this. A thin wash of Burnt Sienna diluted with a little mineral spirits or Liquin, brushed across the panel and wiped back with a rag, leaves a warm transparent mid-tone that dries relatively quickly. A warm grey mixed from Burnt Sienna and Ultramarine Blue works equally well if you prefer a more neutral ground.
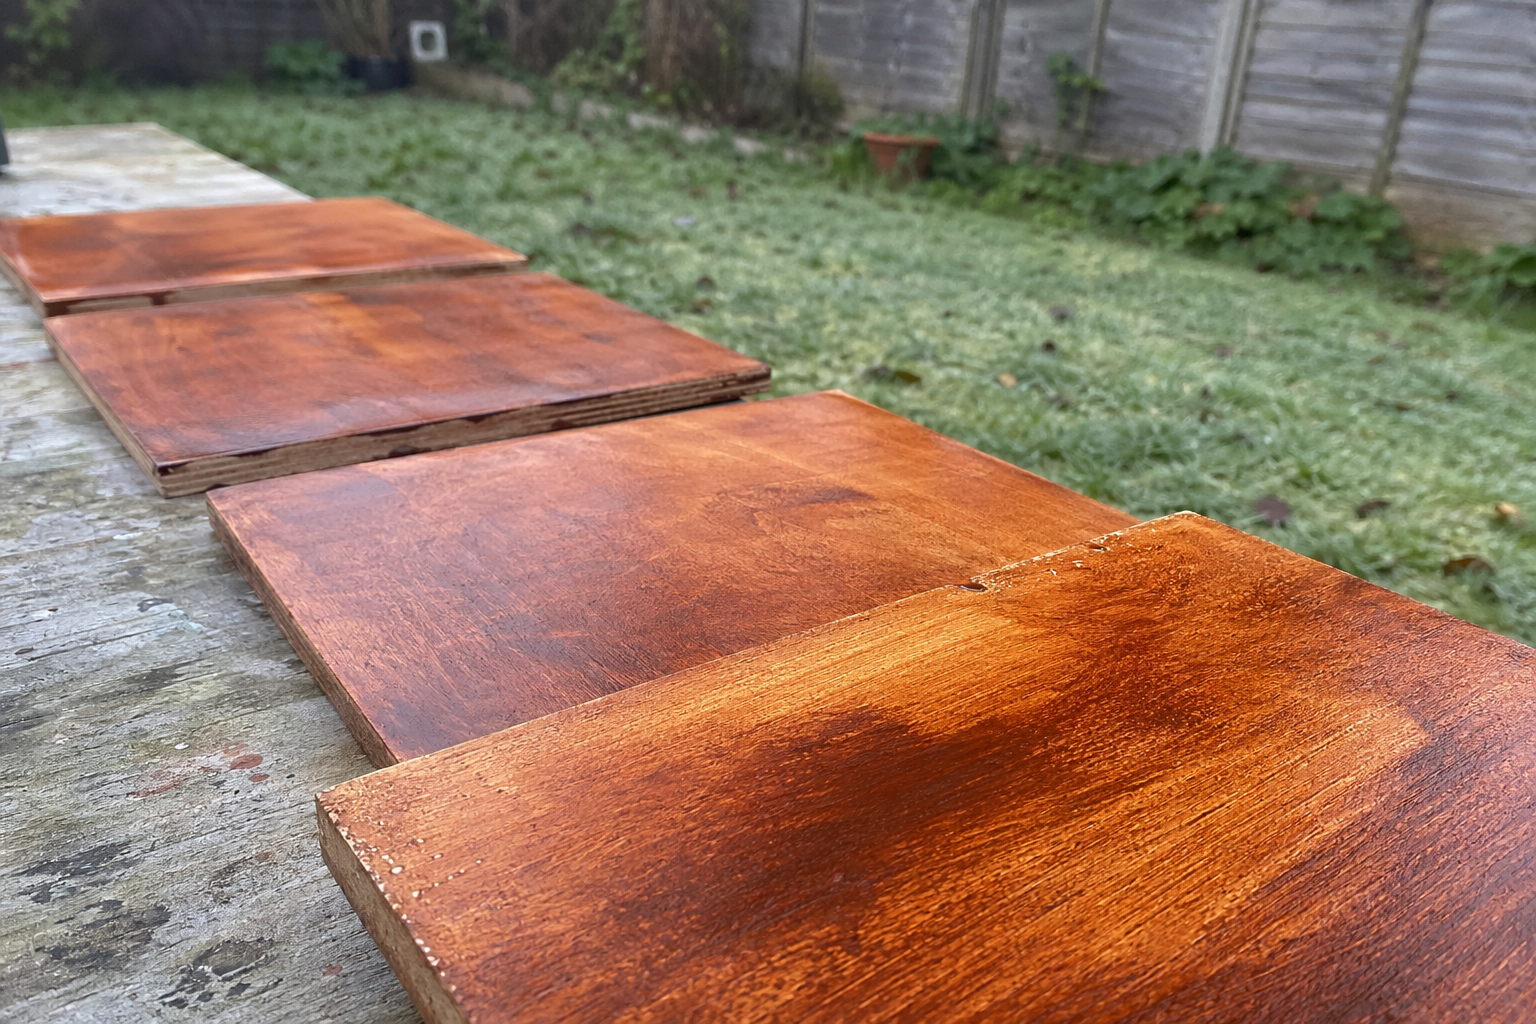
The practical point is to tone your panels at home, the evening before a session, so they're fully dry when you arrive at your location. Arriving with six pre-toned panels means you can start painting immediately, without faffing around waiting for a toned ground to dry in the field. From the first mark, you're working with a neutral mid-tone that lets you see both your lights and darks accurately from the beginning.
3. Limit Your Palette
Decision fatigue is a real problem outdoors. When you're working quickly, under time pressure, with wind potentially rattling your gear and the light shifting, the last thing you need is to spend two minutes deciding which blue to reach for. A limited palette of five or six colours removes most of those decisions before the session begins.
A limited palette also makes colour mixing faster, keeps your mixing area cleaner, and reduces the risk of muddied colours from over-complicated mixing chains. The goal outdoors isn't to find an exact colour match for every element of your scene. It's to capture the tonal relationships and the quality of the light. A tight palette, used confidently, does this better than a full studio range.
| Colour | Role | Notes |
|---|---|---|
| Titanium White | Mixing base and highlights | Essential for value control |
| Yellow Ochre | Warm mid-tones and earthy light | More useful outdoors than Cadmium Yellow |
| Burnt Sienna | Warm darks and earth tones | Excellent for toning panels |
| Ultramarine Blue | Cool darks and sky tones | Mixes well with Burnt Sienna for neutrals |
| Cadmium Red (or Venetian Red) | Warm accents | Use sparingly; a little goes far |
Winsor & Newton Artists' Oil Colour and Daler-Rowney Georgian both cover these five colours well and are stocked by most UK suppliers including Cass Art and Ken Bromley. You don't need to spend a great deal to get started with a solid limited palette.
4. Establish Values Early
Tone is the architecture of a painting. Get the tonal structure right in the first fifteen to twenty minutes and the rest of the session can be spent refining and building on a sound foundation. Get it wrong and no amount of careful colour mixing will rescue the painting later.
The practical approach is to block in your largest tonal masses first, working from dark to light. Identify the darkest darks and the lightest lights in your scene, place them broadly, and use your mid-tones to connect them. Don't go hunting for detail until those masses are established.
In UK conditions, this urgency around values isn't just good practice, it's essential. On a partly cloudy day, your main light effect can shift significantly within thirty minutes. If you spend the first half-hour rendering the texture of a stone wall before establishing the shadow masses, you may find that the shadows have moved entirely before you've laid down the bones of the painting. Block in the structure first; the detail can follow.
5. Use Alla Prima Painting to Your Advantage
Alla prima, completing a painting wet-into-wet in a single session, is the dominant approach in plein air oil painting for good reason. It's fast, it keeps the paint surface fresh and unified, and it suits the reality of working outdoors where you're unlikely to return to the same scene in the same light.
If you're more accustomed to building up oil paintings in layers over multiple sessions, the alla prima approach takes some adjustment. The temptation to add a careful detail too early, or to overblend rather than commit to a mark, can pull you back towards studio habits. The key is to work with intention from the first stroke: each mark you make should carry both colour and tone, placed where it belongs and left there.
A brief note on terminology: alla prima is sometimes confused with wet-on-wet technique in the decorative painting sense. In the plein air context, it simply means resolving a painting in one sitting while the paint remains wet throughout.
Alla prima and the UK climate
Alla prima (completing a painting wet-into-wet in a single session) suits the British outdoor painting reality well. You're rarely guaranteed a second session in the same conditions. Learning to resolve a painting in one sitting takes pressure off trying to replicate a moment that may never return.
6. Mix Generous Paint Quantities Before You Begin
Running out of a mixed sky colour halfway through a session, and then trying to re-mix it exactly while standing in a field with the light changing, is one of the more demoralising experiences in plein air painting. It wastes time, wastes paint, and rarely produces an exact match. The simple solution is to mix more than you think you need before you start.
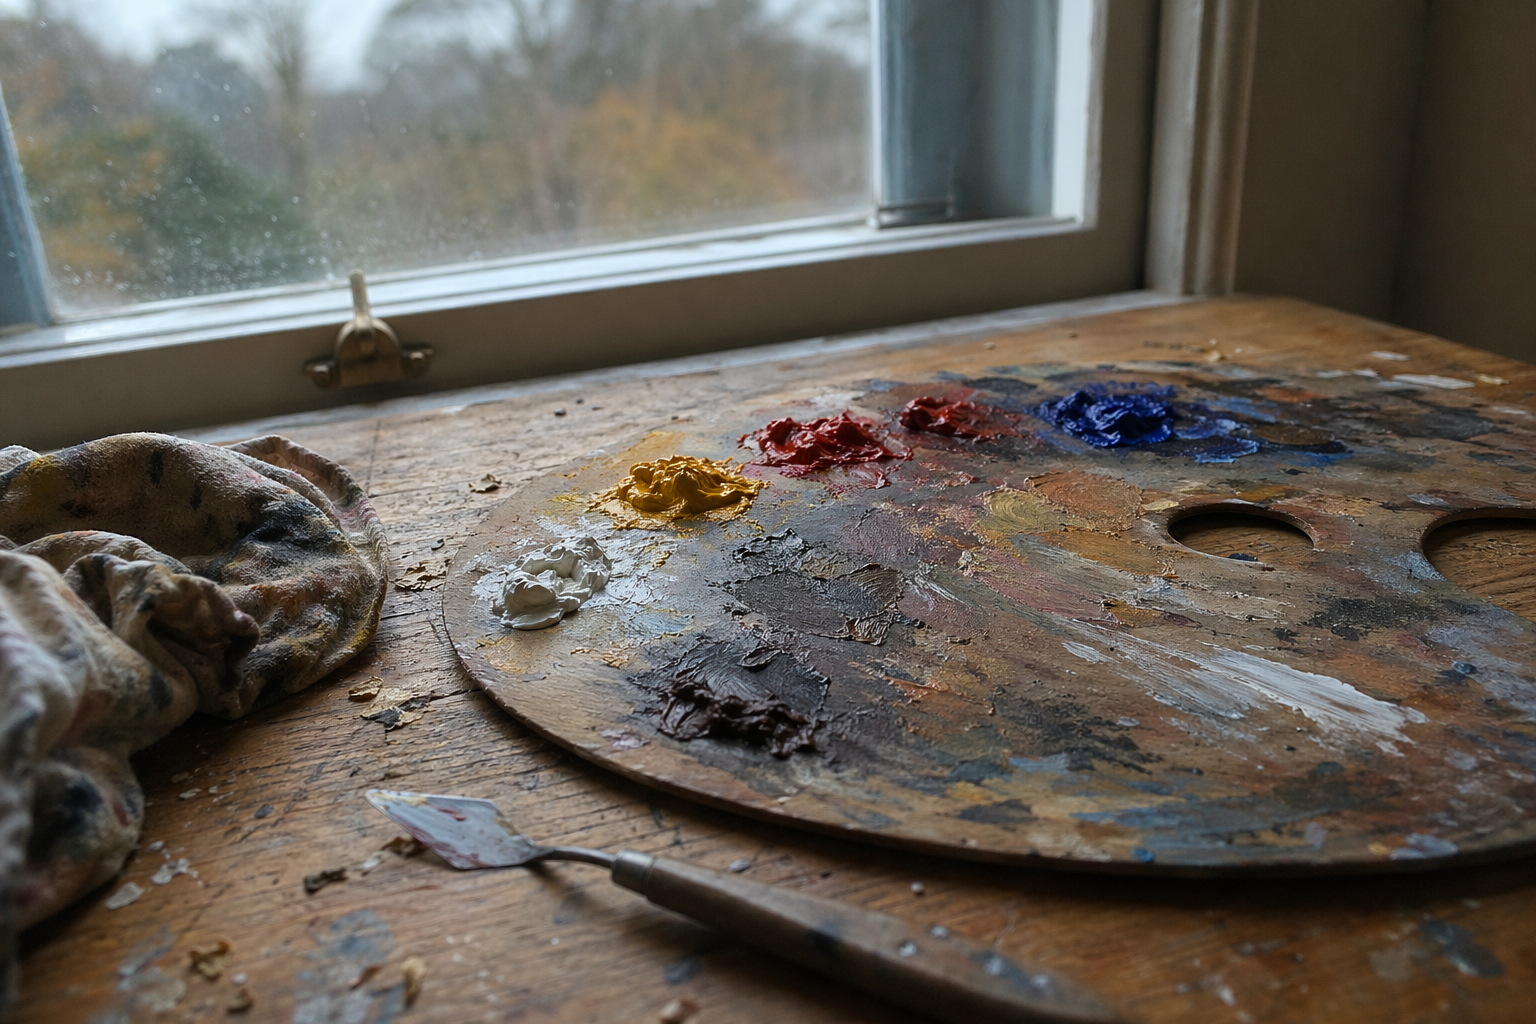
Before picking up a painting brush, spend five minutes laying out generous puddles of your key tones: sky colour, mid-ground colour, shadow mass colour, and your light-struck colour. A palette knife is much more efficient than a brush for this, allowing you to blend large amounts quickly and cleanly. Use it to mix; save your brushes for painting.
Pre-mixing also frees you to paint more loosely and confidently once the session is underway. When you know you have a solid pool of your sky mix sitting on the palette, you can commit to bold strokes without the anxiety of whether you'll be able to match the colour if you need more.
7. Simplify What You See
The hardest skill in plein air painting isn't colour mixing or brushwork. It's editing: deciding what to leave out. The natural world contains infinitely more information than any painting can hold, and the attempt to include all of it results in overworked, confused paintings that fail to capture the essential character of the scene.
The squinting technique is worth making a genuine habit. Squint until the scene reduces to three to five broad tonal masses, losing most of the detail. What remains is the structure of the painting: the dark mass of trees against a lighter sky, the pale flash of water in shadow, the broad gradient of a field from foreground to distance. Paint those masses first; only reach for detail once the structure is in place.
Simplification is also about choosing your subject carefully. A view that contains a clear, readable contrast of tones is easier to resolve quickly than one with complex overlapping planes and subtle value shifts. Learning to identify a strong subject before setting up is a skill that develops with practice and pays dividends in every session.
8. Work Wet-into-Wet With Intention
Wet-into-wet blending is one of the qualities that makes oil paint particularly suited to atmospheric outdoor subjects: soft cloud edges, water reflections, misty distances, and gradations of light across a sky all respond beautifully to gentle blending on the panel surface. But blending everything equally produces muddy, indistinct paintings that lack structure.
The discipline is to be selective. Use wet-into-wet blending for soft, transitional edges: where the sky meets a distant hill, where shadow fades into half-light, where water reflects a cloudy sky. Reserve your hard, unblended edges for structural elements that need to hold their definition: a horizon line, a tree trunk against a light sky, the sharp edge of a shadow on a sunlit wall.
In cold or damp UK conditions, paint straight from the tube tends to be slightly stiffer than in warm weather. This can actually be an advantage for holding marks and avoiding unwanted blending, though it makes very smooth gradations slightly harder to achieve. In very cold weather, keeping your paint tubes inside a jacket pocket until needed helps maintain workable consistency.
9. Know When to Use a Painting Medium (and When to Skip It)
Ask a group of experienced plein air painters about mediums and you'll get a range of answers, which tells you something useful: this is genuinely a matter of preference and working conditions, not a fixed rule. What matters is understanding what each option does so you can make an informed choice for your session.
Many experienced outdoor painters work with little or no medium, using paint straight from the tube. This is often the simplest approach outdoors: fewer items to carry, no risk of knocking over a medium cup, and no alteration to drying time or paint behaviour. If your paint is flowing well and you're working alla prima, you may not need anything else.
If you do choose to use a medium, Liquin Original (Winsor & Newton) is the most practical choice for outdoor use. It speeds up drying time, which matters when you're transporting wet panels, and improves the flow of paint without making it too runny. In damp or cold British conditions, linseed oil is worth approaching with caution: it already slows drying, and cold or humid air slows it further, which can mean a panel that's still tacky days later.
Painting mediums at a glance
- Linseed oil
- Slows drying, increases flow
- Liquin Original
- Speeds drying, useful outdoors
- Walnut oil
- Slower than linseed, less yellowing
- No medium (paint straight)
- Fastest, least fuss
Avoid in damp or cold conditions outdoors
Popular with plein air painters for this reason
Useful for light colours and whites
Many experienced plein air painters prefer this
10. Learn to Read and Chase the Light
Before you pick up a brush at any new location, spend ten to fifteen minutes simply looking. Observe where the light is coming from, where the strongest shadows fall, how those shadows define the forms in your scene, and roughly how long the current light effect is likely to last. Note whether the sun is moving towards or away from cloud cover, and whether the overall quality of light is stable or shifting fast.
This isn't time wasted. Painters who skip this step often find themselves halfway through a painting when the light changes, only then realising they hadn't fully understood what drew them to the scene in the first place.
In the UK, cloud cover creates two very different painting conditions. Diffuse overcast light is relatively stable and can give you a longer working window; the tones are softer and the shadows less dramatic, but the consistency is a genuine advantage. Direct sunlight sessions are shorter and more urgent, with stronger contrasts and more saturated colours, but the light can shift dramatically within twenty minutes. Knowing which you're working in before you start shapes every decision that follows.
The discipline that comes with experience is committing to the light effect you began with and not chasing every change. When the light shifts, keep painting the light you started with, using your memory and your early marks as reference. The painting should record a moment, not average out an afternoon.
Applying These Techniques in UK Conditions
Most plein air painting guidance assumes conditions that don't quite match what British painters actually face. Long, stable sessions in warm sunlight are relatively rare here. What we get instead is variability: sessions that start bright and end under cloud, or vice versa; wind that tips palettes and dries paint surfaces faster than expected; autumn light that's low and beautiful but moves with startling speed.
The techniques above were chosen precisely because they hold up in those conditions. Working small and toning your panel are both responses to the reality of shorter, less predictable sessions. Limiting your palette and pre-mixing generous quantities reduce the time spent on logistics when you'd rather be painting. Alla prima suits a country where the idea of returning to the same spot in the same light is more aspiration than guarantee.
A few practical additions for British outdoor painting: in autumn and winter, low sun angles create strong raking light across fields and hillsides that can be spectacular, but it moves fast. Work smaller and commit to your initial value structure even more quickly than in summer. In windy conditions, a low pochade box easel clamped to a tripod is significantly more stable than a full-size easel; if your panel blows over once, it will change how you set up for ever. In damp weather, keep your paints in a bag or box until you're ready to use them, as moisture on a palette surface can affect paint consistency and adhesion slightly.
None of these conditions make outdoor painting in the UK worse than painting elsewhere. They make it specific. The soft, northern light that Constable and Turner both understood so well is still here, still worth painting, and oil paint is still one of the best tools for capturing it.
Oil painting outdoors: honest trade-offs
Pros
- + Rich colour mixing and blending flexibility
- + Longer working time than acrylics (useful when you need to reconsider)
- + Beautiful results for landscape and atmospheric subjects
- + Alla prima approach suits short UK sessions
Cons
- - Slower drying means wet panels need careful transport
- - Mediums and solvents require more kit to carry
- - Cold weather slows drying further and affects paint consistency
- - Wind can carry dust or debris into wet paint surfaces
Building These Techniques Into Your Practice
Ten techniques is too many to focus on in a single session, and trying to apply all of them at once will leave you more anxious than before you started. The more useful approach is to pick two or three for each outing and give those your real attention.
You might spend two sessions focused on toning panels and establishing values early, then introduce the habit of pre-mixing generous quantities once those first two feel more automatic. Add alla prima thinking once you're comfortable with your tonal structure. Let the techniques build on each other rather than compete for your attention.
A short note in a sketchbook after each session, just two or three sentences about what you tried and what you noticed, builds self-awareness faster than any amount of additional reading. What felt awkward this time will feel natural in three sessions. What produced an unexpected result is worth understanding and repeating.
Progress outdoors is cumulative and it comes from showing up regularly, not from waiting for the ideal conditions that never quite arrive. A painter who commits to one or two sessions a month through autumn and winter will develop far faster than one who waits for a perfect June afternoon. British conditions are not a reason to stay inside. They're the conditions under which a genuinely distinctive kind of painting gets made.
FAQ
Frequently Asked Questions
What panel size is best for plein air oil painting?
Work small. Panels around 6x8 or 8x10 inches help you cover ground fast, make earlier compositional decisions and finish resolved studies before light or weather changes.
Why should I tone my panel before painting outside?
A mid-value ground removes the glare of raw white, helps you judge lights and darks accurately, and speeds the start of a session. Tone panels at home so they are dry when you arrive.
What colours should I take for a limited plein air palette?
Use a tight set of five or six tubes: Titanium White, Yellow Ochre, Burnt Sienna, Ultramarine Blue and a warm red such as Cadmium or Venetian Red. It simplifies mixing and keeps colours clean.
Do I need a medium when painting outdoors?
Many plein air painters use paint straight from the tube. If you want a medium, Liquin Original is practical for outdoor work. Avoid linseed in cold or damp conditions because it slows drying.
How do I handle rapidly changing light while working outside?
Spend 10 to 15 minutes observing the light, block in values early, commit to the effect you began with and aim to resolve the painting alla prima before the light shifts.
Author

PleinAirPainting Editorial Team
PleinAirPainting.co.uk helps artists paint outdoors with confidence through UK-focused guides, equipment advice, resources and plein air inspiration.