Brushwork Tips for Plein Air Realism
Practical strategies to loosen up outdoor oil painting: choose fewer durable brushes, make decisive loaded marks, manage paint in cold or heat, use scumbling and soft edges, and learn when to stop.

Key takeaways
- • Use a small, durable brush kit and favour hog bristle flats and filberts for textured, confident marks.
- • Block in boldly with large loaded strokes, work wet into wet, and manage edges deliberately to create depth.
- • Use scumbling and broken strokes for mid ground texture rather than describing every detail.
- • Adjust paint consistency in the field by warming tubes or adding a drop of linseed oil rather than over thinning.
- • Step back regularly and stop when the study reads well from a distance to preserve freshness.
If your outdoor paintings feel stiff, overworked, or timid compared to what you can see in your head, the problem is rarely your composition or your colour mixing. It's almost always your brushwork. Plein air brushwork demands a different kind of confidence than studio painting: faster decisions, bigger marks, and a willingness to trust what you've put down rather than going back in. This guide works through what actually changes when you paint outside, which brushes to take, and the specific techniques that produce assured, expressive results in oil.
Why Brushwork Feels Different Outdoors
There's a reason painters who work confidently in the studio find themselves making hesitant, scratchy marks the moment they're outside. The conditions conspire against you.
You're working faster, for a start. The light in the UK shifts constantly, even on overcast days. The soft, even illumination that makes British landscapes so paintable can turn flat and directionless within twenty minutes of clouds moving in. That pressure to capture something before it changes makes painters tighten up rather than loosen.
Standing at a distance from your panel also changes how marks read. Up close, a broad stroke looks rough and approximate. Step back three feet and it reads as convincing form. In a studio you can lean in whenever you want. Outside, moving back and forth while the wind gusts and your easel wobbles makes that habit harder to maintain, and many painters end up working too close, making marks that are too small and too careful.
Then there's the physical reality of brush control in wind, cold, or rain. A hand that's slightly chilled doesn't move with the same fluency. A brush held at arm's length in a stiff breeze behaves differently from a brush guided in a warm, still room. None of this is insurmountable, but it helps to understand that the difficulty is real, not a sign you're doing something wrong.
The goal outdoors is economy and suggestion, not tight rendering. The sooner you build your brushwork around that principle, the faster things will start to come together.
Choosing the Right Oil Painting Brushes for Plein Air
The temptation, especially for painters who've been to a few art shops, is to bring too much. A full brush roll, a range of sizes, a few brushes you've never quite got round to trying. Outside, that variety becomes a liability. You spend time choosing instead of painting.
Bristle vs. Synthetic: What Works Best Outside
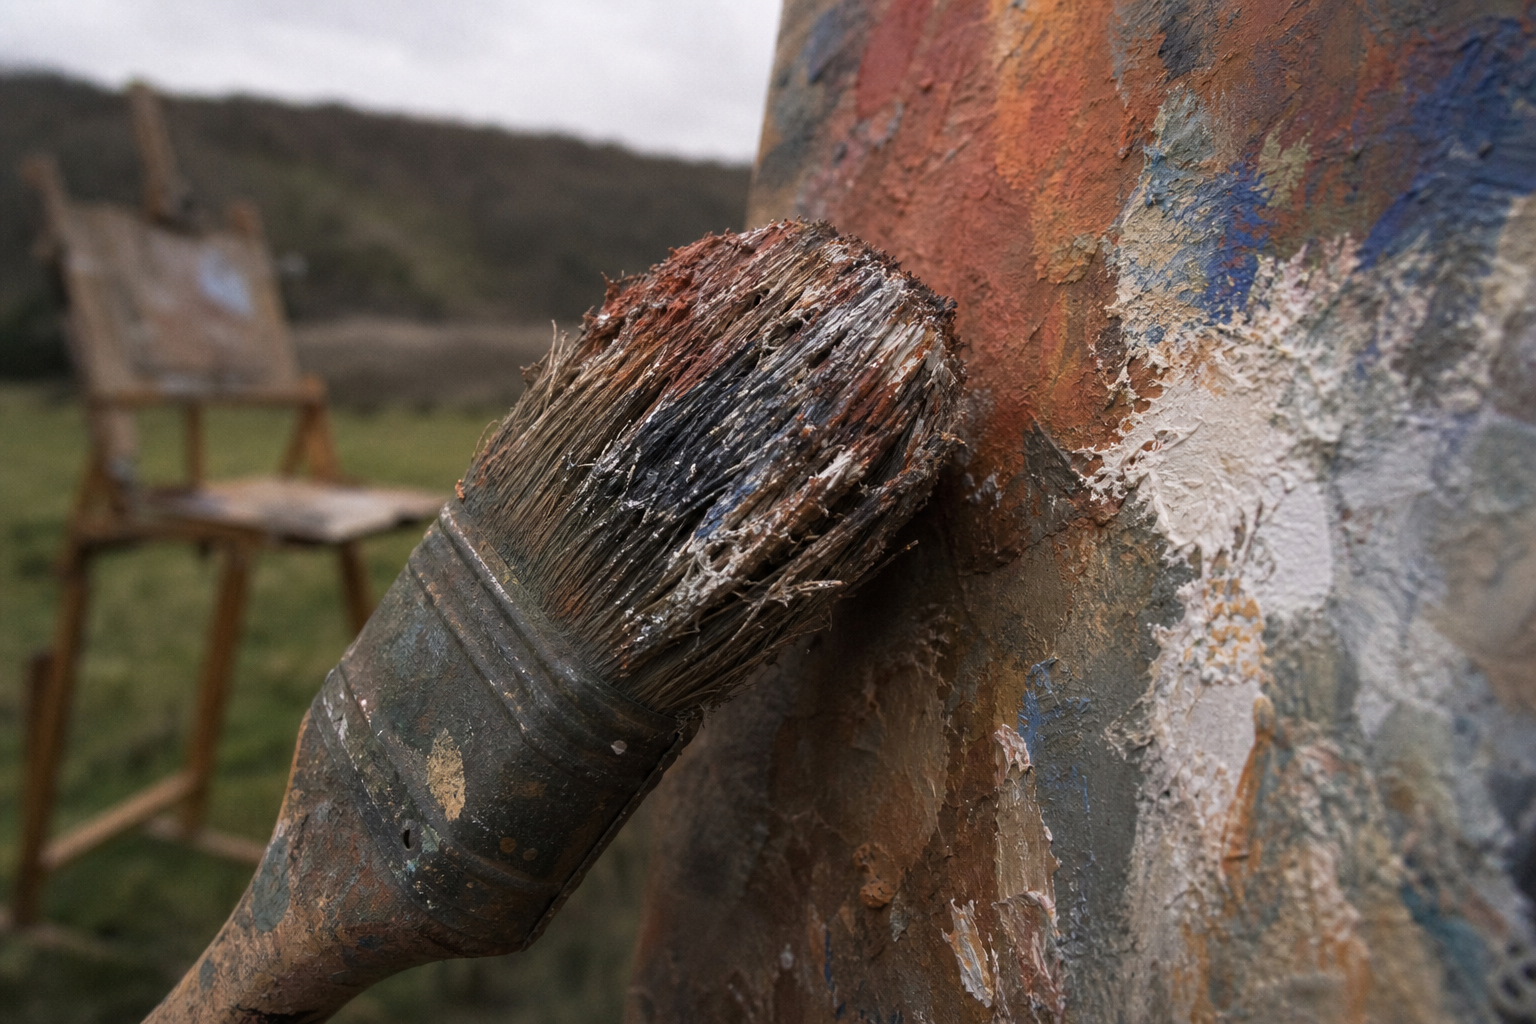
Hog bristle brushes remain the default choice for outdoor oil painting, and for good reason. They're durable, they hold a substantial load of paint, and the natural texture of the bristle creates marks that suit the broken, variable surfaces you're usually painting: foliage, rough grass, water, stone walls. When you drag a loaded hog bristle flat across a panel, you get a quality of mark that reads as genuinely outdoor texture without having to think too hard about it.
Synthetic brushes have improved considerably in recent years and deserve a place in your outdoor kit, but as a complement rather than a replacement. They work well for smoother passages where hog bristle would leave too much texture: a calm stretch of water, a pale sky gradation, a rendered path or road surface. They're also softer on the panel, which matters if you're working on a surface with a fine texture you want to preserve.
Sable or sable-blend rounds are occasionally useful for very fine detail, but use them sparingly outdoors. The temptation with a small round in your hand is to describe every leaf and twig. That way lies overworked, laboured painting.
For UK painters specifically, Rosemary & Co is worth a direct mention. They're a UK-based manufacturer based in Yorkshire, popular with oil painters for the quality and durability of their brushes, and available by post directly from their website. Their hog bristle range holds up well in field conditions. Winsor & Newton hog brushes are widely available from Cass Art, Ken Bromley, and Jackson's Art, and are a solid choice at a reasonable price. If you're after smaller rounds for selective detail, the Winsor & Newton Series 7 is a classic option. For a deeper comparison, see our roundup of the best brushes for plein air oil painting.
How Many Brushes Do You Actually Need?
Keep it simple
Most experienced plein air painters go out with five brushes or fewer. A small selection forces decisive marks and stops you fussing. Two or three flats, a filbert, and a small round will cover almost every situation.
| Brush type | Shape | Best used for | Notes |
|---|---|---|---|
| Hog bristle flat | Flat | Blocking in large shapes, sky areas | Durable, holds more paint |
| Hog bristle filbert | Rounded edge | Mid-tones, soft forms, foliage | Versatile workhorse brush |
| Synthetic flat | Flat | Smoother passages, water, paths | Less texture than bristle |
| Synthetic round | Pointed | Details, fine branches, rigging | Use sparingly; detail-hunting slows you down |
| Rigger / liner | Very fine point | Tree branches, distant detail, signatures | Load well with fluid paint |
Core Plein Air Brushwork Techniques
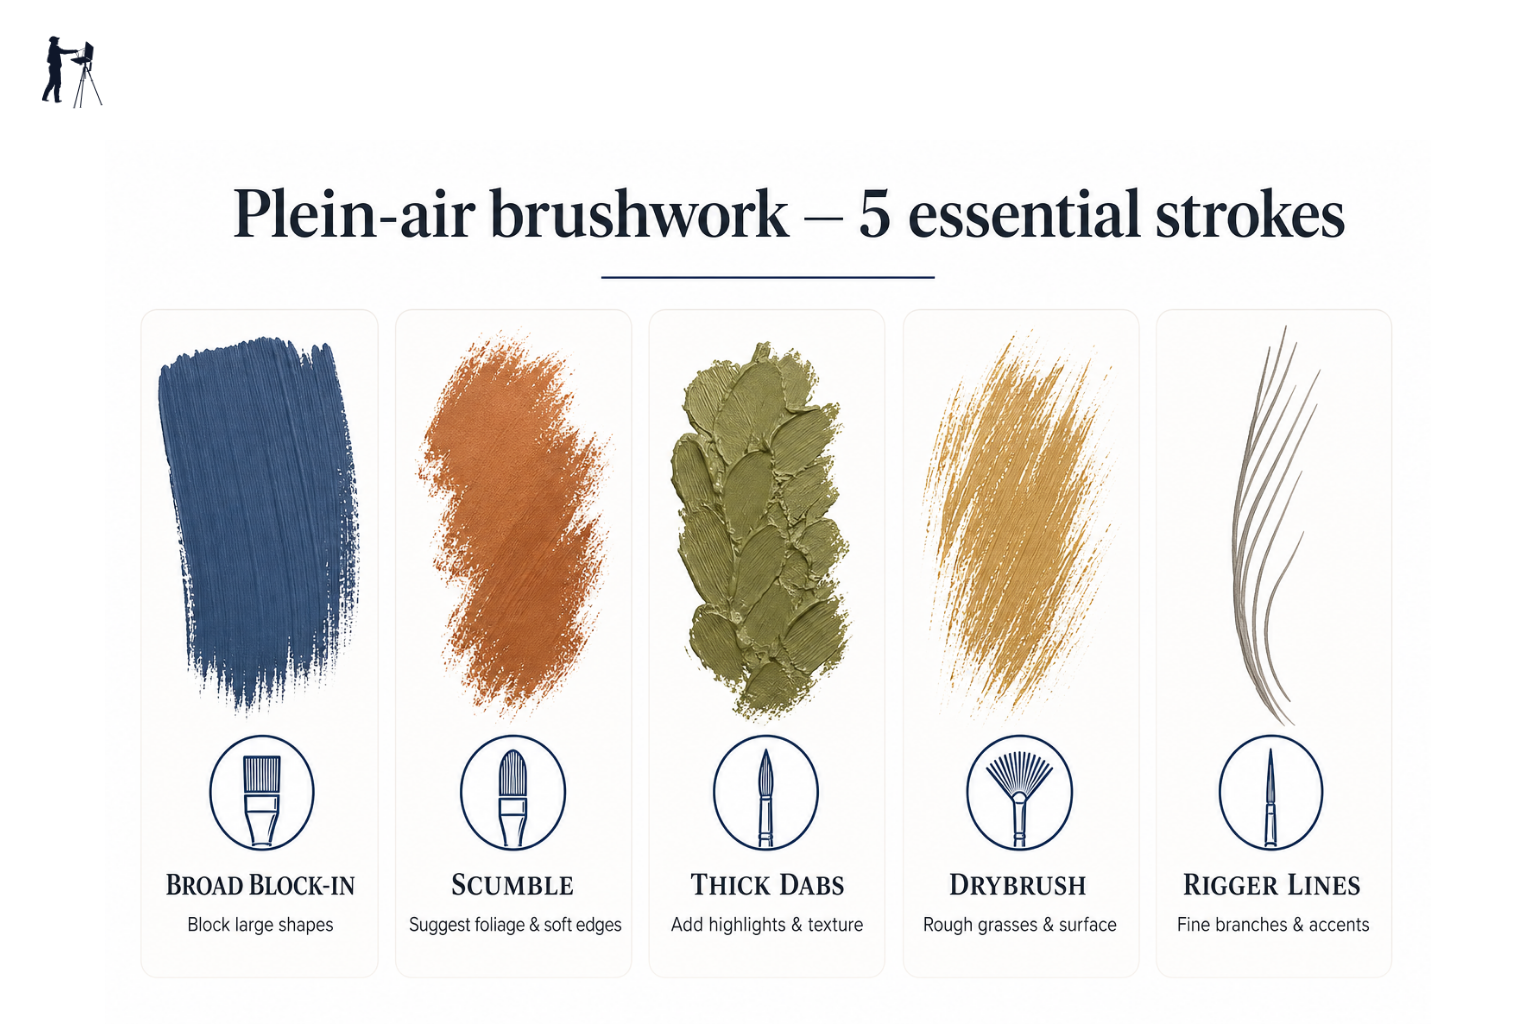
These are the techniques that directly produce results outdoors. Each one addresses a specific problem that plein air painting presents, and each takes practice to use with confidence. Work on them one at a time rather than trying to implement everything at once. The British Plein Air Painters society showcases plenty of examples of how these techniques are applied in finished work.
Blocking In with Confidence
Blocking in is where most plein air sessions go wrong, or right. If you spend the first twenty minutes fiddling with your initial drawing or laying in thin, tentative marks, you've set the painting up for struggle.
Use your largest flat or filbert. Load it properly: that means pressing the bristles into the paint on your palette rather than just dipping the tip. Lay in the major tonal masses with decisive strokes, working across the whole panel rather than finishing one area before moving to another. At this stage you're placing darks, lights, and mid-tones in roughly the right positions. No edges, no detail, no final colours.
The direction of your stroke can do more work than you might expect. Strokes that follow the horizontal plane of a field read differently from strokes that follow the vertical plane of a building. Build this in from the start and the painting will have a structural logic that detail can never replace.
Working Wet into Wet for Soft Edges
Alla prima painting (all paint applied in a single session, wet into wet) suits plein air work well because there's rarely time for anything else. One consequence of this is that you need to manage edges while the paint is still fresh.
Not all edges should be soft. Hard edges advance; they're where the eye wants to go. Soft edges recede; they create depth and atmosphere. UK light, often low and diffuse, tends to produce more soft edges than Mediterranean painters deal with, which means you need to be deliberate about where you push contrast and where you let things merge.
To soften an edge while paint is wet, draw a clean brush lightly along the boundary between two passages. Don't blend back and forth: one or two strokes in one direction is enough. Over-blending is one of the most common ways to kill the freshness of a plein air study. For more on this approach, see our guide to alla prima plein air painting.
Scumbling for Texture and Atmosphere
Scumbling is the technique of dragging a dry (or nearly dry) brush across a painted surface to create broken, textured marks. It works particularly well when there's a slightly tacky or semi-dry underlayer to drag across, though it can be used wet on wet with a light touch.
Scumbling in the field
Scumbling works well for broken light on water, rough grass, or distant hedgerows. Load a dry bristle brush lightly and drag it across a slightly dry underlayer. The broken texture reads as convincing outdoor texture without fussy detail.
In practice, scumbling is excellent for the kind of mid-ground passages that would take forever to render conventionally: a hedgerow fifty yards back, rough pasture catching low light, the broken surface of a tidal river. The optical effect of paint dragged over an uneven surface suggests complex texture convincingly without describing it literally.
Knowing When to Stop
This is genuinely a technique, not just a mindset observation. There's a moment in most plein air studies when the work is done: the marks are fresh, the tonal relationships are working, and the painting reads as a coherent whole from a few feet back. Experienced outdoor painters learn to recognise this moment and stop. Less experienced painters keep going.
The problem is that every additional mark risks something. It might work, but it might overblend a passage that was fresh, or add detail that pulls the eye somewhere it shouldn't go, or generally add busyness where economy was serving you well. If you're not certain a mark needs to be there, don't make it.
A useful rule: when you think you're nearly done, step back and look at the painting from at least two metres. If it reads well at that distance, it's probably finished. Marks that look unfinished up close usually read perfectly well from a normal viewing distance.
A simple brushwork approach for a plein air study
Block in large shapes
Use your largest flat or filbert. Load the brush well and lay in the major tonal masses without fussing. No detail at this stage.
Establish key edges
While the paint is wet, soften any edges that should recede. Leave harder edges where you want the eye to land.
Build mid-ground texture
Use broken strokes or scumbling for mid-ground areas: fields, foliage, water. Vary the pressure and direction of your marks.
Add selective detail
Use a small round or rigger only for the details that matter. One or two marks in the right place are more powerful than many.
Step back and assess
Move away from the panel. Do the marks read at a distance? Resist the urge to go back in.
A UK-weather mark-making decision sequence
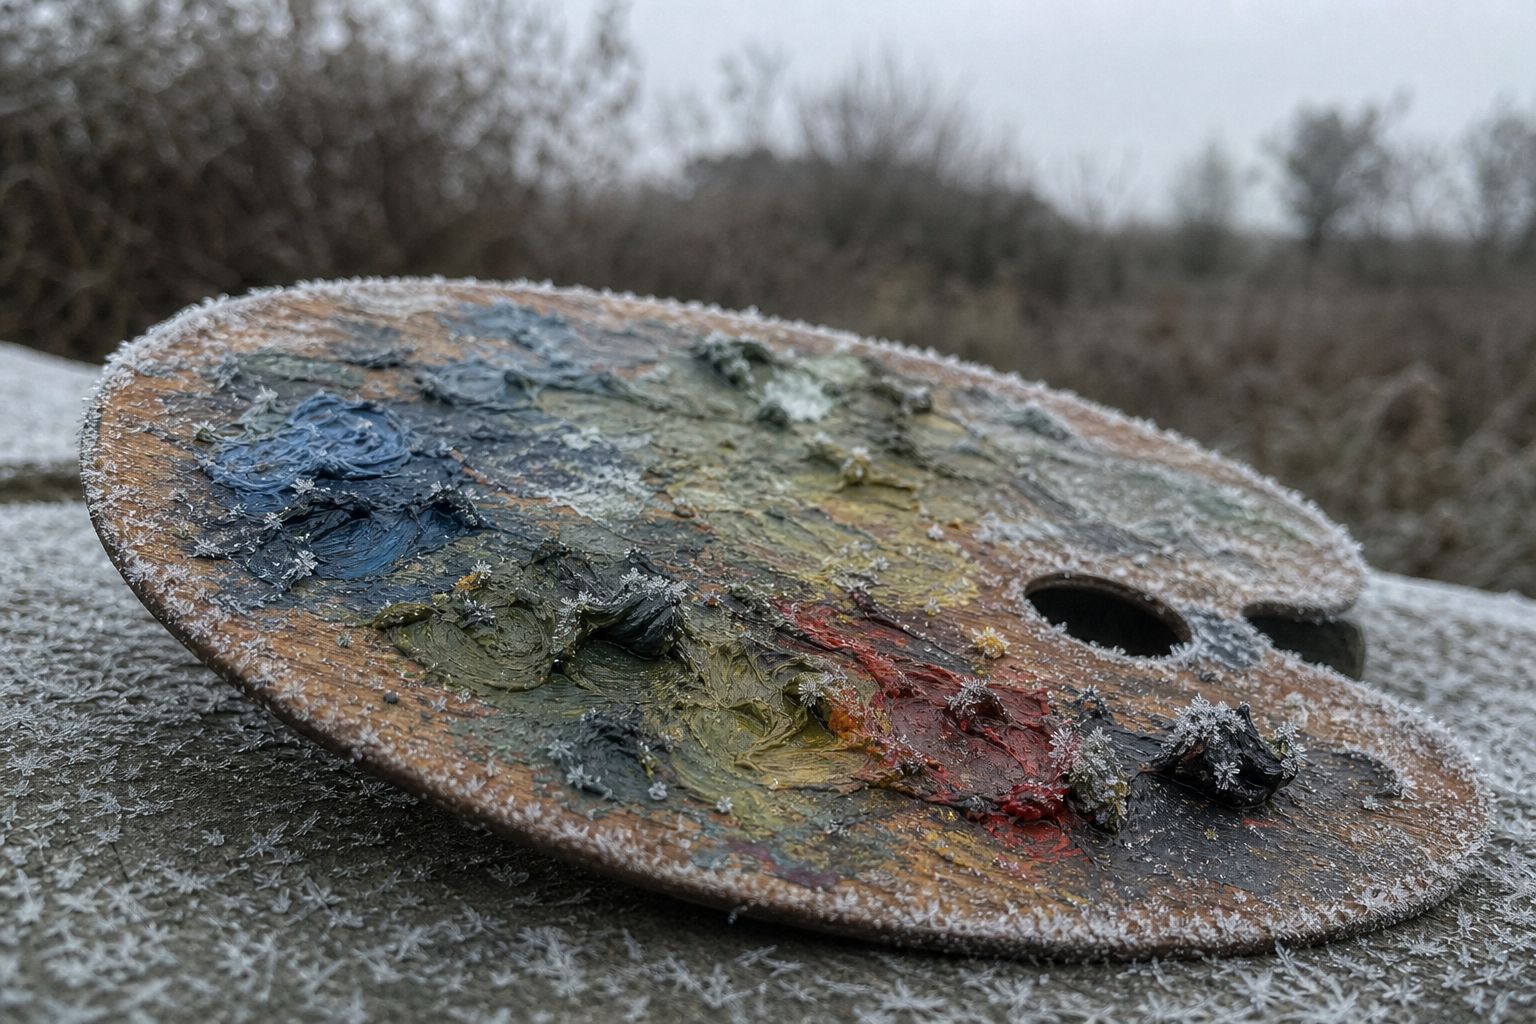
Read temperature, wind and humidity before you load the brush. Those three decide consistency, grip and drying. Technique pages such as alla prima and scumbling assume you have already made this outdoor call. No manufacturer URL belongs here.
Cold: thicken, do not drown
Below about 10°C oil and alkyd drag. That is most of the UK season. Keep the pile stiffer rather than flooding it with solvent. Over-thinning weakens the film.
Choose consistency without over-thinning. A warm, sealed palette helps more than extra white spirit. If the mark still crawls, the brush is too small or too dry, not the paint too thick.
Example, overcast Norfolk field: values stay even for an hour. Load fully, one size larger than studio habit, and describe the plane in one direction. Stop when later ticks reduce clarity.
Wind and heat: grip and drying
On a rare hot UK day the palette skins. Keep piles smaller and work faster. Summer plein air covers shade and heat; here the job is still the mark.
Example, gusty coastal session: wind changes both grip and drying. Hold higher on the handle, use the elbow, and accept a shorter sitting. A palette knife can lay a plane when the bristle sail is too much. Brush choice itself stays on the brushes review; this page does not become a shopping list.
Humidity rarely wrecks oil handling. It can slow drying. Do not chase it with extra medium.
Commit to the stroke, then stop
Pick one size larger than studio habit. Load fully. Let the stroke direction describe the plane. Choose hard versus soft edges from the light, not from fear.
Timid outdoor work is usually small, dry ticks, not missing theory. Make the larger mark first. If it is wrong, scrape; do not embroider.
One clean stroke beats three in the same place. Each extra pass muddies colour and flattens the plane.
Stop when later marks reduce clarity. That is the outdoor end of the sequence, even if the studio version of you would keep going.
Stand back after each committed pass. If the plane still reads from two metres, leave it.
Common Brushwork Mistakes and How to Fix Them
Reaching for small brushes too early. Detail is seductive, but detail without a sound tonal foundation just adds confusion. Small brushes should come out late, if at all. If you find yourself picking up a round in the first quarter of the session, put it back.
Overblending edges. When a passage is going slightly wrong, the instinct is to blend more. This is almost always the wrong response. Overblending loses the freshness that distinguishes plein air oil work and creates grey, indeterminate passages that suggest nothing convincingly. If an edge is troubling you, try leaving it and assessing from a distance before touching it again.
Describing rather than suggesting. You cannot paint every leaf on a hedge. More importantly, you should not try. A few well-placed broken strokes suggest a complex natural surface more convincingly than careful description ever will. Train yourself to look at foliage as tonal mass, not as individual elements.
Dirty brushes. Cleaning brushes as you move between colour groups matters more outdoors than in the studio, where you have time and space to manage things carefully. A brush that carries mud from a previous passage will contaminate every subsequent colour mixed with it. Keep a rag and a small jar of solvent or brush cleaner to hand, and wipe down between passages.
Trying to rescue a passage that's gone wrong. Sometimes a section of a painting fails and can't be fixed while wet. Trying to repaint it wet into wet usually results in a muddy mess that makes things worse. The better option is to scrape the passage back with a palette knife and let it dry before reworking it, or simply accept that the study has problems and treat it as a learning session. Not every painting outside will be successful. That's genuinely fine.
The mark-making that looks effortless in other painters' plein air work is the result of repetition and deliberate practice, not natural gift. Get outside, make the marks, and pay attention to what works. It comes with time.
FAQ
Frequently Asked Questions
Which brushes work best for plein air brushwork?
Hog bristle flats and filberts are the go to for outdoor oil painting because they hold a lot of paint and make textured marks. Use synthetic flats for smoother passages and reserve small rounds or sable sparingly for selective detail.
How many brushes should I take on a plein air session?
Keep it simple. Most experienced plein air painters use five brushes or fewer: two or three flats, a filbert, and a small round. A limited kit forces decisive marks and stops you fussing.
What can I do when paint gets too stiff in cold weather?
Avoid over thinning with solvent. Add a single drop of linseed oil or a solvent free gel to restore workability, keep tubes warm in a pocket, or use a sealed palette to retain heat.
How do I soften edges without losing freshness?
While paint is wet, draw a clean brush lightly along the boundary with one or two strokes in a single direction. Do not over blend. Leave hard edges where you want the eye to land.
How do I know when a plein air study is finished?
Step back to at least two metres. If the painting reads as a coherent whole from that distance, resist further modification. One or two well placed marks beat constant fiddling.
Author

PleinAirPainting Editorial Team
PleinAirPainting.co.uk helps artists paint outdoors with confidence through UK-focused guides, equipment advice, resources and plein air inspiration.