How to Clean an Oil Painting: A Safe, Step-by-Step Guide
Practical steps for how to clean an oil painting at home: careful dusting, very light soapy spot cleaning for stable work, tests to try, and when to call a conservator.
Key takeaways
- • Always assess the painting in raking light for flaking, cracks, or instability before touching it.
- • Start with dry dust removal using a soft natural bristle brush and let the dust settle before rehanging.
- • For light surface grime on stable, fully cured paintings use a very dilute mild soap in distilled water and work in tiny areas, testing first.
- • Never use solvents, alcohol, baby wipes, saliva, or rough cloths which can damage varnish or paint.
- • Seek a qualified conservator for varnish removal, flaking paint, smoke or water damage, or any high value or unstable work.
Learning how to clean an oil painting is one of those things that sounds straightforward until you are actually standing in front of a painting you care about, cotton bud in hand, wondering if you are about to do something you cannot undo. The honest answer is that cleaning an oil painting carries real risk, and many well-intentioned attempts have caused more damage than the original dirt. This guide will walk you through what is safe to do yourself, how to do it carefully, and when to put the cotton bud down and call a professional.
Why oil paintings need careful cleaning
Over time, every oil painting accumulates a layer of airborne grime. In a typical UK home, that grime is a mixture of dust, cooking grease, and, if you have an open fireplace or wood-burning stove, a fine film of soot and smoke residue. This last category is especially common in older British properties, and it can leave a surface that looks dull and slightly greasy rather than simply dusty.
Paintings hung near kitchens, fireplaces, or in rooms with poor ventilation are most vulnerable. Coastal homes, particularly in places like Cornwall, Norfolk, and the Scottish coast, may also see higher levels of atmospheric salt and humidity affecting stored or displayed work over time.
The paint surface itself is more fragile than it looks. Beneath any grime, you have layers of oil paint that have been hardening and polymerising over years. Above that, there may be a varnish layer. Both are vulnerable to the wrong cleaning approach. Abrasion, solvents, and even excess moisture can strip, dissolve, or lift paint in ways that are impossible to reverse at home. Most DIY cleaning disasters happen not because people are careless but because they underestimate what they are dealing with.
What you can safely clean yourself (and what you cannot)
Before you pick up any cleaning materials, it is worth being clear about the boundaries. The following applies to stable, fully cured oil paintings in reasonably good condition.
DIY cleaning: what is and is not safe
Pros
- + Removing loose surface dust with a soft brush
- + Very light cleaning of stable, well-dried paintings with mild soapy water
- + Improving storage and display conditions to slow dirt accumulation
Cons
- - Attempting to remove varnish or discolouration
- - Cleaning paintings less than 6 to 12 months old (paint may still be curing)
- - Using alcohol, solvents, or commercial household cleaners
- - Cleaning damaged, flaking, or cracked paint surfaces
- - Cleaning antique, inherited, or high-value paintings without professional advice
If your painting falls into any of the "cons" categories above, the rest of this guide is not for you yet. Skip ahead to the section on finding a professional conservator.
Before you start: assess the painting
A few minutes of careful assessment before you do anything else can prevent a great deal of regret.
Check the paint surface
Take the painting to a window or hold a torch at a low, raking angle to the surface. This kind of side lighting reveals texture, cracks, and areas of instability that are invisible under normal room lighting. Look for any paint that appears to be lifting at the edges, areas where the surface looks uneven or bubbly, or fine cracks running through the paint layer.
Consider the painting's age
Oil paint takes far longer to fully cure than most people realise. The surface may feel dry within days or weeks, but the paint continues to oxidise and harden for months, sometimes a year or more. If the painting is less than six months old, do not wet clean it. If it is between six and twelve months old, proceed with real caution and only if the paint appears completely stable.
Check for flaking, cracking, or active damage
Run your eye carefully over the entire surface. Pay particular attention to edges, corners, and any areas where the canvas may have been flexed or knocked. If the support itself is warped, if the canvas is slack, or if a board has begun to delaminate, wet cleaning could make things significantly worse.
When to stop before you start
If a painting has flaking paint, visible cracks, or feels unstable to the touch, do not attempt any cleaning. Even light contact can dislodge fragile paint. Seek advice from a professional conservator first.
How to clean an oil painting: dust removal
For most paintings in most situations, a careful dust removal is all that is needed and all that is safe. This is the right place to start, and for many paintings it is the right place to stop.
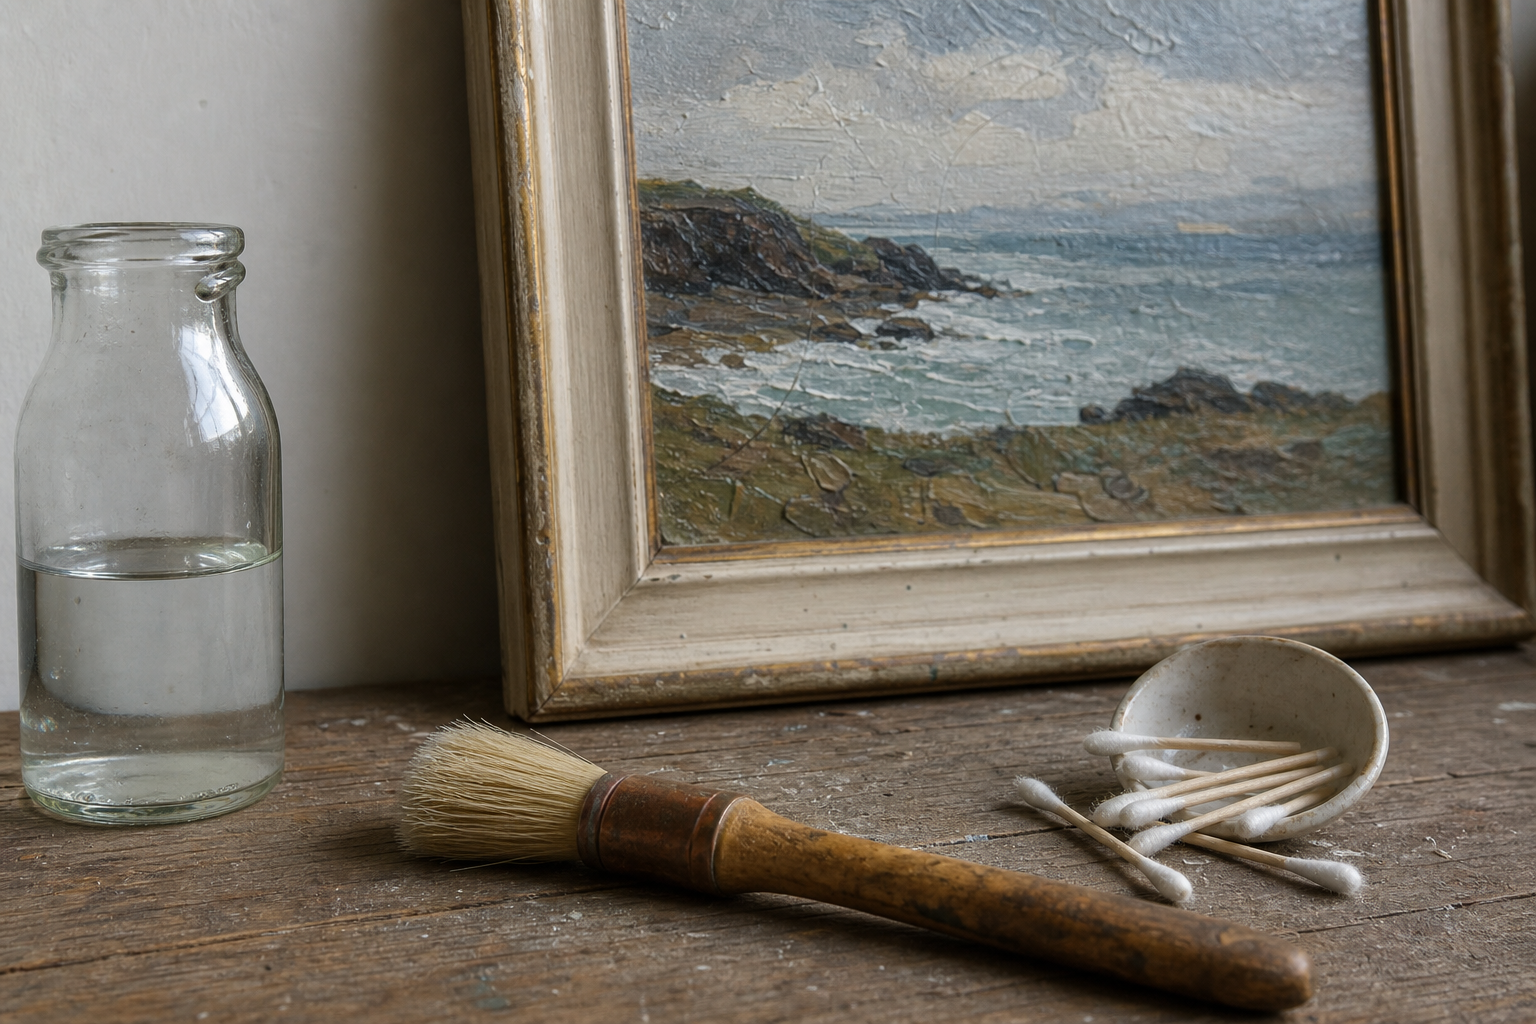
A soft natural-bristle brush is your primary tool here. A wide, flat watercolour mop brush works well, as does a clean, unused make-up brush. Brushes from Jackson's Art or Ken Bromley in a size 20 to 30 hake or mop style are well suited to this. Avoid synthetic bristle brushes: they can generate static and drag against the surface.
Dust removal step by step
Lay the painting flat
Place the painting face-up on a clean, padded surface. Do not lean it vertically while cleaning.
Choose the right brush
Use a soft, clean brush with natural bristles. A wide, flat watercolour brush or a clean make-up brush works well. Avoid synthetic brushes, which can create static.
Work from the top down
Use light, sweeping strokes from the top of the painting downward. Let the dust fall away rather than pushing it across the surface.
Check your progress in raking light
Hold a torch or lamp at a low angle to the surface. This reveals dust and dirt that is not visible in direct light.
Leave it to settle
Allow at least 30 minutes before handling or rehanging the painting.
One thing worth emphasising: do not blow the dust off with your breath. Breath contains moisture and, in quantity, that moisture is enough to cause issues on an already fragile or varnished surface. Let the brush do the work.
How to clean an oil painting: light surface soiling
If dust removal is not enough and the painting has a film of grime that a dry brush cannot shift, a very mild wet clean may be appropriate. This method is only suitable for fully cured, stable paintings with no surface damage and no active varnish concerns.
What you will need
- Soft lint-free cotton cloths or cotton buds (available from any pharmacy or art supplier)
- Distilled water (not tap water, which contains minerals that can leave deposits; distilled water is inexpensive and widely available from UK supermarkets and hardware shops)
- A mild olive oil soap, such as Marseille soap or a plain castile soap; these are available from health food shops and online, and are significantly gentler than household washing-up liquid
- A clean, flat surface to work on
The cleaning process
Mix approximately one level teaspoon of the soap into around 500ml of distilled water. Stir gently. The solution should be very lightly soapy, barely lathering. If it foams freely, it is too concentrated; dilute it further.
Work in very small sections, no larger than a postage stamp at a time. Dampen (do not soak) a cotton bud in the solution, then use light circular motions across the section. Rotate the cotton bud frequently to a clean area, and check it regularly for any sign of paint transfer. After each small section, follow with a clean cotton bud dampened in plain distilled water to remove any soap residue. Allow at least 24 hours for the painting to dry fully before handling or rehanging.
Testing on an inconspicuous area first
This step is not optional. Before you touch any prominent area of the painting, test the solution in a small, inconspicuous corner.
Always test first
Before cleaning any area of the painting, test your solution on a very small, inconspicuous corner. Apply gently with a cotton bud, wait 30 seconds, and check for any paint transfer on the cotton. If you see colour, stop immediately.
If you see any colour on the cotton bud at all, stop. Do not continue. The paint is either not fully cured or the surface is more vulnerable than it appears. In that case, professional advice is the right next step.
What to avoid when cleaning oil paintings
Some cleaning materials that seem logical are actually damaging. The following are the most common mistakes, and the reasons they cause problems.
| What to avoid | Why it causes problems |
|---|---|
| Household glass or surface cleaners | Contain solvents and detergents that dissolve paint binders |
| Baby wipes or wet wipes | Contain alcohol, fragrance, and surfactants that can lift paint |
| Saliva | Traditional myth; introduces bacteria and enzymes that can damage paint over time |
| Rough cloths or paper towels | Scratch and abrade the paint surface and any varnish layer |
| Excessive water or soaking | Water can seep into cracks and cause canvas or board to warp or expand |
| Isopropyl or rubbing alcohol | Even diluted, it strips varnish and can dissolve paint layers |

It is worth addressing the saliva method directly. Some older painting guides mention it as a traditional technique, and it has a grain of historical truth to it. Certain enzymes in saliva can break down surface grime without affecting paint. However, saliva also introduces bacteria, proteins, and biological material that can cause slow deterioration over time, and the technique is not recommended by professional conservators. It is one of those practices that has been quietly retired for good reason.
Similarly, any product containing alcohol, including baby wipes, most hand sanitisers, and rubbing alcohol, is strictly for professional use only. Even when diluted, these solvents can strip varnish and begin to dissolve older paint layers with alarming speed.
When to call a professional conservator
Knowing when not to clean a painting yourself is as important as knowing how to do it safely. Some situations genuinely require trained expertise, and recognising them is not a failure of nerve: it is good judgement.
Signs a painting needs professional attention
- Visible yellowing or darkening that is more likely discoloured varnish than surface dirt
- Smoke or water damage of any kind
- Paint that is actively flaking, lifting, or powdering
- Mysterious staining or tide marks
- Any painting with sentimental, financial, or historical significance that you cannot afford to get wrong
- Paintings that have been rolled, stored in damp conditions, or suffered physical damage
Finding a qualified conservator in the UK
Finding a qualified conservator in the UK
Look for conservators accredited by ICON, the Institute of Conservation, the professional body for conservation in the UK. The ICON website (www.icon.org.uk) has a Find a Conservator directory where you can search by specialism and location. Always ask about their experience with oil paintings specifically.
When you contact a conservator, it is reasonable to ask about their specific experience with oil paintings on canvas or board, whether they carry out a condition report before beginning any work, and what their approach would be for your particular painting. A good conservator will want to assess the work before committing to a treatment plan.
Some regional museums and galleries are also willing to recommend local conservators they have used and trusted. Fine Art Restoration UK is one example of a specialist service, though it is always worth verifying current availability and credentials before booking.
Professional conservation is not cheap, but for a painting that matters to you, it is a better outcome than an irreversible mistake at home.
Preventing dirt build-up in the first place
The best approach to cleaning is reducing how often it becomes necessary. Good habits around storage and display make a real difference, particularly in UK homes where open fires, cooking, and condensation are genuine environmental factors.
Where you hang work matters. Avoid hanging paintings directly above or adjacent to fireplaces, in kitchens, or on exterior-facing walls in older buildings where condensation forms. South-facing walls in rooms with unfiltered direct sunlight can cause paint to fade and varnish to yellow faster than necessary.
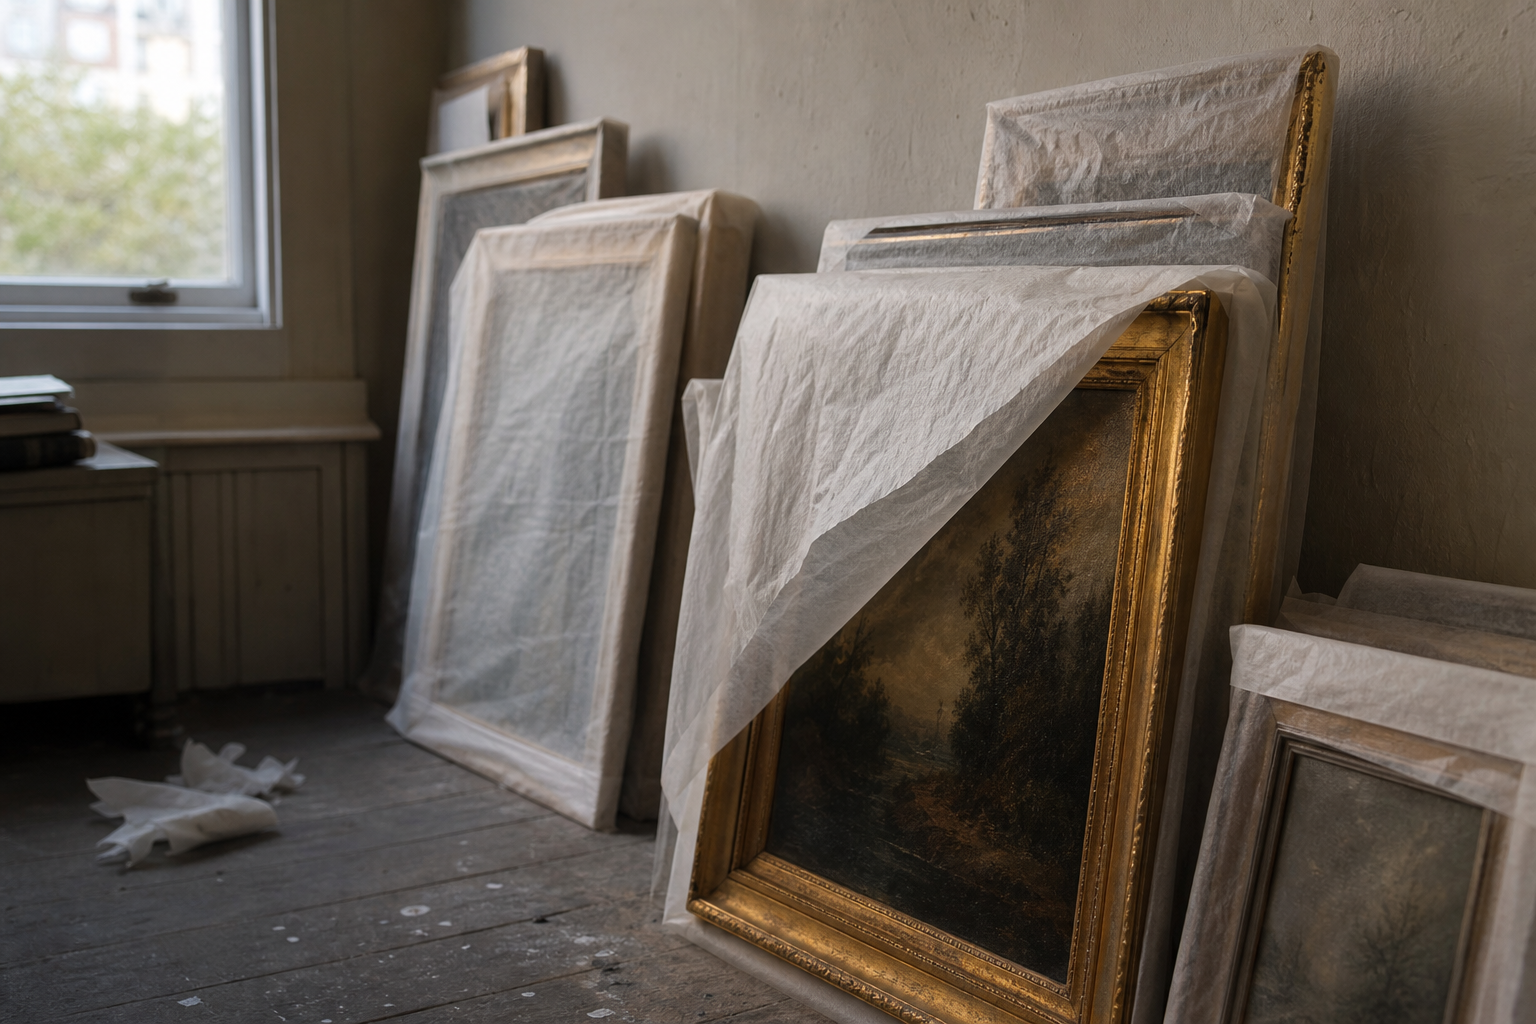
In coastal areas, higher ambient humidity is a real consideration. If you store work in a shed, garage, or outbuilding near the coast, be aware that fluctuating humidity causes canvas and boards to expand and contract repeatedly over time, which weakens the paint layer. A climate-controlled interior space is always preferable.
For stored paintings, never place bubble wrap directly against the paint surface. The texture can transfer and adhere over time, particularly in warm conditions. Instead, use acid-free tissue or archival paper between paintings if stacking is unavoidable. Jackson's Art and Cass Art both stock acid-free tissue and archival storage materials at reasonable prices.
Backing boards on framed work significantly reduce the amount of dust that settles on the back of a canvas and migrates to the front over time. If you are having work framed, it is worth asking your framer to include a backing board as standard.
Dust gently and regularly. A quick pass with a soft brush every few months prevents the kind of ground-in grime that makes wet cleaning feel necessary. Little and often is far preferable to an infrequent deep clean.
A note on varnish and cleaning
Many oil paintings, particularly older ones, have a varnish layer sitting between the viewer and the actual paint surface. This is relevant to cleaning because what looks like a dirty painting is sometimes a yellowed or discoloured varnish, and the two problems require completely different approaches.
If you wet-clean a varnished painting, even with mild soap and water, you risk affecting the varnish layer. Some varnishes are water-sensitive, and a damp cloth can cause cloudiness, streaking, or uneven dulling that is difficult to reverse.
Varnish removal is professional territory. If you suspect your painting has a dirty varnish rather than a dirty paint surface, do not attempt to clean it at home. A conservator can identify the type of varnish present and remove it safely if that is the right course of action.
For plein air paintings that have not yet been varnished, this is less of a concern, but it is worth understanding the relationship between the two layers before you begin any cleaning process. Applying varnish to a fully cured and clean painting is a separate topic, but timing and condition matter there too. For the underlying methods that lead to a stable, cleanable surface in the first place, our guide to plein air oil painting techniques is a useful companion read.
The short version is this: if you are unsure whether your painting has a varnish layer, treat it as though it does and proceed accordingly.
FAQ
Frequently Asked Questions
Is it safe to clean an oil painting at home?
Yes, but only for stable, fully cured paintings with no flaking, cracking, or varnish concerns. Start with dry dusting and test any wet cleaning on a small, inconspicuous area first.
How do I remove dust from an oil painting?
Lay the painting face up on a padded surface and use a soft natural bristle brush in light, downward strokes. Check progress in raking light and allow 30 minutes before handling.
When is mild wet cleaning appropriate and how is it done?
Only for fully cured, stable paintings with no damage. Use distilled water with a tiny amount of mild soap, work in postage stamp sized areas with damp cotton buds, and rinse each area with plain distilled water.
What common products should I never use on an oil painting?
Avoid household glass cleaners, baby wipes, rubbing alcohol, saliva, rough cloths, and excessive water. These can strip varnish, dissolve paint, or abrade the surface.
When should I contact a professional conservator?
Call a conservator for yellowed or discoloured varnish, smoke or water damage, flaking or powdering paint, mysterious stains, or any valuable or sentimental work you cannot risk damaging.
Author

PleinAirPainting Editorial Team
PleinAirPainting.co.uk helps artists paint outdoors with confidence through UK-focused guides, equipment advice, resources and plein air inspiration.