Dawn and Dusk: A Practical Guide to Golden Hour Plein Air Painting
Practical tactics for golden hour plein air painting in the UK. Plan, premix, block large to small, and use small panels, a headtorch, and warm layers to capture fast shifting light.

Key takeaways
- • Plan and prep: scout, arrive early, tone panels, and premix warm and cool notes.
- • Window varies by season and latitude; summer is brief, winter is longer.
- • Use two clear temperature families and limit white in warm mixes to keep glow.
- • Work fast from large to small on small panels and stop major colour decisions when the light ends.
- • Bring practical kit: headtorch, warm layers, stable pochade box, and extra panels.
The light changes faster than you expect. One minute you're looking at a landscape in ordinary early morning grey; the next, the sky has gone amber, the shadows have turned blue-violet, and every surface that faces west is burning. That shift is what golden hour plein air painting is about. And if you're not ready for it, it's gone before you've mixed your first colour.
This guide is for painters who have done a handful of sessions outdoors and are now ready to take on something more demanding and more rewarding. We'll look at the specific behaviour of golden hour light, how long you actually have in UK conditions (which varies significantly by season), and what to do before, during, and after the window opens.
Why Golden Hour Is Worth the Early Start (or Late Finish)
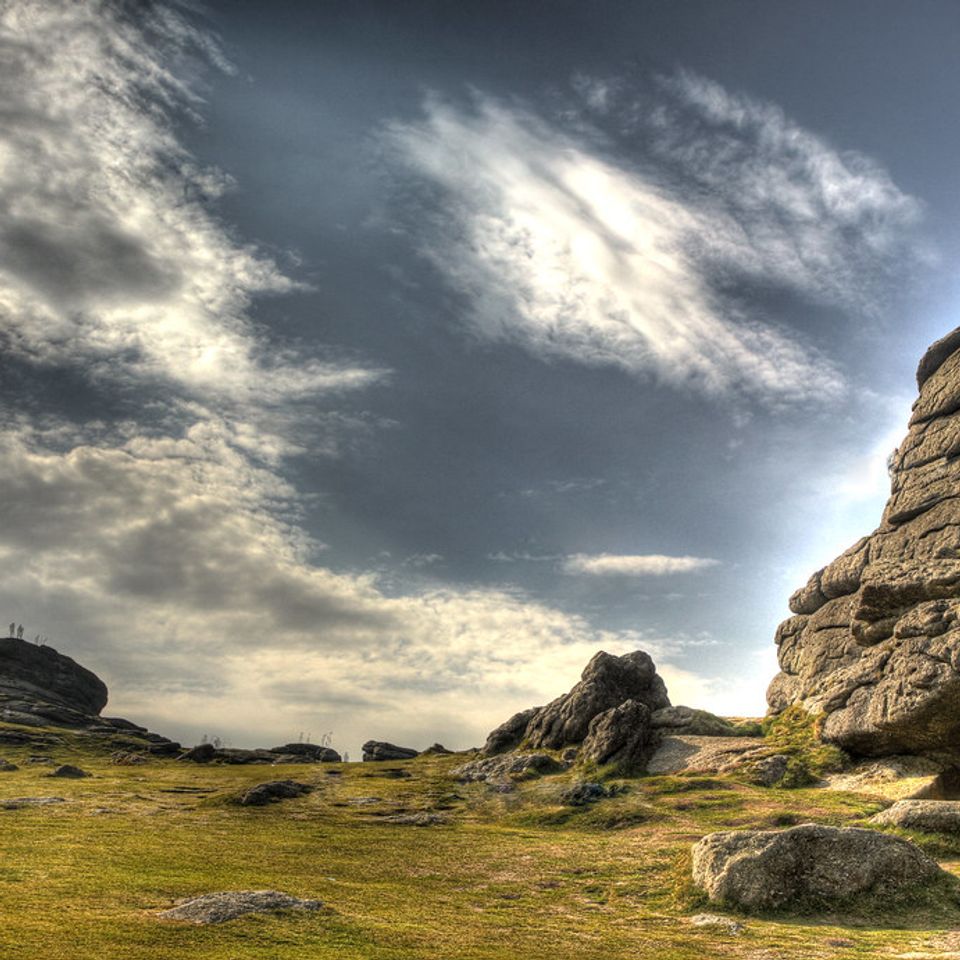
The sun's low angle at dawn and dusk does something no other lighting condition can replicate: it rakes across surfaces rather than falling from above. Texture that would be invisible at noon becomes dramatic. Shadows stretch out across the ground and read as distinct, cool shapes against warm lit surfaces. The contrast between the temperature of the light and the temperature of the shadows is at its most extreme.
Colour saturation also increases close to sunrise and sunset. The warm yellows, ambers, and pinks that colour the sky at these moments carry across the entire scene, tinting every lit surface and making the shadows feel distinctly blue or violet by comparison. This is not a subtle effect. It is the reason painters have chased this light for centuries, from Constable sketching on Hampstead Heath at dawn to contemporary plein air painters setting up on clifftops at 8pm in October.
The honest version: it's also cold, often brief, and occasionally the light simply doesn't deliver. UK weather being what it is, a planned golden hour session can end with a flat grey sky and thirty minutes of uninspiring drizzle. This is part of outdoor painting, not a reason to stay home.
Understanding the Golden Hour Window in the UK
This is where a lot of general advice falls short. Most content on golden hour painting treats it as a universal experience with a fixed duration. In the UK, the timing varies dramatically depending on the season and your latitude, and understanding that variation is part of planning a successful session.
How Long Does Golden Hour Actually Last?
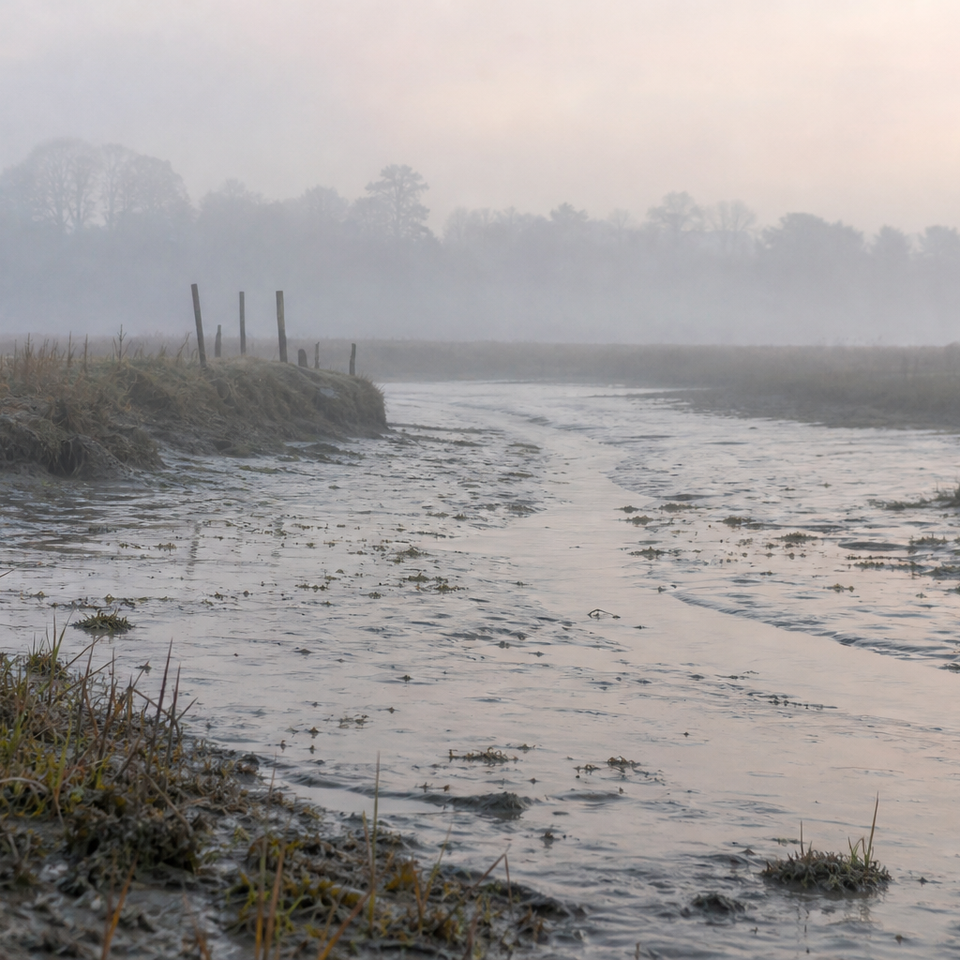
The term "golden hour" is optimistic by name and sometimes misleading by duration. The warm light window around sunrise and sunset is shaped by how quickly the sun moves through the atmosphere relative to the horizon. At the UK's latitude, roughly 50 to 58 degrees north, the sun travels at a shallower angle than it does in lower-latitude countries. In winter, this means the warm raking light lingers. In summer, the sun rises and sets more steeply and the golden window can be extremely short.
Cloud cover is always a variable. Heavy overcast can eliminate the golden light entirely, while broken cloud can intensify it beyond what a clear sky produces, as the light catches the underside of clouds and bounces additional warmth back onto the scene.
Seasonal Differences to Plan Around
| Season | Approximate window | What to expect |
|---|---|---|
| Winter (Dec–Feb) | 30–50 minutes | Extended warm light, low sun angle, long shadows |
| Spring (Mar–May) | 20–35 minutes | Cleaner light, rapidly shifting conditions |
| Summer (Jun–Aug) | 10–20 minutes | Brief and intense; very fast colour shift |
| Autumn (Sep–Nov) | 25–40 minutes | Warm, hazy light; mist possible in lower areas |
These are practical estimates, not precise measurements. Coastal haze, local geography, and atmospheric conditions all affect real-world duration. A painter on the North York Moors in January will have different conditions to someone painting on the South Downs in June. Use these figures to plan your session and manage your expectations, not as a guarantee.
Scotland and northern England, sitting closer to 56 to 58 degrees north, benefit from noticeably longer golden windows in winter. If you have the chance to paint at dawn or dusk in the Scottish Highlands in December, the low sun and long shadows produce conditions that persist long enough for a genuinely considered study.
Setting Up for Success Before the Light Arrives

The painters who make the most of a golden hour window are almost always the ones who did the work before it opened. Preparation is not a secondary concern here; it is the technique.
Scouting the Location in Advance
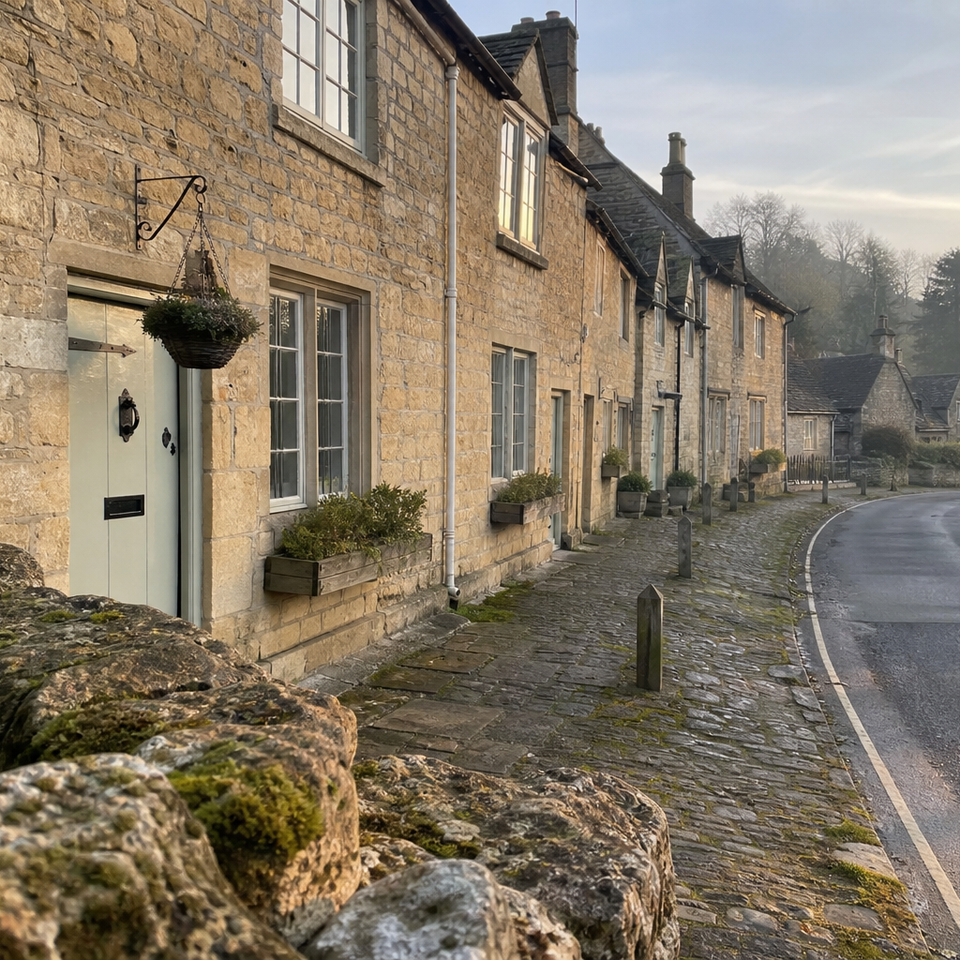
If you are visiting a location for the first time, scout it in ordinary daylight before committing to a golden hour session there. You need to know where the sun will rise or set relative to your subject, where you can park or access the spot safely, and what the composition options are. Trying to make these decisions in low light, with the clock running, is a reliable way to waste the window.
For dusk sessions, this is straightforward: arrive in the afternoon, walk the location, decide on your viewpoint, and then stay or return. For dawn sessions, it means visiting the previous evening. Even a ten-minute reconnaissance the day before is worth more than a half-hour of confused orientation in the dark.
What to Mix Before You Start
Arrive before the light
Golden hour does not wait. Aim to arrive at your location at least 30 minutes before the expected window, ideally longer in summer when the shift is faster. Use the flat light beforehand to set up, tone your panel, and mix your base colours. When the light turns, you want to be painting, not unpacking.
Arrive with a toned panel already dry. A warm mid-tone, mixed from yellow ochre and a touch of burnt sienna, works well for most dawn and dusk subjects. Starting on white at golden hour is genuinely difficult; the pale ground makes every warm mix look more saturated than it is, and your value relationships will be off from the first stroke. Tone your panels at home the day before and let them dry overnight. Arriving on site with three or four prepared panels is one of the most practical habits you can build.
Before the light arrives, mix approximate versions of your key colour notes: a warm light tone, a mid-tone, and a cool shadow. You will refine these once the light actually turns, but having them ready means you're making adjustments rather than starting from scratch when the clock is running.
Colour and Tone: What Changes at Golden Hour

Warm Light, Cool Shadows
The defining characteristic of golden hour light is the temperature contrast between the lit and shadow areas. The light source is warm: amber, orange, or golden-yellow depending on atmospheric conditions. Shadows, lit only by the cooler blue of the sky, read as distinctly cool by comparison, often blue-violet or cool grey. This contrast is much stronger than at midday, when the light is whiter and shadows are correspondingly less blue.
In practical terms, this means you need two clearly separated temperature notes in your palette: a warm family for the lights, a cool family for the shadows. The temptation is to neutralise both towards a middle ground. Resist it. The painting will lose the very thing that makes golden hour light compelling. For a deeper look at managing light and shadow in outdoor work, it is worth reading further on the subject.
Keeping Saturation Without Overloading Your Mixes
High saturation in the lights is appropriate at golden hour, but it needs to be handled carefully. Heavily saturated paint can look garish if the values are wrong, and it's easy to push the warmth too far and lose the sense of atmosphere.
Work in relative terms. The warmest areas of the lit sky or ground might take a nearly full-strength yellow or orange, but the lit areas of your middle-ground subject will be slightly cooler and less saturated than that. Shadows should be mixed neutrally enough to sit back, but not so neutrally that they look like grey paint added at random.
Minimise white in your golden mixes
White cools and greys a mixture quickly. When mixing the warm tones of golden hour light, try using yellow ochre or a pale transparent yellow to extend your lights rather than reaching straight for titanium white. This keeps the warmth in the mix and helps you hit that characteristic glow.
Facing Towards or Away from the Sun
Your orientation relative to the sun changes everything about what you are looking at. Facing into the sun at golden hour gives you strong contre-jour conditions: subjects appear as dark silhouettes against a luminous sky, edges dissolve, and the scene is dominated by the light source itself. It is dramatic and relatively simple in terms of value structure. Facing away from the sun gives you lit subjects against a cooler, darker sky, with long shadows moving towards you across the ground. Both are worth trying. Many painters find the away-from-the-sun view more manageable for a first golden hour study, because the values are easier to read.
Working at Speed: Technique Adaptations for a Short Window
This is the practical heart of golden hour plein air painting. Everything else supports this. When the light is only going to hold for fifteen or twenty minutes, your working method has to change.
Working from Large to Small, Fast
The biggest mistake in any timed painting session is getting absorbed in detail before the major masses are established. In golden hour work, this is compounded by the speed of the light change. If you spend the first ten minutes carefully rendering a gate post, you will have no coherent record of the light that was actually there.
Work broadly from the first brush stroke. Establish the large warm areas and the large cool shadow masses. These major colour and value relationships are the most important thing to capture. Details can be added or adjusted later; the overall temperature relationship between light and shadow cannot be reconstructed from memory with any accuracy.
Smaller panels help significantly here. An 8x10 or even a 6x8 gives you the best chance of a coherent result in a short window. You can cover the whole surface quickly, make adjustments before the light has moved far, and finish with something that reads as a unified statement rather than a partially developed painting. This approach pairs well with alla prima working methods, where the entire study is completed in a single sitting.
Premixing and Painting from Memory
Some experienced plein air painters use a version of sight-size matching during golden hour: mixing a colour, holding the brush up against the subject to compare, then placing it on the panel. In ordinary conditions this is a useful accuracy check. At golden hour, it is worth knowing but should not slow you down. Your premixed approximations will get you ninety percent of the way there. The final adjustments can be made quickly by eye rather than through extended comparison.
Painting partly from memory is also legitimate. Once you have established your major notes, the specific colours are in your mind and on your palette. If the light shifts slightly before you have finished a passage, completing it from what you observed is better than stopping and trying to match a light that no longer exists.
Knowing When to Stop
The worst golden hour paintings are the ones that were continued after the light changed. The painter tries to adjust the warm tones to follow the shifting light, then corrects the shadows to match, and ends up with a muddy, confused surface that records nothing clearly.
Know the approximate window for your season before you go. In summer, that might mean you have fifteen minutes of genuine golden light. Decide in advance that major colour decisions stop when the window closes. You can refine values and edges after the light has changed, but altering your temperature relationships once the warm light is gone will undermine everything you captured while it was there.
A simple approach for the golden hour window
Tone and dry your panel in advance
Arrive with a toned panel already dry. Warm mid-tone works well for dawn and dusk sessions.
Pre-mix your key colour notes
Before the light arrives, mix approximate versions of the warm lights and cool shadows. You'll refine them once the light turns, but having them ready saves vital minutes.
Block in the large shapes fast
As soon as the light shifts, work broadly. Establish the major warm areas and the cool shadows in the first few minutes. Do not detail anything yet.
Refine and adjust
Once your major masses are in, make corrections to colour temperature and value. You are working against the clock, so prioritise what matters most.
Stop before the light is gone
The worst mistake is continuing to paint as the light shifts, then ending up with a muddy middle ground. Know the approximate window length for your season and stop painting major colour decisions before it ends.
Dawn Versus Dusk: Which Is Better for Plein Air Painting?
Neither is objectively better. They suit different painters, different seasons, and different subjects. Here is an honest breakdown.
Dawn sessions
Pros
- + Calmer, often more stable atmospheric conditions
- + Mist and low cloud can add mood without ruining visibility
- + Fewer people at popular locations
- + Light travels from cool to warm, so you see the shift unfold
Cons
- - Very early starts required, particularly in spring and summer
- - Cold temperatures in most UK seasons
- - More difficult to scout a new location in the dark
Dusk sessions
Pros
- + Easier to plan around normal daytime commitments
- + You can scout and set up in full daylight
- + Light is often richer and more saturated at dusk than dawn
- + Better for coastal and upland locations where access is easier in daylight
Cons
- - Painting continues into failing light, making colour judgements harder
- - Need artificial light to pack up; a headtorch is essential
- - Some locations may have access or parking restrictions after dark

For most working painters with daytime commitments, dusk is the more practical choice for most of the year. In midsummer, when a sunset in southern England might not come until 9pm or later, there is a reasonable window between finishing work and getting out to paint. In winter, dusk arrives early enough to be accessible even on a working day.
Dawn sessions have a quality that is genuinely different and worth pursuing at least occasionally. The pre-dawn quiet at a familiar location, watching the light come in from cool grey through pink and into gold, is one of the more memorable experiences available to a plein air painter. If your subject suits soft, slightly misty light with less contrast than dusk, dawn is often the better choice.
Practical Kit Considerations for Early Mornings and Late Evenings
Golden hour sessions impose specific practical demands that ordinary outdoor painting does not. A few adjustments to your kit make a significant difference.
Small panels. Working smaller is strongly advisable. An 8x10 panel gives you enough space to make meaningful compositional decisions while remaining manageable in a short window. Panels are best prepared in advance with a warm mid-tone ground, allowed to dry fully at home. Arriving with three or four ready-toned panels means you can start a second study or have a backup if the first goes wrong.
Headtorch or clip-on panel light. For dusk sessions, some form of artificial lighting is not optional; it is essential. Natural light fails surprisingly quickly once the golden window closes, and packing up in the dark without a light source is awkward at best and unsafe at worst. A headtorch keeps your hands free while you clean brushes and secure your panel. An LED clip-on panel light, fitted to your easel or pochade box, allows you to continue making colour judgements as the ambient light drops. These are available from outdoor and photography suppliers and are worth carrying from the first dusk session.
Warm layers. This should not need saying, but it is consistently underestimated. A 6am start on the Yorkshire Wolds in March is significantly colder than any afternoon session in the same location, even when the sun is shining. Thermal base layers, a windproof outer, and warm gloves are practical requirements for most UK dawn sessions from October through to April. Cold hands make poor brushwork. Dress to be comfortable enough to paint, not just comfortable enough to stand still.
Portable seating and a stable setup. In the low light of early morning or late evening, you want a setup you can operate without fumbling. Keep your kit simple and well-organised. A pochade box on a tripod, with paints laid out in a consistent order, is faster to use under time pressure than a French easel requiring adjustment in the dark.
Making the Most of What You Capture
A twenty-minute golden hour study is not always a finished painting, and it does not need to be. Think of it primarily as a colour document: a record of a specific light condition at a specific moment, captured accurately enough to be useful.
Back at home in good light, read the study carefully. Look at the temperature relationships between light and shadow. Check whether the warm areas hold together as a family, and whether the cool passages are consistent. These are the things that are hardest to get right and most valuable when you do.
Some painters use a golden hour study as a reference for a larger studio work, either working up the study itself or using it alongside drawings and memory to construct something more developed. This is a legitimate and long-established way of working: Constable, Corot, and countless others painted rapid outdoor studies specifically to inform larger compositions. There is no obligation to exhibit or sell a study; its value may be entirely in what it teaches you.
If the session produced something you want to build on, consider returning to the same location at the same time of day and season for a follow-up study. Comparing two studies of the same subject made weeks apart tells you a great deal about both the consistency of the location and the development of your own colour perception.
And if the light failed entirely? If the cloud stayed heavy, the sky stayed grey, and the warmth never came? That is outdoor painting in Britain. Sketch the composition in pencil, note the structure of the scene, and go back. The light will come eventually. When it does, you will already know where to stand.
FAQ
Frequently Asked Questions
How long does the golden hour last in the UK?
It varies by season and latitude. Typical windows are winter 30–50 minutes, spring 20–35, summer 10–20, and autumn 25–40. Local weather and geography can shorten or lengthen this.
What should I do before the light arrives?
Scout the site in daylight, arrive at least 30 minutes early, tone and dry several panels, and premix key warm light and cool shadow notes so you can paint as soon as the window opens.
How should I handle colour and tone at golden hour?
Keep two clear temperature families: warm lights and cool shadows. Minimise white in warm mixes to preserve glow and use saturation selectively while keeping correct values.
Is dawn or dusk better for golden hour plein air painting?
Neither is universally better. Dawn is quieter and can offer mist and steadier conditions. Dusk is easier to plan, often richer, and better for most working painters.
How can I work fast enough to capture the light?
Work large to small, block in major warm and cool masses immediately, use small panels, rely on premixed notes, and stop major colour decisions once the window closes.
Author

PleinAirPainting Editorial Team
PleinAirPainting.co.uk helps artists paint outdoors with confidence through UK-focused guides, equipment advice, resources and plein air inspiration.