Plein Air Composition: How to Choose a Strong Outdoor Scene
A practical guide to plein air composition: pick a motif, use a viewfinder, squint to see big shapes, apply the rule of thirds, and use a short checklist to set up and work confidently outdoors.

Key takeaways
- • Choose a single motif rather than trying to paint the entire view.
- • Use a viewfinder and squint to reduce the scene to three to five large shapes and clear tonal masses.
- • Treat the rule of thirds as a starting point; keep the horizon off centre and place dominant masses off centre.
- • Decide the light effect early, block in transient elements first, and work within a 60 to 90 minute session.
- • Set up in shade with side light where possible and run through a short checklist before touching the panel.
You're standing in a field, or on a coastal path, or at the edge of a country park. There's a beautiful, complicated, enormous landscape in front of you and absolutely no idea where to point your brush. Plein air composition — the process of choosing and framing a scene before you paint — is the skill that turns that overwhelm into a painting. It's learnable. It's repeatable. And this article will walk you through a practical process you can use every time you go out.
If you're completely new to painting outdoors, it might help to read up on what plein air painting involves before diving into compositional technique. For everyone else, let's get into it.
Start With the Motif, Not the View
There's an important distinction to make before you do anything else. A view is everything in front of you. A motif is the specific thing you've chosen to paint. Strong outdoor painting composition begins the moment you stop trying to paint the view and start looking for your motif.
Your job as a painter outdoors isn't to record everything. It's to select something. That single act of selection is itself a compositional decision, and it's the most important one you'll make.
A practical rule: if you've been scanning the scene for more than five minutes without committing, look at what you've glanced back at most often. That's almost certainly your motif.
Everyday subjects make strong paintings
You don't need a dramatic view. The Royal Academy has long encouraged painters to treat ordinary British environments as legitimate subjects, and for good reason. A gate into a field, a terrace of houses against a grey sky, a corner of a harbour wall, a hedgerow catching the last of the afternoon light. These subjects work precisely because they're specific. Grand vistas can actually be harder to compose well because there's too much pulling for attention.
A bus stop, a park bench, a section of dry-stone wall. All valid. All potentially strong. The subject doesn't need to be impressive. It needs to be yours.
How to stop feeling overwhelmed by a big landscape
When the scene feels too big and too busy, the temptation is to keep looking until you find a better view. Resist this. Instead, use a few simple tactics to reduce what you're taking in.
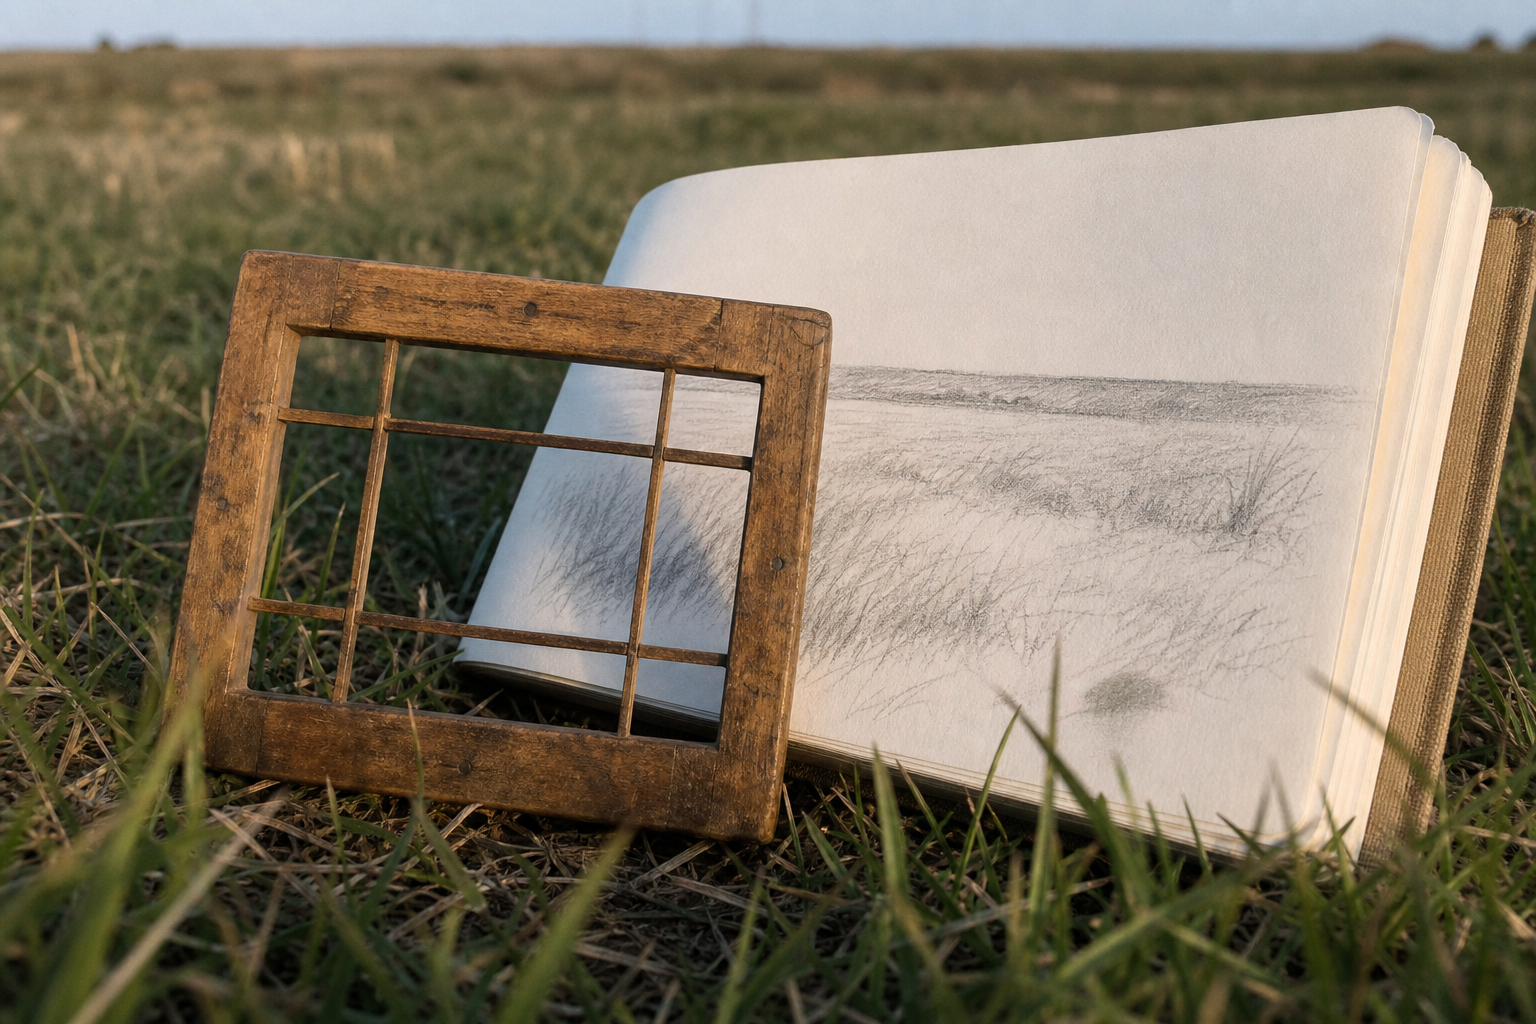
Turn your back on part of the scene. Literally rotate until you're facing a smaller portion of it. Squint. Half-closing your eyes collapses fine detail into broad shapes, which makes it much easier to see whether anything is worth painting. And use a viewfinder to isolate rather than include. The viewfinder is one of the most useful tools in landscape composition for plein air, and it's worth understanding how to use it properly.
Using a Viewfinder to Frame Your Composition
Viewfinder composition is one of the simplest and most effective habits you can develop as an outdoor painter. It gives you a bounded frame to look through, which immediately forces you to make decisions about what to include and what to leave out. Without a frame, the scene is infinite. With one, it becomes manageable.
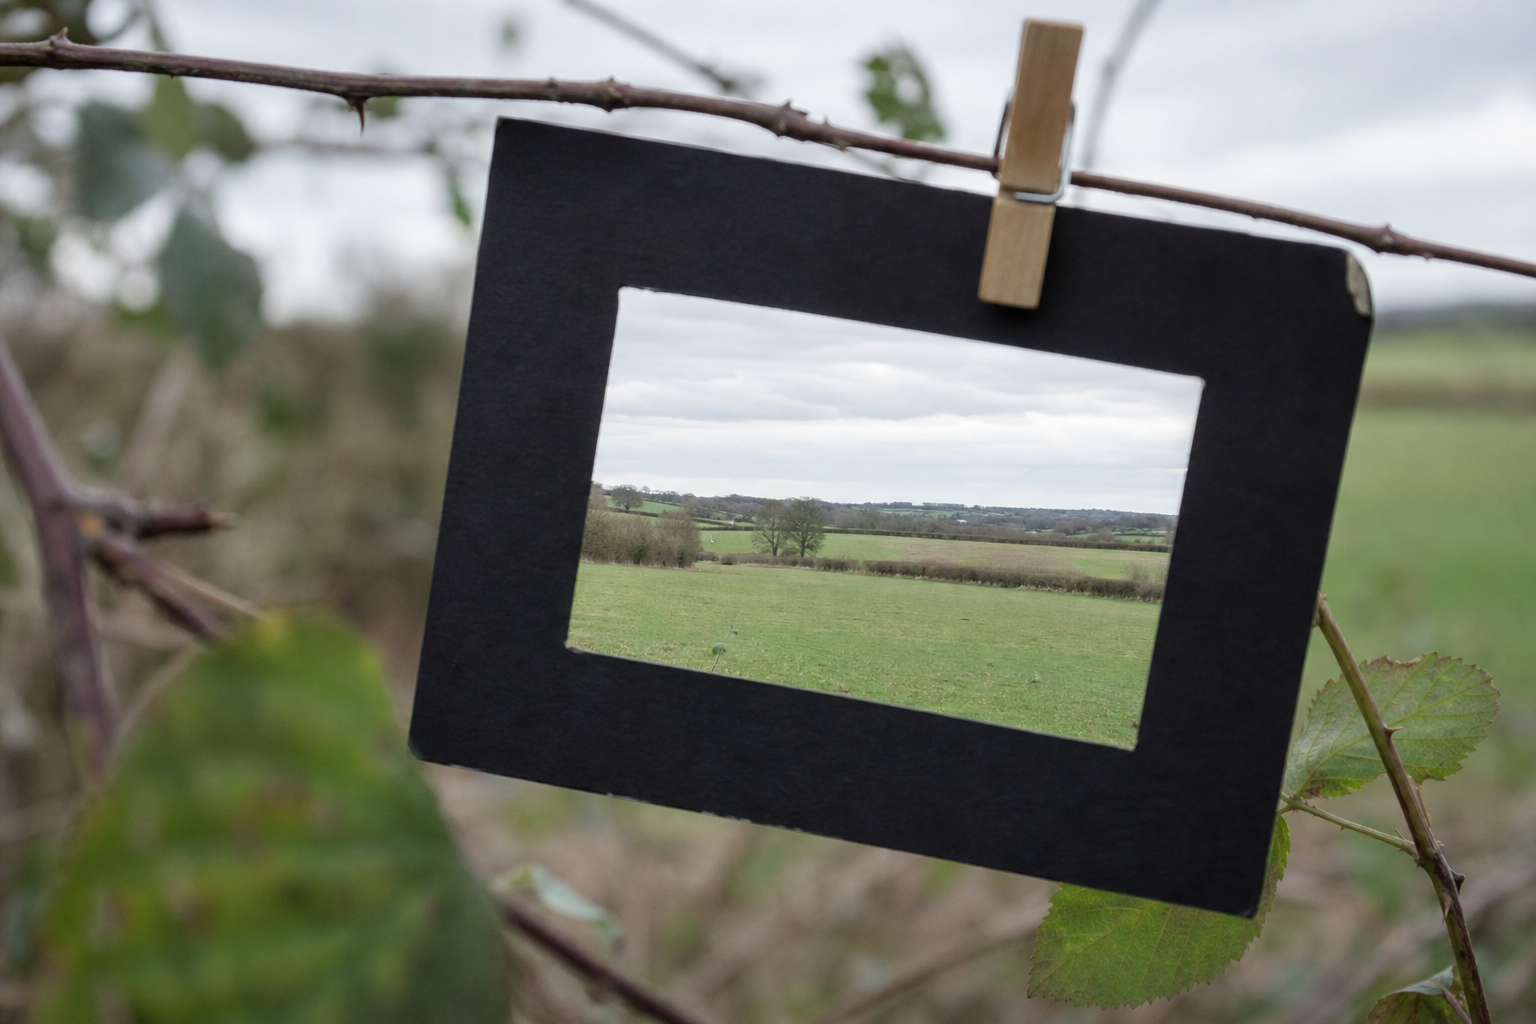
Hold your viewfinder up and spend a minute or two moving it slowly across the scene. Try it in different positions. You're not looking for perfection at this stage. You're looking for arrangements of shapes that feel balanced and interesting.
Hold it at a consistent distance
Keep your viewfinder at the same arm's distance each time you look through it. Changing the distance changes what you see, which makes it harder to compare options fairly.
Three types of viewfinder (and which to start with)
You have three main options, and none of them requires spending much money.
| Type | Cost | Best for | Limitation |
|---|---|---|---|
| Hand-framing | Free | Quick auditions on the go | Hard to see fine detail |
| Card viewfinder | Pence | Beginners trying different crops | Single fixed proportion |
| Adjustable plastic | £5–15 | Matching your panel size exactly | One more thing to carry |
Hand-framing (forming a rectangle with your thumbs and forefingers) is the most immediate option and costs nothing. It's good for quickly auditioning different parts of a scene, though it's harder to hold steady or see fine detail through.
A card viewfinder is a rectangle cut into a piece of stiff card. You can make one in minutes with a craft knife. Cut the aperture to the same proportions as your painting surface and you have an instant compositional tool. The limitation is that it's fixed to one proportion, so if you change your mind about painting format you'll need a different card.
Adjustable plastic viewfinders can be set to different proportions to match common panel sizes: 8x10, 9x12, or 11x14 inches, for instance. This makes them genuinely useful for deciding on your surface before you start. They cost a few pounds and are widely available from UK art suppliers.
Start with the card viewfinder. It's the simplest, and simplicity is what you need when you're just beginning to develop a compositional eye.
Portrait, landscape, or square?
Before you commit to a surface, use your viewfinder to try both orientations. Some scenes naturally suit a horizontal (landscape) format: wide moorland, a long beach, an open valley. Others work better in portrait: a tall tree, a cliff face, a street with buildings reaching upward.
The viewfinder lets you test this before you've put a mark on anything. It's worth spending sixty seconds trying both. You'll usually know immediately which one feels right for the scene in front of you.
The Rule of Thirds: a Starting Point, Not a Rule
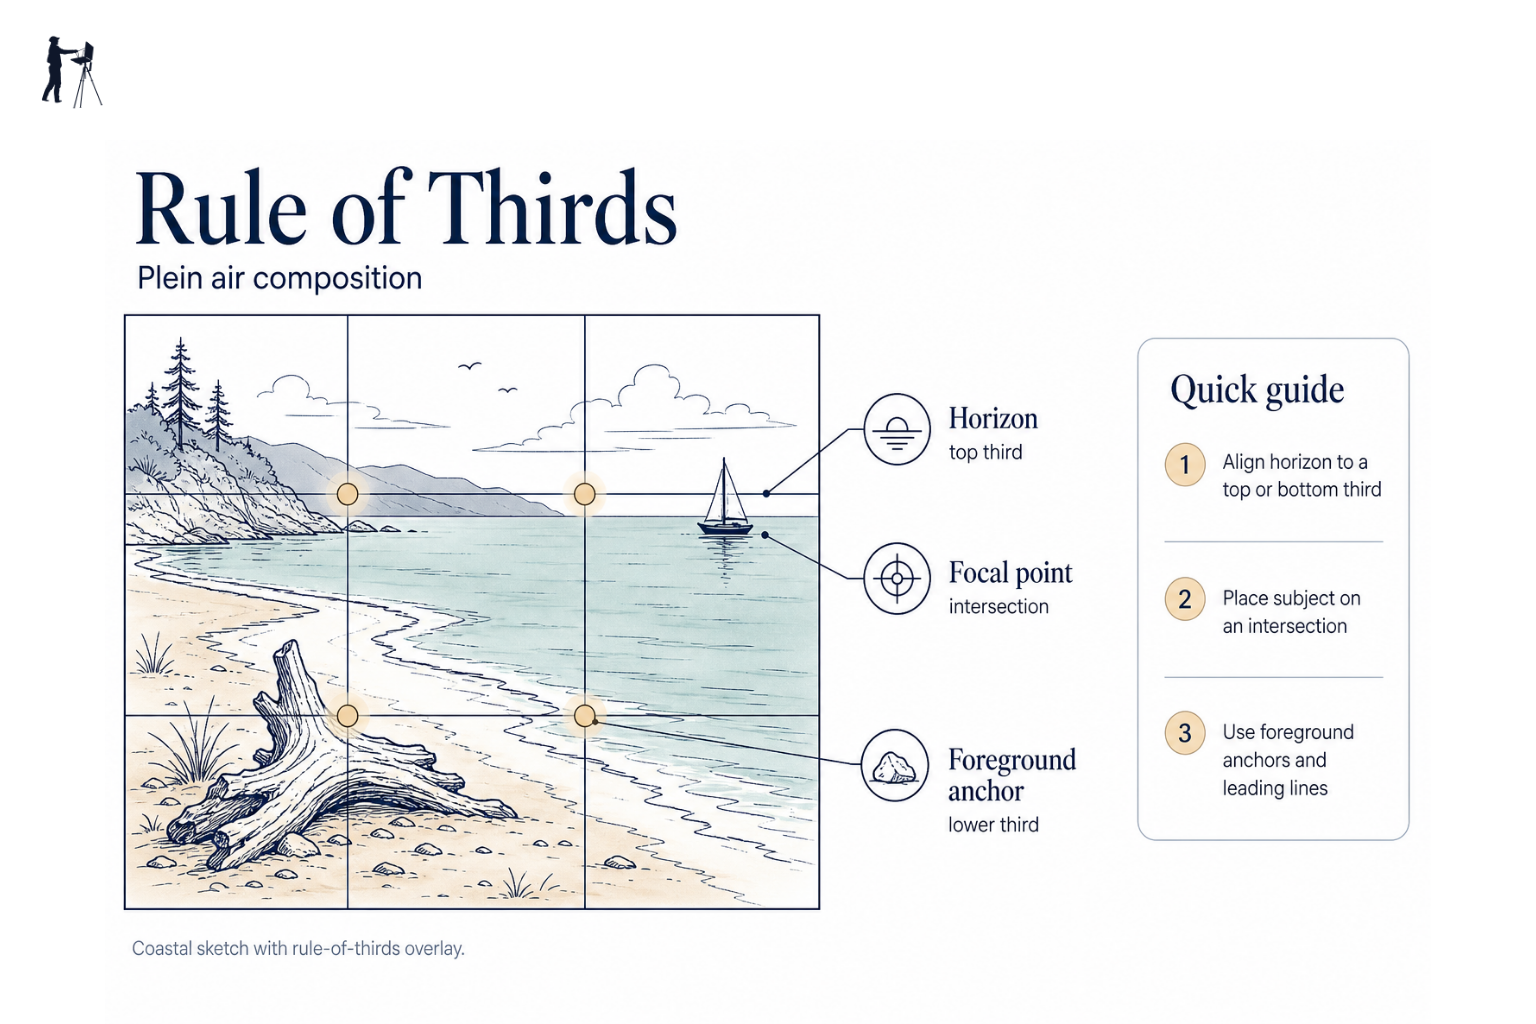
The rule of thirds is the most widely taught compositional guideline, and it's worth understanding properly. Divide your picture plane into a grid of nine equal rectangles (three columns, three rows). The idea is that placing key elements along these lines, or at the points where they intersect, tends to create more dynamic, engaging compositions than placing everything dead centre.
In practice, this means two things for landscape composition in plein air work. First, keep your horizon out of the middle of the frame. Place it in the upper third if the foreground is the most interesting part of your scene, or in the lower third if the sky is the dominant feature. A centred horizon almost always feels static. Second, position your dominant mass (a stand of trees, a barn, a cliff) off-centre, ideally near one of the four intersection points of the grid.
Try both horizon positions
Before you settle on a composition, hold your viewfinder up and try the horizon in the upper third, then the lower third. One will almost always feel more interesting. Go with that.
Think of the rule of thirds as a diagnostic tool rather than a prescription. If a composition feels flat or dull and you can't immediately work out why, check whether everything is sitting in the middle of the frame. It often is. Shifting your key elements off-centre is frequently all it takes to make the whole thing feel more alive.
Experienced painters break these conventions deliberately and with good reason. But breaking a rule well requires understanding what the rule is for. Learn to use it first.
Simplify First: Big Shapes and Values Before Detail
The most common mistake beginners make outdoors is trying to paint everything they can see. It's completely understandable. The scene is right there, with all its detail and texture and variation, and it feels dishonest to leave any of it out. But attempting to capture everything produces muddled paintings with no clear focal point and no sense of structure.
The solution is to simplify before you start. Not simplify your painting style, but simplify what you're looking at. Strip the scene down to its largest shapes before you pick up a brush.
Squinting: the most useful compositional habit
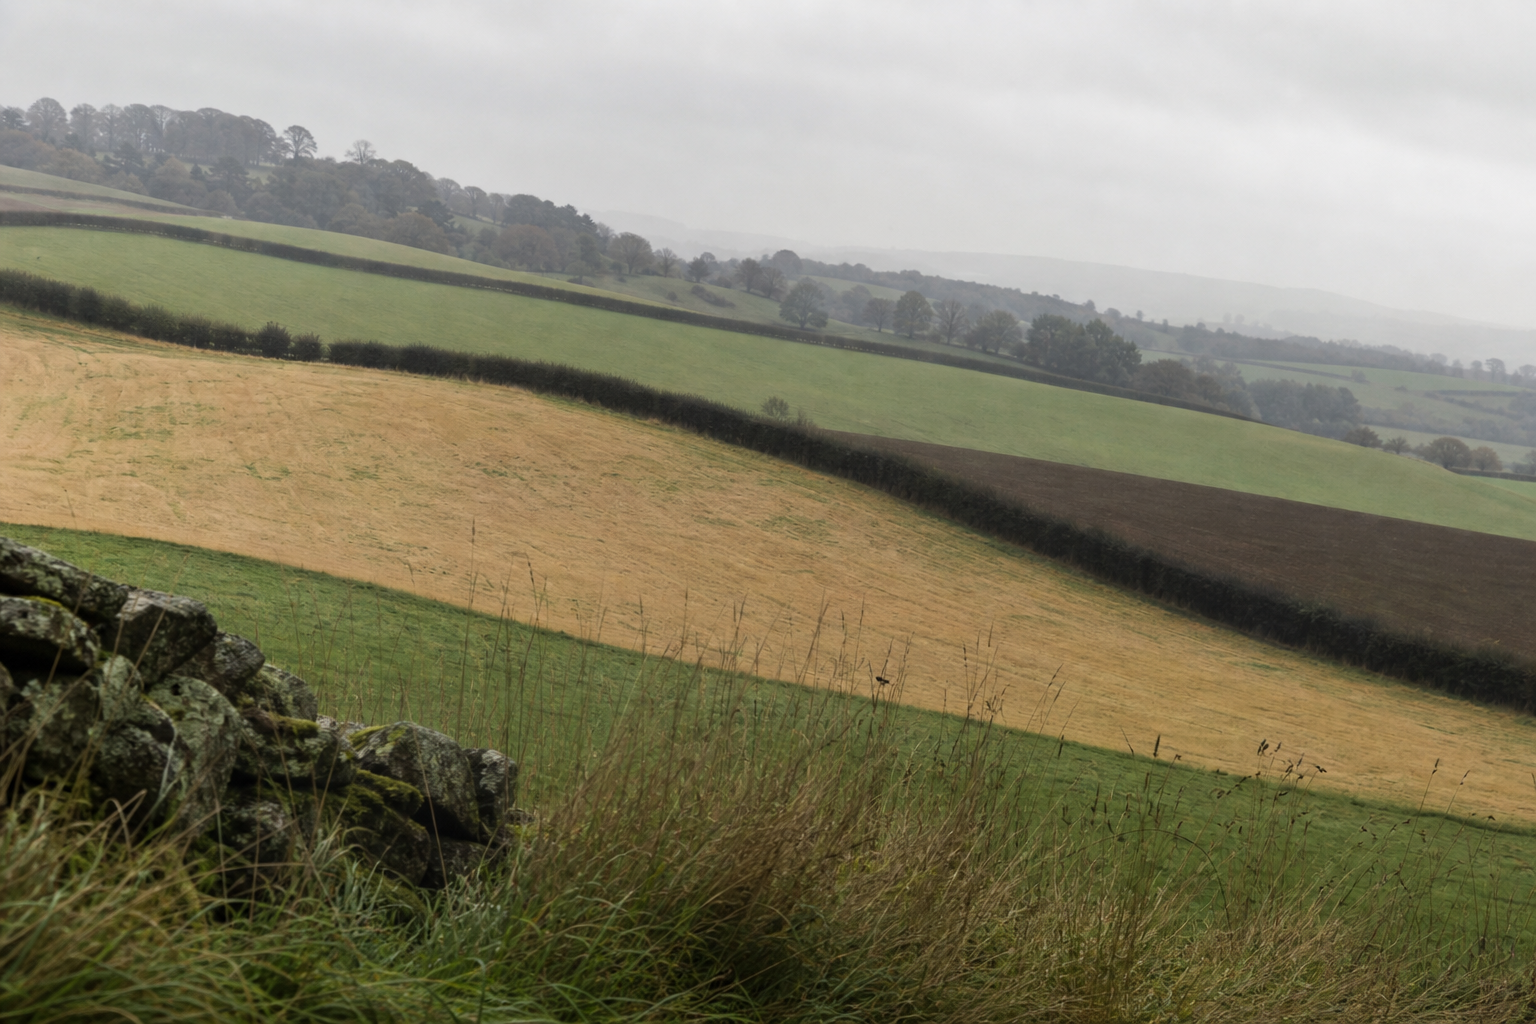
Squinting, or half-closing your eyes until fine detail disappears, is the single most useful habit you can build as an outdoor painter. When you squint, the complex texture of a hedgerow becomes a single dark shape. The variation in a sky becomes a broad area of light. You stop seeing leaves and start seeing masses.
This is important because composition operates at the level of masses, not detail. The detail comes later, if at all. The compositional foundation of your painting is the arrangement of large shapes in relation to each other, and squinting is the quickest way to see those shapes clearly.
It also reveals the tonal structure of the scene: which areas are lightest, which are darkest, and where the strongest contrasts sit. That contrast is almost always where your focal area should be. If you're unsure how values work in outdoor painting, looking into tonal studies is a useful next step.
Think in three to five shapes
Before making any marks, try to reduce the scene to three to five large masses. Sky. Distant ground. Mid-ground. Foreground. One dominant feature (a tree, a building, a stretch of water). Nothing smaller than that yet.
If you can't identify three to five distinct large shapes, the scene may be too complex or too uniform to work well as a composition. Try moving your viewfinder until the shapes resolve into a clearer arrangement.
From landscape to composition
Squint at the scene
Half-close your eyes until fine detail disappears and you see the scene as broad masses of light and dark.
Count the big shapes
Identify three to five large areas: sky, distant hills, mid-ground, foreground. No smaller than that yet.
Find the dominant value
Which shape is lightest? Which is darkest? That contrast is likely to be your focal area.
Frame it
Use your viewfinder to isolate the arrangement of those shapes in a way that feels balanced and interesting.
Sketch the structure
Lightly draw the main shape boundaries on your panel before applying any paint.
Composing for Changing Light
In the UK, light doesn't stay still for long. Cloud cover shifts, the sun moves faster than you expect, and what was a beautifully lit scene when you arrived can look completely different forty minutes later. This is part of the experience of painting outdoors in Britain. It isn't a problem to eliminate. It's a constraint to manage.
The key is to make your compositional decisions early and commit to them even after the light changes. Decide what light effect you're painting before you start: morning side-light, soft overcast diffuse light, or late afternoon warmth. Then hold to that decision. The light will shift, but your painting records what you saw at the start of the session, not what's there at the end.
What to establish early
Paint the most changeable elements first. Shadows move and disappear. Figures walk out of the frame. Boats shift with the tide. Clouds reform entirely. These are the things to record as early as possible in your session, even if only as rough blocked-in shapes.
Buildings, treelines, hedgerows, and walls are stable. Their basic position and proportion won't change. You can refine these later in the session. Getting the transient elements down quickly is a compositional act as much as a practical one: it fixes the light effect you're working from so that the rest of the painting can be consistent with it.
Set a time limit and stick to it
A time limit isn't just about managing the light. It also forces compositional commitment. When you know you have ninety minutes, you can't spend twenty of them fussing over where to put the horizon. You make a decision and work with it.
Typical plein air session at a glance
- Recommended session length
- 60–90 minutes
- Time to spend composing
- 5–10 minutes
- Ideal time of day
- Morning or late afternoon
- UK overcast days
- Still worth painting
Long enough to work, short enough to keep the light consistent
Before touching the panel
Raking light creates stronger shadows and contrast
Diffuse light softens values — useful for beginners
Practical Composition Tips for UK Landscapes
Outdoor painting composition in the UK has some practical dimensions that generic guides tend to skip. Here's what actually matters when you're setting up in a country park in the Peak District or on a harbour wall in Cornwall.
Set up in shade if you can. Bright sunlight falling directly on your panel distorts your perception of colour and value. What looks like a correct mid-tone on a sunlit canvas will often turn out to be far too dark when you see it indoors. Working in shade gives you a more accurate reading of what you're mixing.
Stand so the light comes from the side. If the light source is directly behind you, it washes out the scene and reduces contrast. If it's in your eyes, you can't see your panel clearly. Side-lighting is the most comfortable and usually gives you the strongest tonal structure to work with.
On overcast days, make deliberate focal decisions. Flat light is one of the specific challenges of outdoor painting composition in Britain. When there's no dramatic light shaft or strong shadow to naturally define your focal area, you have to make that decision actively. Ask yourself: where do I want the viewer's eye to go? Then use tonal contrast (however subtle) to draw attention there.
Urban and suburban subjects are fair game. A section of brick wall against a pale sky, a curve in a suburban road, a patch of allotments, a Victorian terrace catching the last light. Look for the junction of two or three large shapes rather than trying to capture a whole street. The corner where a wall meets a tree against an open sky is often a stronger subject than the full street scene around it.
Check access before you set up. Near National Trust properties, country parks, and public coastal paths, keep your easel clear of pathways and check for any site-specific restrictions. Most locations in the UK welcome painters, but it's worth a quick look before you settle in for ninety minutes.
Overcast vs. sunny light for outdoor composition
Pros
- + Overcast days give consistent, stable light for longer sessions
- + Softer shadows are easier to read for beginners
- + Greens and muted colours are easier to simplify into shapes
Cons
- - Flat light reduces contrast, making focal areas harder to define
- - Less obvious tonal structure requires more active compositional decisions
- - Can feel uninspiring — harder to find a compelling light effect to anchor the painting
A Simple Composition Checklist Before You Start Painting
This is meant to be genuinely useful, not a summary. Take a photo of it on your phone, or jot it on a card and tuck it into your kit bag.
- Have I chosen a specific motif rather than trying to paint everything in front of me?
- Have I used a viewfinder to test at least two different crops of the scene?
- Have I decided on portrait or landscape orientation before touching my panel?
- Is my horizon sitting in the upper or lower third of the frame, rather than dead centre?
- Have I identified the three to five large shapes that make up this scene?
- Have I squinted to confirm the tonal structure before picking up a brush?
- Have I noted which elements are most likely to change (shadows, figures, boats) so I can block those in first?
- Am I set up in shade, with the light coming from the side, and comfortable enough to work for sixty to ninety minutes without needing to move?
Good composition won't guarantee a good painting. But a weak composition makes everything that follows harder to resolve. Getting these decisions right before you start gives the rest of the session a solid foundation to build on. Now go find your motif.
FAQ
Frequently Asked Questions
What is plein air composition and why does it matter?
Plein air composition is choosing and framing the specific motif you will paint outdoors. It matters because a strong compositional choice turns a busy view into a clear painting with a focal point and structure.
How do I pick a motif when a landscape feels overwhelming?
Stop trying to paint the whole view. Look for what you keep glancing back at, turn your body to face a smaller portion, use a viewfinder, and squint to reduce detail into broad shapes. Ordinary subjects often make the strongest motifs.
How should I use a viewfinder to frame a scene?
Hold it at a consistent arm's distance, move it slowly across the scene, try both portrait and landscape crops, and test horizon positions. Start with a simple card viewfinder and match proportions to your panel where possible.
What do I do when the light keeps changing?
Decide the light effect you are recording before you start. Block in changeable elements first, such as moving shadows, figures, or boats, and set a 60 to 90 minute session so you commit and work with consistent light.
What quick checks should I do before I start painting?
Confirm you have a clear motif, tested crops with a viewfinder, decided orientation, placed the horizon off centre, identified three to five large shapes, squinted for tonal structure, and set up in shade with side light if possible.
Author

PleinAirPainting Editorial Team
PleinAirPainting.co.uk helps artists paint outdoors with confidence through UK-focused guides, equipment advice, resources and plein air inspiration.