Sketching Before Plein Air Painting: How to Use Thumbnails and Value Plans
A practical 10 to 15 minute workflow using small thumbnails, a three to five step value plan, quick notes, and a photo to guide your plein air painting.

Key takeaways
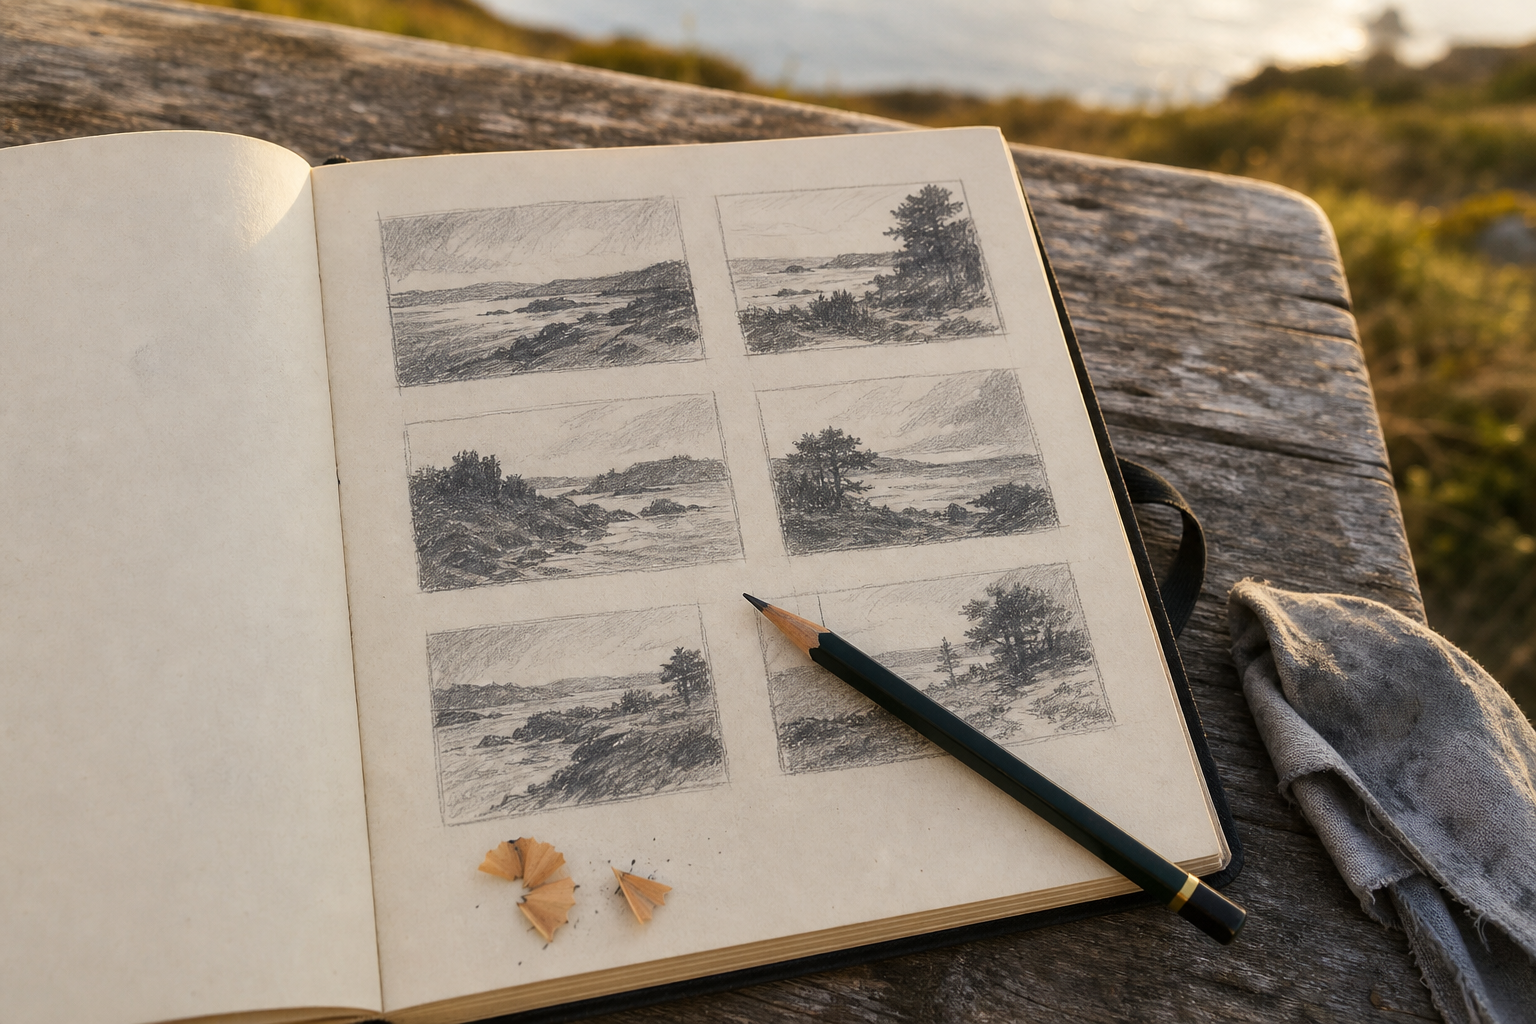
- • Spend 10 to 15 minutes on three small thumbnails to decide composition and value structure before you paint.
- • Keep thumbnails matchbox sized and think in shapes not detail; mass in three to five value steps.
- • Squint to simplify the scene and use a notan or grey marker for quick two value checks.
- • Jot a few notes on light direction and why you chose the scene; a quick photo is useful for studio work.
- • Block in the panel from the thumbnail: tone the ground, map major shapes, mass darks first, lights next, then midtones.
The habit of plein air sketching before painting is one of the most reliable ways to improve your outdoor work. It is not a complicated ritual or an advanced technique reserved for professional artists. It is a short, focused process that takes ten to fifteen minutes and pays back that investment many times over during the painting session that follows.
If you have ever stood in front of a landscape, brush in hand, and felt genuinely lost about where to start, this is why. Outdoors, you are asked to solve composition, values, and colour all at once, under time pressure, with changing light. That is too much to sort out on the panel. A quick planning sketch takes those decisions off the table before they can overwhelm you.
Why a Quick Sketch Before Painting Makes Such a Difference
Most beginners skip thumbnails because they feel like extra work before the real work begins. In practice, the opposite is true. Without a clear plan, you spend the first twenty minutes of a painting making decisions that should have been made before you opened your paintbox. By the time you have settled on a composition, the light has shifted and you are already reacting rather than painting.
Thumbnails do three things. They help you design the composition before committing to it. They force you to think about value structure, the distribution of lights and darks, before colour enters the picture. And they give you a fixed reference point when the scene inevitably changes around you.
In the UK, that last function is especially useful. A grey sky can flatten contrast in minutes. Low autumn sun moves across the scene faster than you expect. A quick plan made at the outset gives you something to return to when the conditions shift.
Putting it in perspective
- Time for three thumbnails
- 5–10 minutes
- Recommended thumbnail size
- Matchbox to 5cm square
- Suggested value steps
- 3 to 5
- Typical UK painting window (autumn/winter)
- 1–2 hours
A small investment before a 1–2 hour paint-out
Small enough to think in shapes, not detail
Dark, mid, light — plus optional accent and sky
Short sessions make a clear plan essential
The numbers make the case plainly. Spending five to ten minutes on thumbnails before a ninety-minute painting session is not a significant sacrifice. It is cheap insurance against a composition that never quite works.
What Goes Into a Plein Air Planning Sketch
A planning sketch is not a finished drawing. It is a working document, legible only to you, used to make decisions quickly. There are three things it needs to do: fix the composition, map the values, and capture a few notes about the light. That is all.
Composition thumbnails
Keep your thumbnails small, no bigger than a matchbox, and draw at least three of them. The point is to think in shapes and masses, not in line and detail. You are not recording what is in front of you; you are designing the painting.
Each thumbnail should explore a different possibility: a different crop, a different focal point, a different horizon placement. Squashing the horizon low gives you more sky. Lifting it gives you more ground. Moving the main subject left or right of centre changes the weight of the composition entirely. You will not know which version works until you have tried a few.
Use a card viewfinder or make a finger frame with your hands to match the proportions of your panel. Decide on your format now: landscape, portrait, square, or panoramic. That decision shapes everything that follows, and it is far easier to make it here, at thumbnail scale, than after you have already blocked in a composition that does not suit the subject.
Placing the horizon or the main dividing line consciously, rather than letting it land wherever it falls, is one of the simplest improvements you can make to a plein air painting. Do it at thumbnail stage, when you can still change your mind without consequence.
Value plans
Once you have your composition thumbnails, shade in the main value zones. Limit yourself to three to five steps: darkest darks, lightest lights, and the midtones that sit between them. If you want a finer breakdown, you can add a near-black accent and a separate tone for the sky, but three values are enough to test whether a composition has a strong structure.
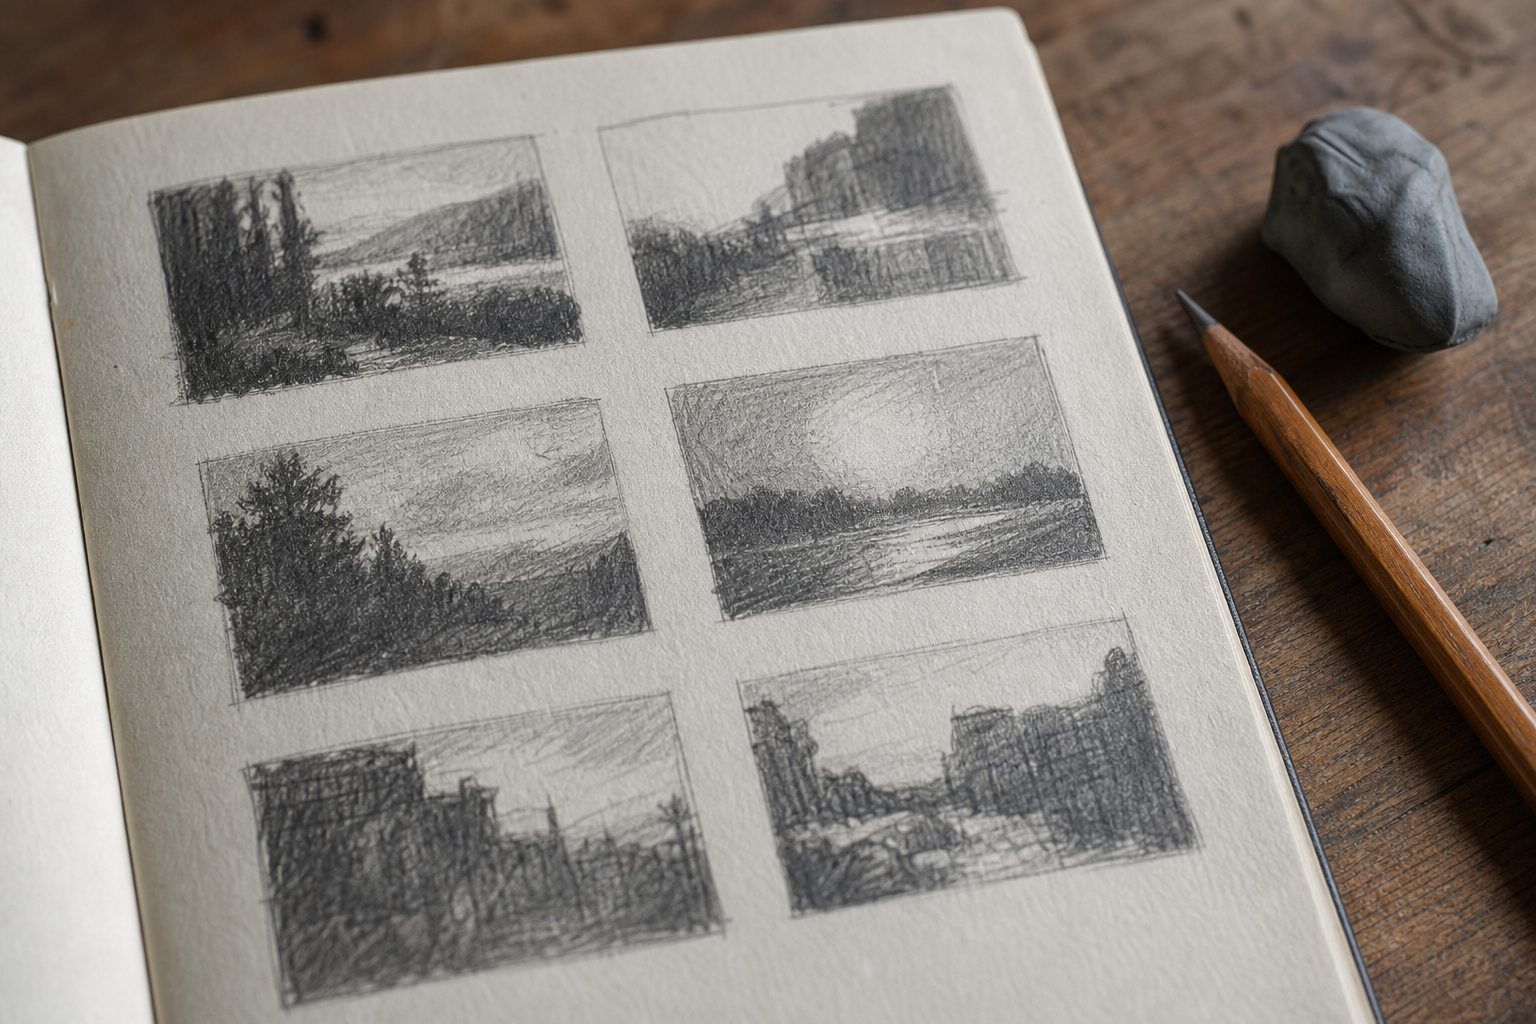
A notan sketch is a useful alternative, especially for beginners. Mass in all the darks in one pass, leaving everything else as white paper. The resulting two-value image shows you immediately whether the light and dark pattern is clear and interesting, or muddled and confused.
The squinting test
Squint hard at the scene until everything blurs. If you can't see a clear pattern of light and dark shapes, your value plan won't hold either. Keep squinting until you can identify three distinct zones: your darkest darks, your lightest lights, and the midtones that sit between them. That's your value plan.
Value structure matters more than colour. A painting with strong values and average colour will read well. A painting with beautiful colour and weak values will feel flat. Getting the value plan right at thumbnail stage is the single most useful thing you can do before picking up a brush.
Written notes and colour observations
Alongside your thumbnails, jot down a few words. Note the direction the shadows are falling and the angle of the light source. Write a word about the quality of the light: cool overcast, warm afternoon side-light, bright backlit. These observations take thirty seconds and can save you from losing your bearings mid-painting when the conditions shift.
It is also worth writing down what attracted you to the scene in the first place. A phrase is enough: "low sun catching the field edge," "dark treeline against pale sky." That original observation is easy to lose once you are deep in the painting. Having it written down keeps you honest.
A quick photograph is a sensible addition, particularly if you plan to finish the piece in the studio. It is not a shortcut; it is a practical record of the scene that your thumbnail alone cannot fully capture.
A Simple Pre-Painting Workflow You Can Use Every Time
The whole process, from arriving at the location to having a clear plan on paper, should take no longer than fifteen minutes. The steps below can be followed at any location, in any conditions.
A simple plein air pre-painting workflow
Arrive and look before you set up
Walk around the site. Look in different directions. Don't open your paintbox yet. You're searching for a scene that genuinely interests you — one with a clear light effect, a strong shape, or a mood worth chasing.
Frame the scene
Use a card viewfinder, a simple phone crop, or make a finger frame with your hands. Match the proportions to the panel or page you'll be painting on. Decide whether you want landscape, portrait, square or panoramic format now, not later.
Draw at least three quick thumbnails
Keep each one small — no bigger than a matchbox. Sketch the main masses of the scene, not the detail. Try a different crop or focal point in each one. This takes five to ten minutes total, not longer.
Mass in your values
Shade the three main value zones into each thumbnail: darks, midtones, lights. Squint hard at the scene to simplify what you see. You're looking for a clear, graphic light-and-dark pattern. If you can't find one, try a different composition.
Choose your strongest thumbnail and add notes
Pick the thumbnail that has the most interesting value pattern and the clearest focal point. Jot down a few words: shadow direction, the quality of the light, what drew you to the scene in the first place.
Translate it to your panel
Block in the main shapes and value masses on your panel before you touch colour. Follow the thumbnail, not the scene. The sketch is your map.
Walking around first is worth emphasising. The instinct when you arrive somewhere is to set up in the first spot that looks reasonable. Resisting that instinct, even for five minutes of walking and looking, often reveals a better composition than the obvious one.
Choosing Your Tools for Outdoor Planning Sketches
The goal is speed. Your planning sketches do not need to be neat; they need to be readable to you. That means the best tools are the ones that are quick, reliable in cold or damp conditions, and light enough that you will actually carry them.
| Tool | Best for | UK outdoor notes |
|---|---|---|
| Pencil (HB or 2B) | Quick thumbnails, fine lines | Works in most conditions; avoid heavy pressure in rain |
| Ballpoint or fineliner pen | Fast, confident line work | Reliable in cold; ink can bleed on damp paper |
| Soft graphite stick | Rapid value masses | Smudges easily but ideal for blocking in tones fast |
| Marker (grey chisel tip) | Notan and two-value studies | Dries instantly; useful in short weather windows |
| Small watercolour kit | Value and colour notes together | Can struggle in heavy rain; keep a dry cloth handy |
| Gouache | Opaque value notes | Slower to dry in cold; excellent tonal coverage |
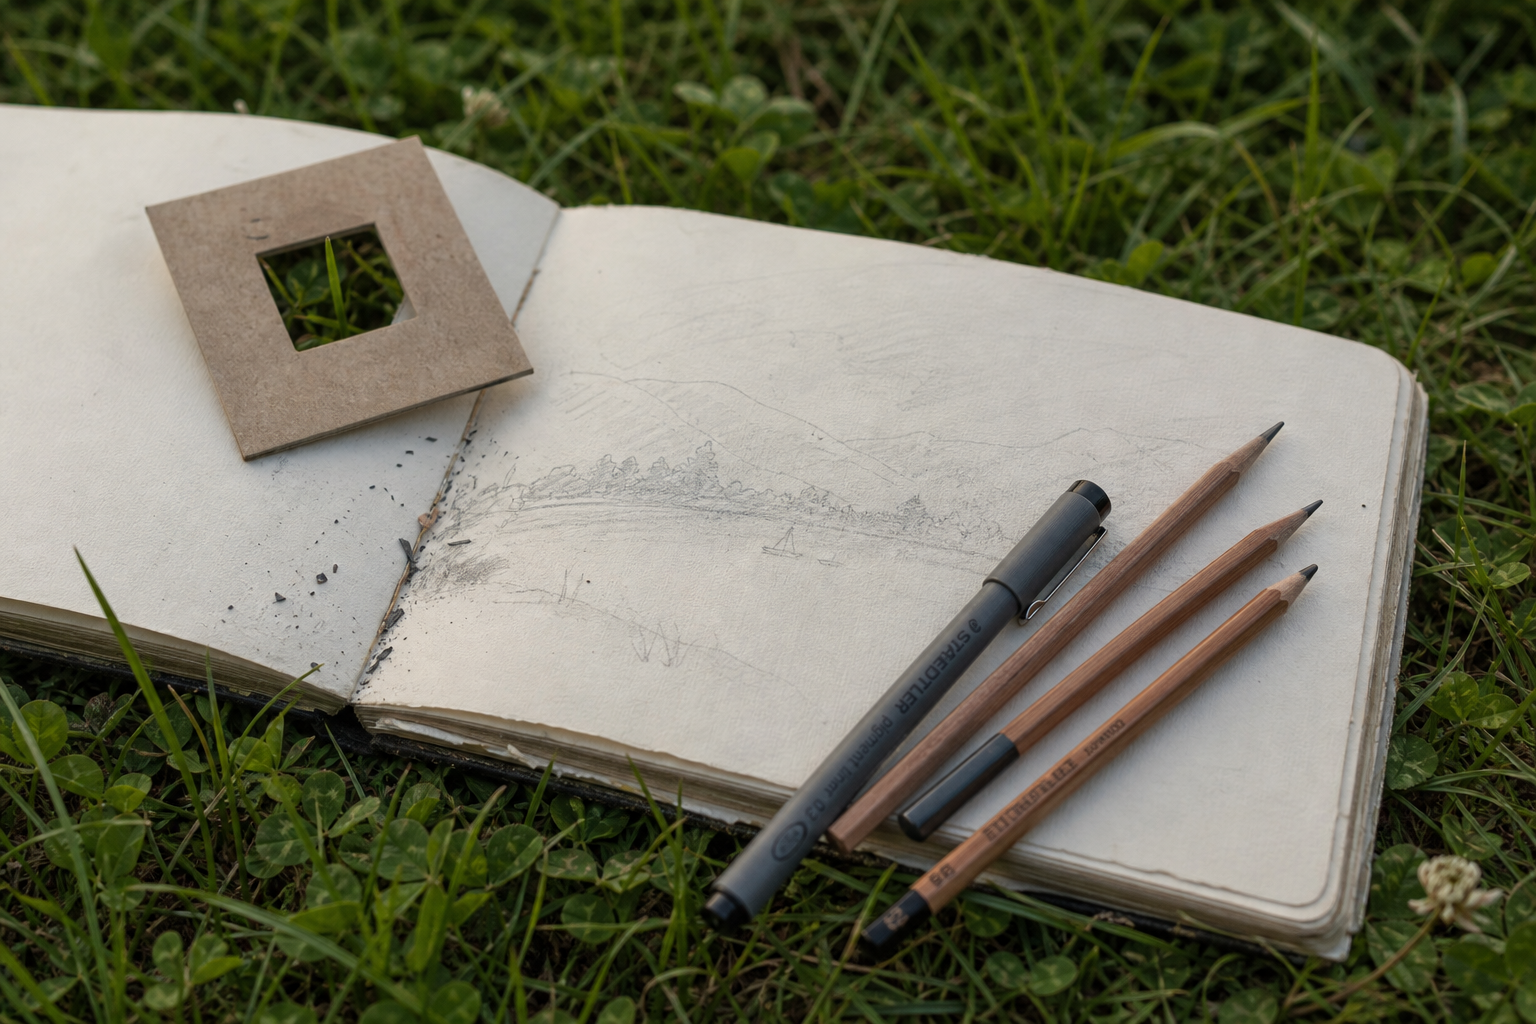
Pencil vs marker for value thumbnails
Pros
- + Pencil is universally available and forgiving for beginners
- + Markers produce fast, decisive value masses with no blending needed
- + Both are lightweight and pack easily into a jacket pocket
Cons
- - Pencil value ranges can be subtle and hard to read in dull UK light
- - Markers are less forgiving — hard edges only, no easy blending
- - Neither replaces a quick colour note for scenes where light temperature matters
A card viewfinder is worth making before you go out. Cut a rectangle into a piece of dark card, sized to match the proportions of your most-used panel, and keep it in your bag. It costs nothing and makes composition decisions noticeably quicker.
For sketchbooks, a small A6 or A5 pad with cartridge paper holds up well outdoors and fits in a jacket pocket. Jackson's Art, Ken Bromley, and Cass Art all carry suitable options at a range of price points.
A word about sketching in public: a small sketchbook attracts far less attention than a full easel and palette. If you feel self-conscious about setting up in a busy location, starting with just a sketchbook and pencil is a genuinely lower-key way to work. Most people will either not notice or will simply be curious.
Handling Changing Light and Typical UK Conditions
The UK rarely delivers two hours of stable, consistent light. Overcast days compress the tonal range, making it harder to see strong value contrasts. Low winter sun moves across the sky quickly. Coastal locations can shift from bright to grey in minutes. This is not a reason to abandon outdoor painting; it is a reason to plan before the light changes rather than after.
The thumbnail-first approach is particularly suited to these conditions. Once you have a clear value plan on paper, you paint from the plan, not from the scene. The thumbnail captured the light effect that attracted you to the spot. If the clouds come in halfway through, you still have that record to work from.
It is worth setting a time limit before you begin. A sixty to ninety minute field study is realistic for most UK conditions; in autumn and winter, that window can be shorter. Knowing you have a fixed session length encourages decisive seeing from the outset, which is where thumbnails help most.
In poor weather, a quick sketch and a photograph may be all you get from a session. That is still a worthwhile outing. The sketches and notes can become the basis of a studio piece later, and the act of observing carefully in difficult conditions sharpens your eye for future paint-outs.
On access: sketching on public land, footpaths, and in parks is generally straightforward and does not require prior permission. If you are planning a larger setup or a group session on National Trust land or a managed heritage site, a brief advance inquiry is sensible. Staying off planted areas, keeping clear of paths, and being relaxed and friendly if people stop to look makes the experience easier for everyone.
Turning Your Thumbnail Into a Painting
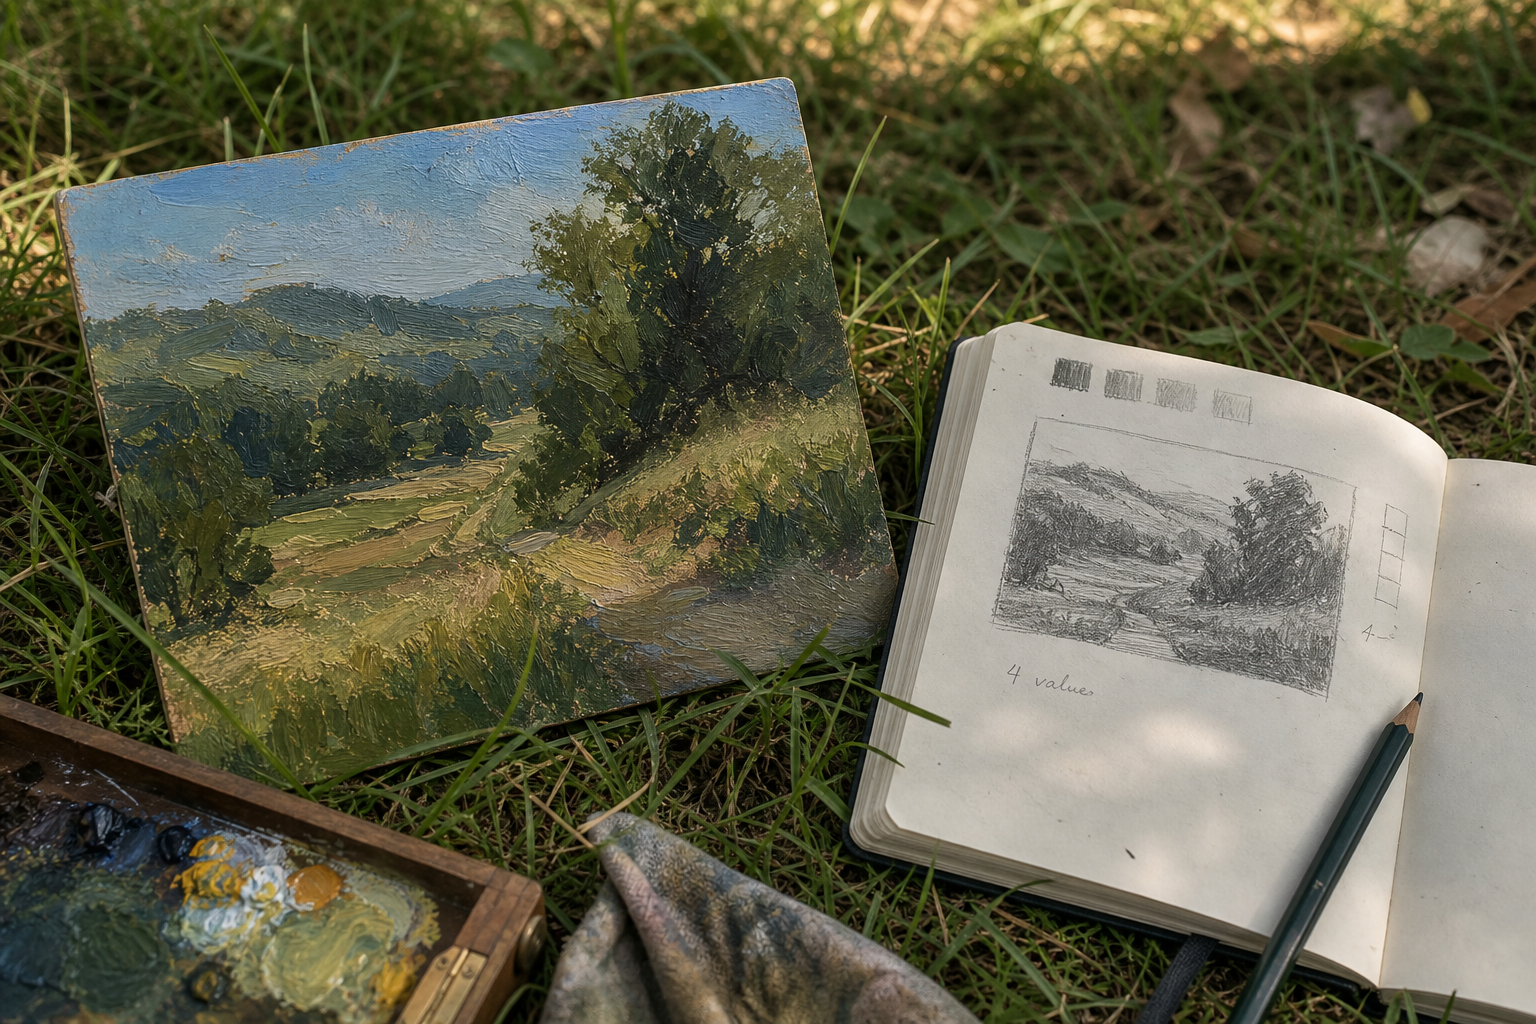
Moving from thumbnail to panel is where many painters lose the thread. They set up the panel, look back at the scene, and start painting from what they can see rather than from the plan they made. The composition shifts, the proportions change, and the value structure they worked out ten minutes ago quietly disappears.
The thumbnail is the blueprint. Start by toning your panel with a thin, fast-drying wash: burnt sienna or raw umber in a solvent or alkyd medium works well for oils. This knocks back the white ground and makes it much easier to judge your values as you work. Let it dry or near-dry before you continue.
Re-establish the main compositional lines on the toned ground, keeping them light and simple. Follow the proportions from your thumbnail rather than remeasuring against the scene. Then mass in the darkest darks first, using a large brush and thin paint. Add the lightest lights next. Fill in the midtones last. This sequence follows the logic of your value plan and keeps the big structure legible throughout.
Resist the urge to add detail before the major structure is in place. Your thumbnail had none; your blocked-in painting should not either. Detail can come once the value and composition foundation is secure.
Follow the sketch, not the scene
Once the light shifts — and in the UK, it will — resist the urge to chase it. Your thumbnail captured the light effect that attracted you to the scene in the first place. Trust it. The sketch is your anchor when the clouds roll in.
Common Mistakes to Avoid
Skipping thumbnails entirely is the most common, and the advice in this article is straightforward on that point. But there are a few other habits that undermine the process even when painters are making the effort to sketch.
Drawing only one thumbnail and treating it as definitive removes the main benefit of the exercise. The value of doing three is that the third one is almost always better than the first. The act of exploring alternatives sharpens your eye for what works.
Making thumbnails too large is a reliable way to turn a planning sketch into a drawing exercise. Once a thumbnail is bigger than about 5cm, you start thinking about line quality and proportion rather than shapes and masses. Keep them small.
Trying to record everything in the thumbnail rather than simplifying to the essentials is a related problem. You are not making a study of the scene; you are designing a painting. Leave out what does not contribute to the composition or the value structure.
Changing the composition mid-painting when the light shifts is something most painters do occasionally. The fix is straightforward: look at the thumbnail rather than the scene. The thumbnail shows the light effect you chose. The scene now shows something different.
Spending so long on thumbnails that the good light has gone is less common but worth naming. Fifteen minutes of planning is the upper limit. If the thumbnails are taking longer than that, they have become a different kind of work.
Finally, treating the mark-making quality of a thumbnail as important is a distraction. No one else will see these sketches. They exist to help you make decisions. A scruffy matchbox-sized value sketch that solves the composition is doing its job perfectly.
FAQ
Frequently Asked Questions
How long should I spend on plein air sketching before painting?
Keep it short. Aim for 10 to 15 minutes total for three thumbnails and quick notes. That is enough to lock composition and value structure without losing the light.
What size should my thumbnails be?
Small. Matchbox size up to about 5 cm square. Small thumbnails force you to think in shapes and masses rather than detail.
How many value steps do I need in a value plan?
Three to five steps is enough. Use darkest darks, midtones, and lightest lights. You can add a near black accent and a separate sky tone if needed.
What tools work best for quick outdoor planning sketches?
Choose fast, reliable tools you will carry. Pencil, soft graphite stick, grey marker, or a ballpoint pen are all good options. A small sketchbook and a card viewfinder help too.
What if the light changes while I am painting?
Paint from the thumbnail and value plan, not from the changing scene. The sketch records the light effect that attracted you. Use your notes and photo if you need to finish in the studio.
Author

PleinAirPainting Editorial Team
PleinAirPainting.co.uk helps artists paint outdoors with confidence through UK-focused guides, equipment advice, resources and plein air inspiration.